Category: track

Building a Spooky Trestle Bridge for Gruesome Gulch | GGRR 14

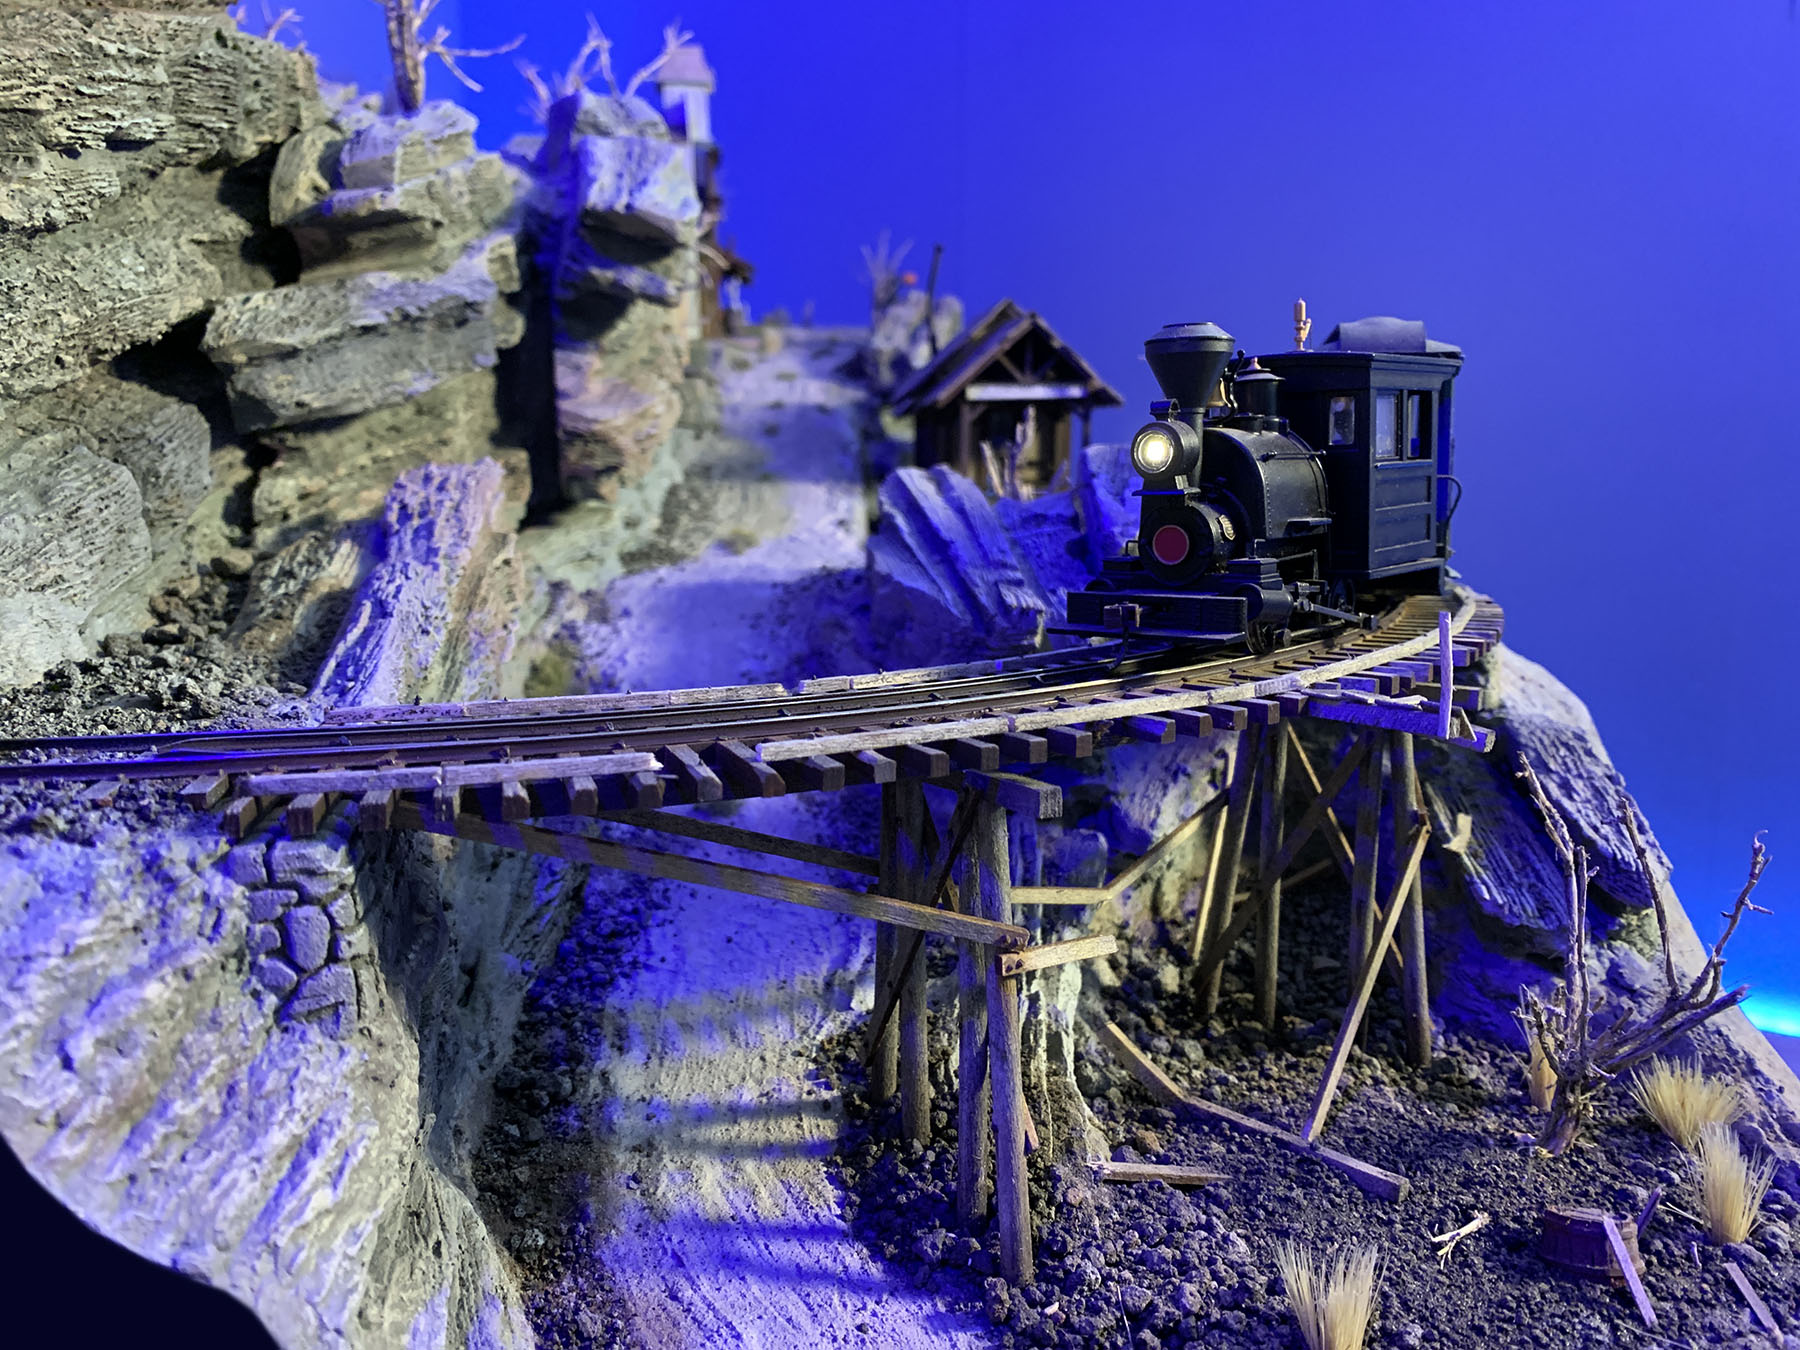
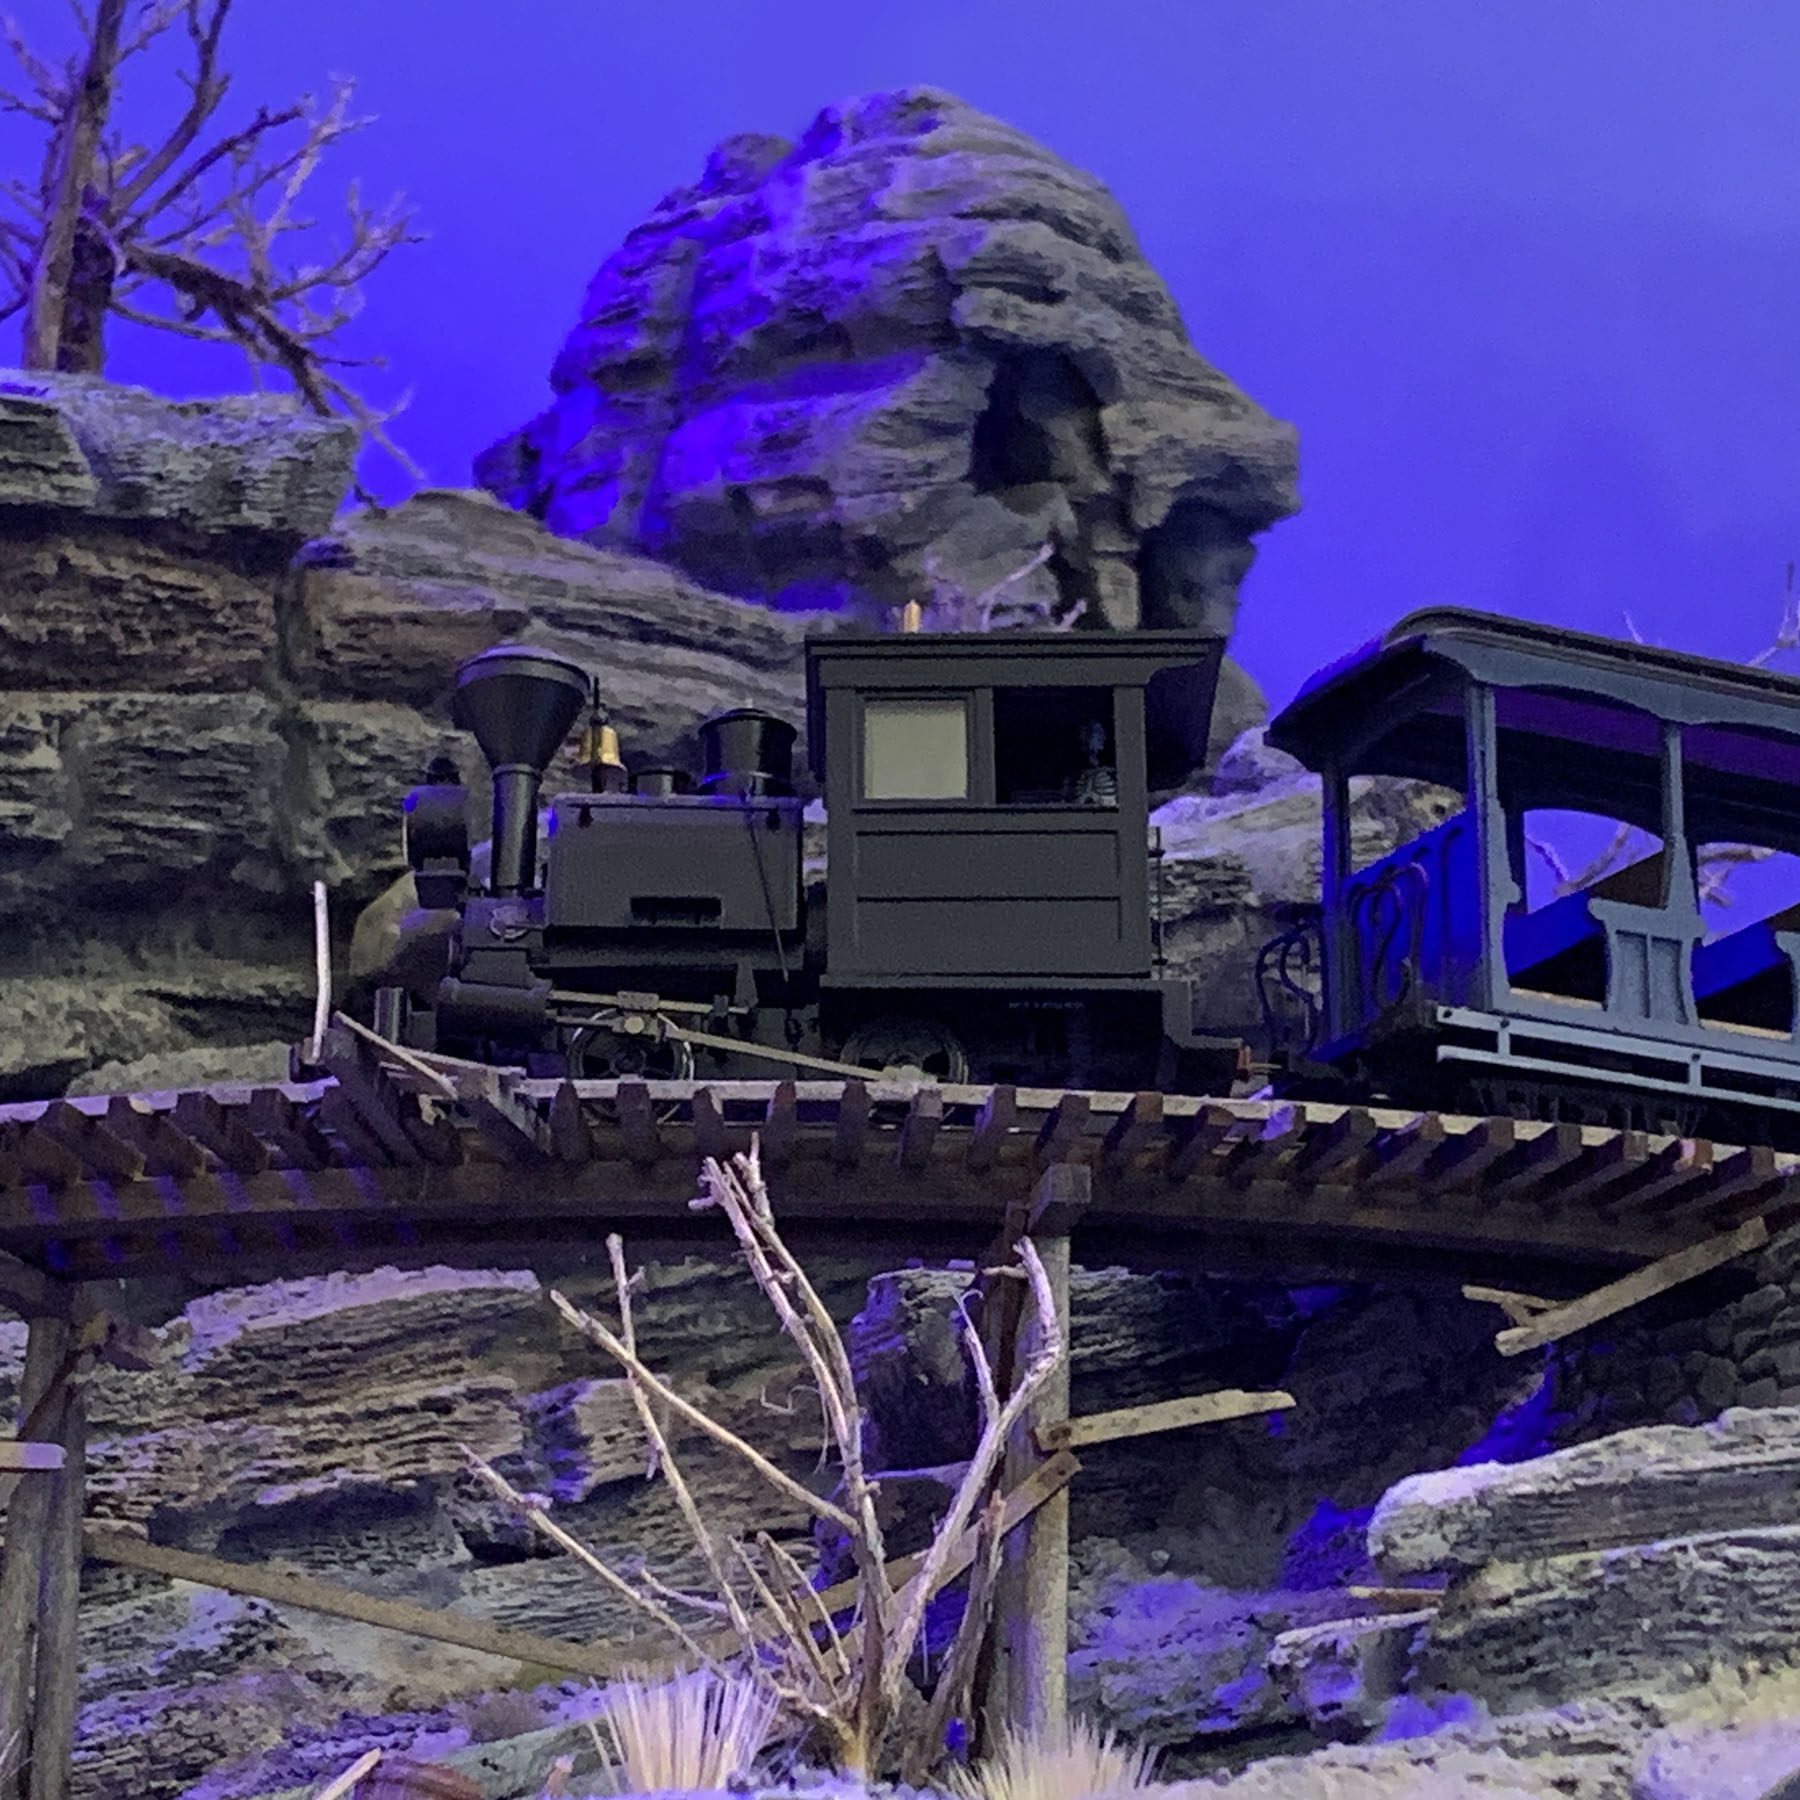
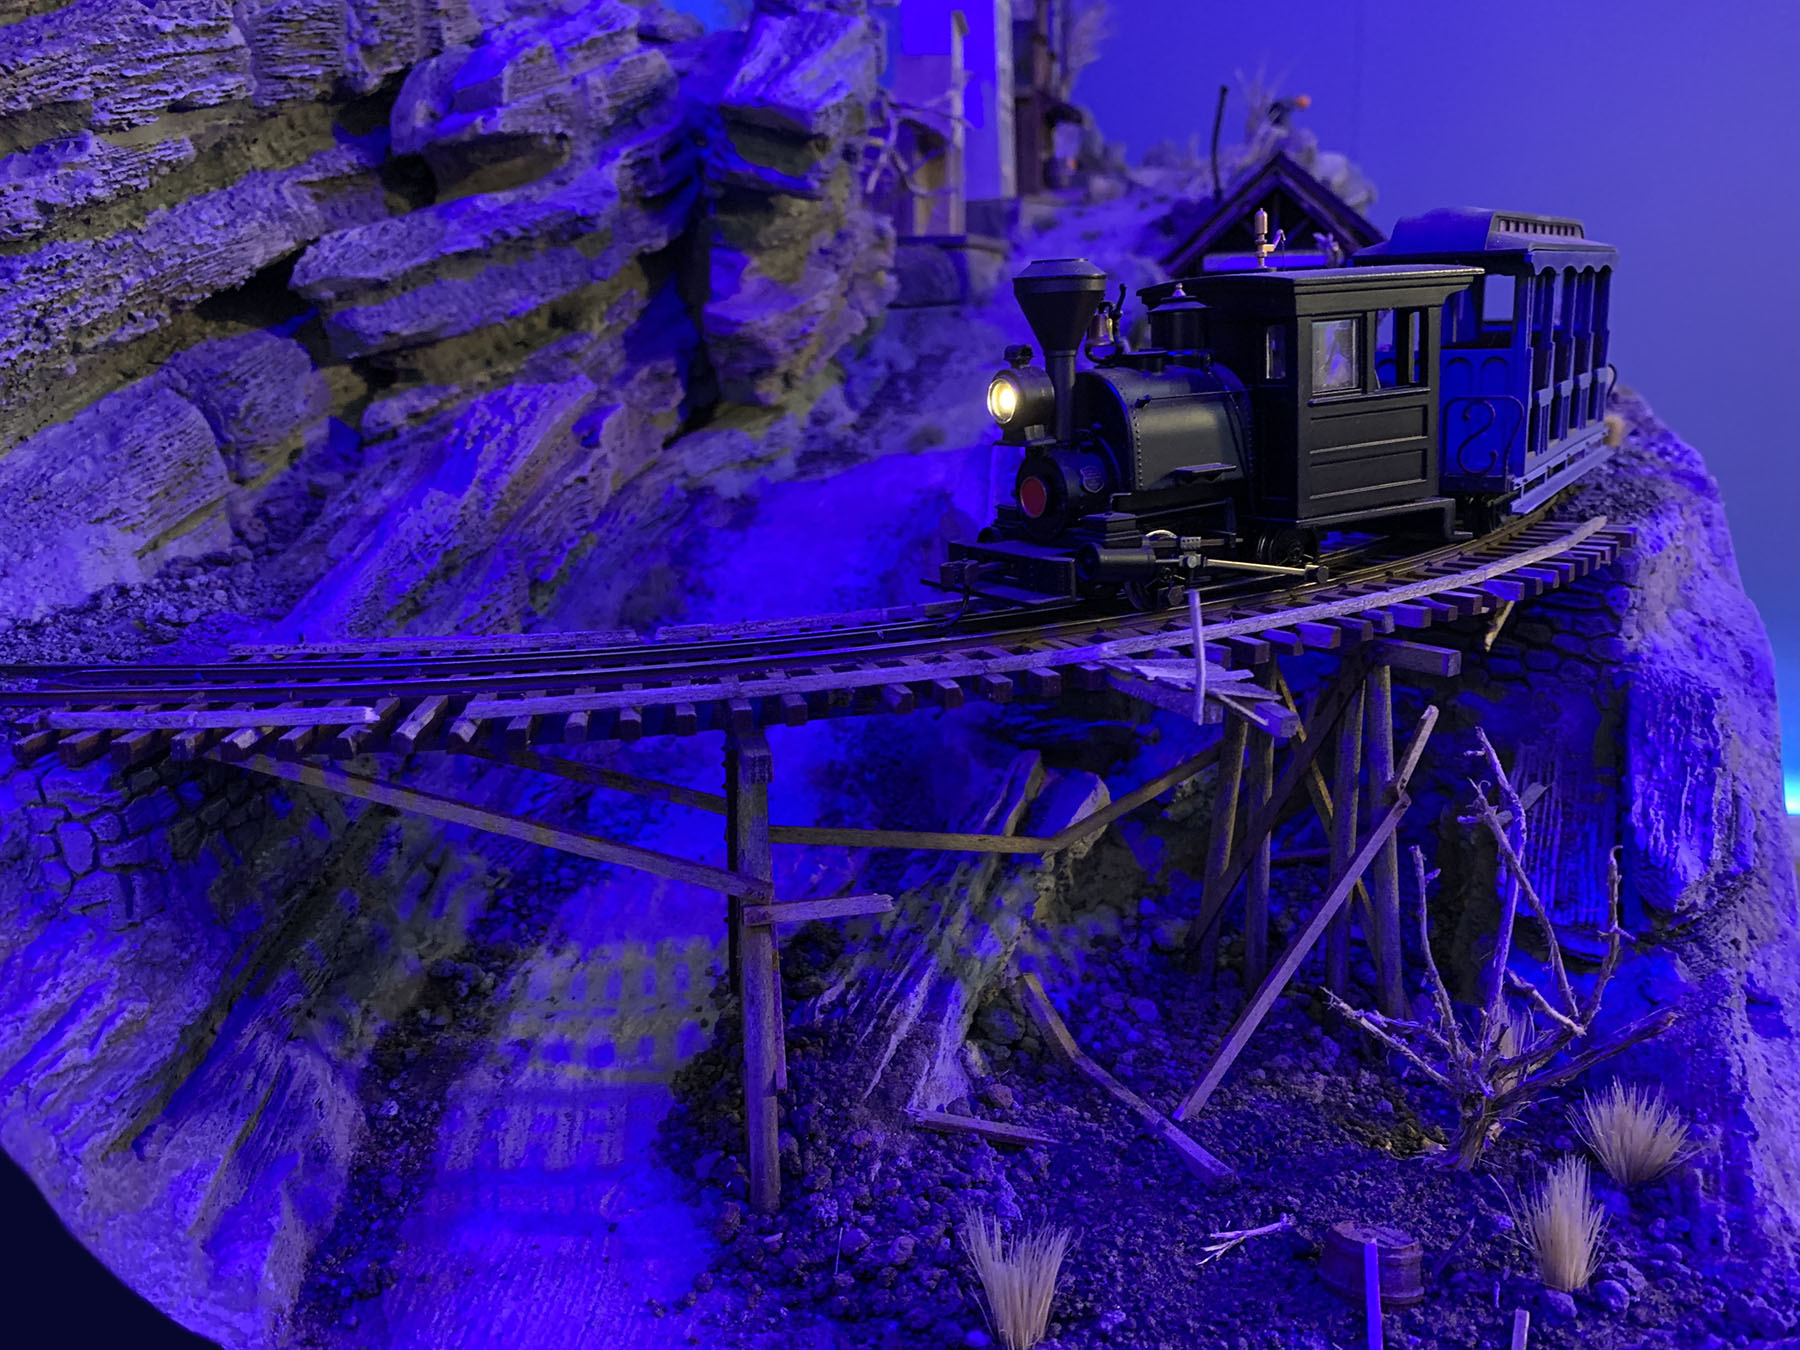
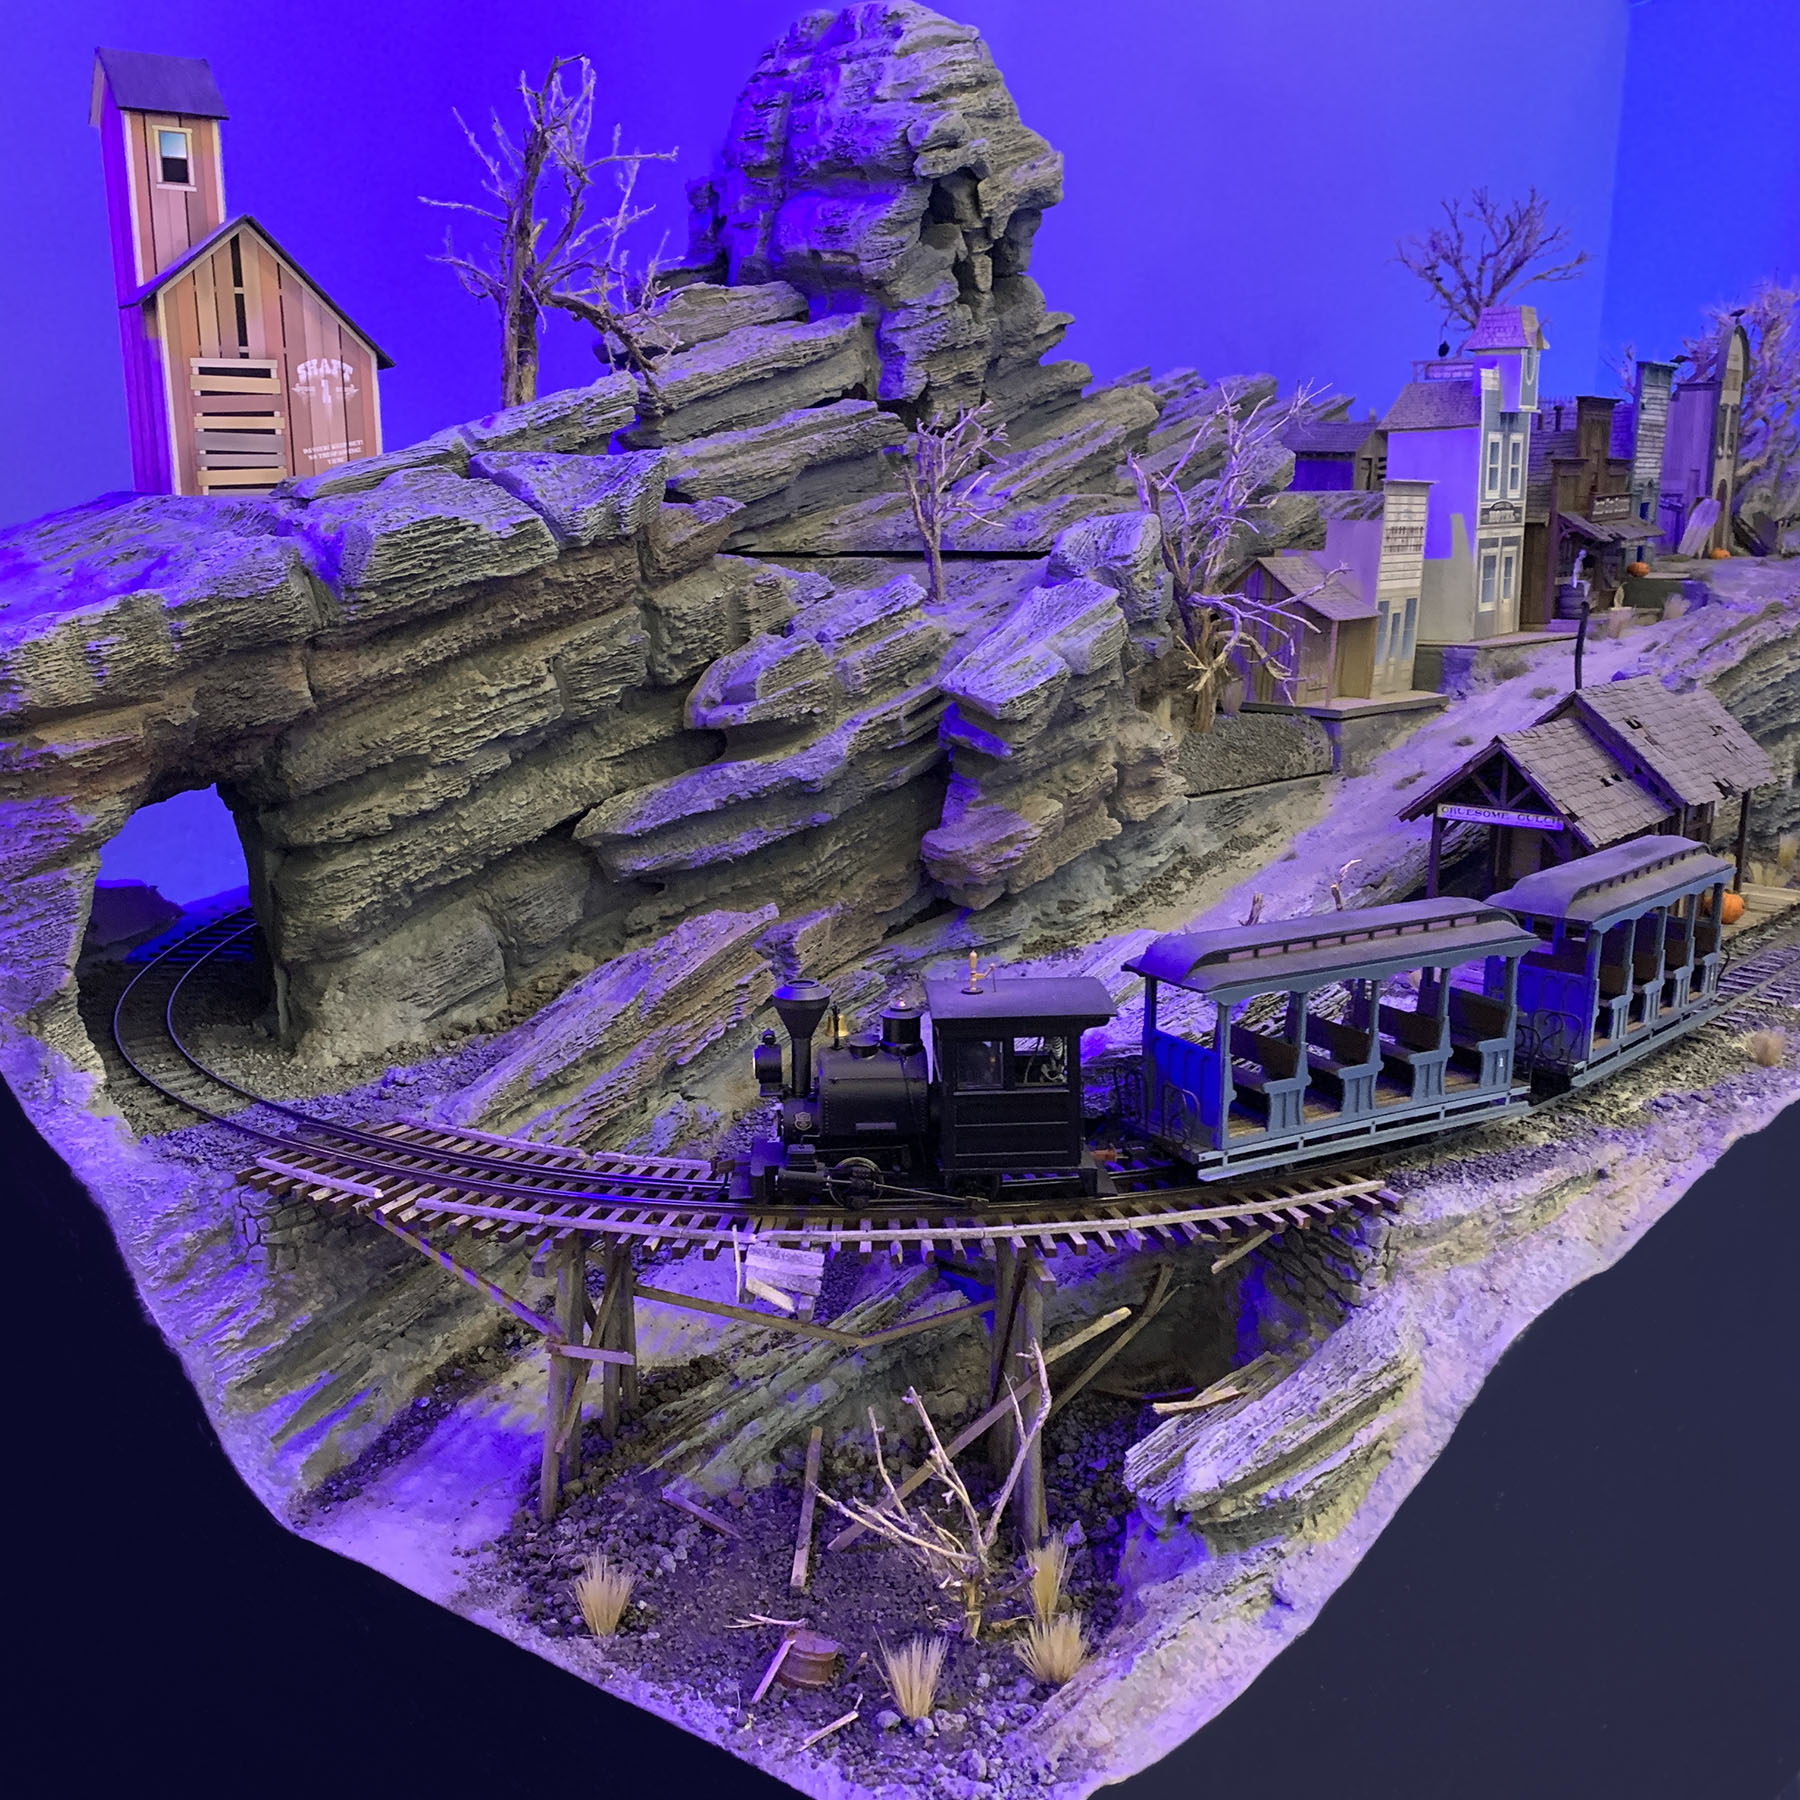
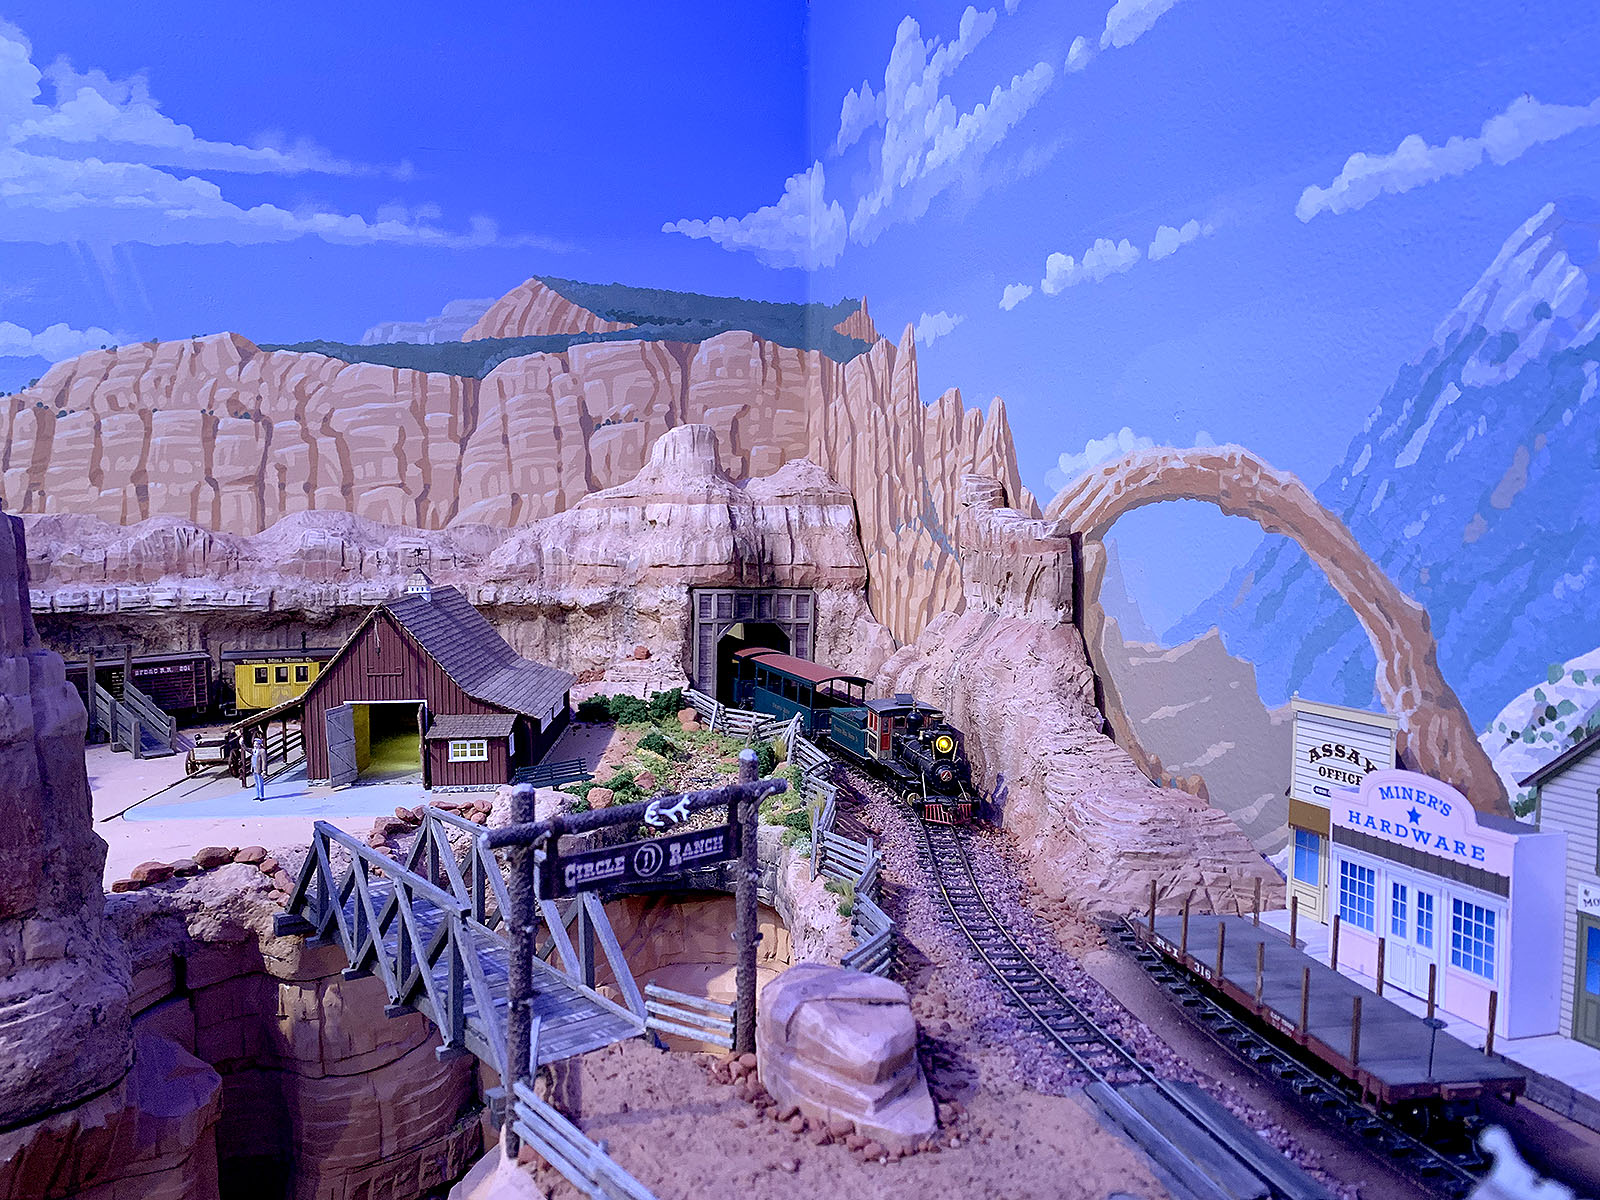
You can almost hear the old trestle creek and moan as the train crosses – no telling how much longer she’s gonna last!

This week I’m building a broken down old wooden trestle bridge for Gruesome Gulch that looks as if it might collapse at any moment. Wooden bridge construction, spiking rails, building trestle bents – it’s all here, plus a few tips and tricks for making it spooky! Stay tuned for more from Gruesome Gulch coming soon!

Thanks for watching, amigos!
Dave

Bandit Canyon Railway | Roadbed, Track and Power


BCRy Part II. Work continues on my On18 Bandit Canyon Ry micro-layout! This week, I add risers to raise the plywood sub-roadbed up to the desired height, then it’s time for cork roadbed, laying some Peco flextrack, building a simple manual turnout linkage, and hooking up the DC power. Join me as I bring the BCRy to life for the first time and explain a few tips and tricks learned over the years to make all of these tasks a little smoother and easier.

Thanks for watching, amigos!
Dave

Foam Benchwork and Laying Track on Gruesome Gulch – GGRR Part 4


It’s time to finish the benchwork and get some trains running on my On30 Gruesome Gulch mini-layout! In this installment, I build both benchwork and roadbed from layers of lightweight extruded polystyrene foam (XPF), then lay down some On30 flextrack on the upper and lower loops. Some tips on soldering track connections with a butane torch too, and a little track cleaning to keep everything running smoothly. More to come!

Thanks for watching, amigos!
Dave

Calico Mountain Expansion Part 4: On18 Track Levels


In episode 4 of the Calico Mountain Expansion how-to series we get the On18 trains running on two levels! Some changes are made to the original plan, with a second mid-height loop of On18 track added to increase the fun and visual interest. Don't forget to subscribe and hit that notification bell so you don't miss a single episode. Thanks for tuning in, amigos! Dave

How to Paint & Ballast On30 Track


Here's my "How-To" on a much requested topic: painting and ballasting model railroad flextrack and turnouts. These are the methods I've used throughout the On30 Thunder Mesa layout for many years with good results. Though the focus here is On30, the same techniques can also be used for other scales like HO and N.

Thanks for tuning in, amigos!
Dave

Calico Mountain Expansion Part 2: Roadbed, Track & Wiring


Welcome to the second episode in this series on building the Calico Mountain Expansion to the Thunder Mesa model railroad layout! In this episode we'll install the cork roadbed, lay On30 flextrack and turnouts, and wire everything up to run trains with DCC control - including installation of an auto-reverse unit! In future episodes, we'll get the On18 track running, begin building scenery and structures, do some backdrop painting, and so much more.

Thanks for tuning in, amigos!
Dave

Wiring Turnouts for Reliable Operations

Featuring the Tam Valley Depot Frog Juicer


I get into the tech side of model railroading in this episode, explaining how to use Tam Valley Depot "Frog Juicers" to ensure reliable turnout operations. There's some good, basic information on how Peco Electrofrog power routing turnouts work, and a demonstration on how to retrofit an already painted and ballasted turnout with a Frog Juicer.

Meanwhile, Back at the Ranch

In the overhead view, I worked on the creek area to the right of Walt's Barn, adding rocks and ground cover. The second photo shows a new section of split rail fence between the Circle D and Thunder Mesa's mainline, and some new greenery along the creek as well. The next shot is the first train to come through these parts in a long time. Paint, glue and track ballast are tough on electric trains so all of the track needed to be cleaned and fine tuned before trains could run again. The last photo shows the remainder of the ranch property real dirt ground cover, blending the base of Walt's Barn with the rest of the scenery. Now I can finish the stock pens and start thinking about the log cabin that will sit at the base of Thumb Butte.


Operating Turnouts

In true narrow gauge fashion, all of the switches on the TMMC are thrown by hand. I extend the switch point ties on the Peco turnouts with scale 6x8s, and use N scale Caboose Ground Throws and a simple wire linkage to move the points. Here is a video of the ground throws in action at the Circle D and Calico sidings.


A Work Train Passes the Circle D

Engine #8, R.H. Gurr, heads up a short work train passing the Circle D en route to Thunder Mesa.


The Problem with Facebook
This post is part of an ongoing attempt to relocate material from Facebook to this website. Unfortunately, Facebook continues to engage in a wide variety of highly unethical practices which I have no desire to support. If you are a fan of my art and/or modeling, please follow them here. I will be posting much more here in the days and weeks ahead, and much, much less on Facebook. Registered users can leave questions and comments on posts so please, join in the conversation!

All the best,
Dave

Modeling Canyon Country Scenery with Foam

Building the Diorama

The one question I am asked more than any other is, "How do you model your rocks?" I've done a couple of videos that explain my methods in detail, and this one, originally created for Joey Riccard's Trackside Scenery YouTube Channel is among the best. I've re-edited my segment of that video to make things a bit clearer, and added it to my own ongoing series of "How To" videos.

The Lone Rock diorama featured in this video began with an email from Joey Ricard. He asked if I might be interested in contributing to an upcoming video about modeling rocks and I was happy to agree. Joey's videos are always fun and informative, focusing on both tried-and-true and new-and-innovative techniques. Just my kind of project. Most of the build is covered in the resulting video, so this post focuses on a few additional details that may have been glossed over.

The 12" x 24" diorama started with a simple frame of 1" x 2" MDF and three layers of 1.5" white polystyrene bead-board. Some 1" thick gold polyurethane foam (Balsa Foam) was roughly shaped to form a single, towering butte. 1/2" plywood was cut to shape for track sub-roadbed and glued in place atop the foam. The white foam was shaped with a hot-wire cutter, and a small stone culvert made from Balsa Foam was created to bridge the gully. I used Loctite Power Grab construction adhesive to glue everything together.

The butte was carved from hard density Balsa Foam. This is a commercial version of the same gold urethane carving foam used by Walt Disney Imagineering and Hollywood special effects model builders. It's available through better stocked art and craft dealers.

A short section of the 1/2" plywood sub-roadbed was cut away and a chunk of 1" thick Balsa Foam was used to form a small stone culvert. The arch was created with sandpaper wrapped around a small bottle, and the stones were carved with a hard 5H pencil.

Using photos of rocks from Monument Valley, Moab and Sedona, Lone Rock Butte was carved from Balsa Foam using mostly a #2 hobby knife. The butte was then glued to the base with Loctite Powergrab adhesive. Four bamboo skewers between the butte and the base add additional strength.

Sculptamold was used to blend the butte into the base and to form an embankment along the sub-roadbed right of way. A soft, wet brush was used to smooth the Sculptamold and blend it with the different foams.

Since there would be scenery below it, the stone culvert was finished early and installed flush with the sub-roadbed. It was painted with acrylics and the mortar lines were filled with spackling paste. Midwest HO scale cork roadbed was glued down with yellow carpenter's glue, then just about everything on the diorama was given a base coat of golden-tan flat latex house paint. When that was dry, a length of Peco On30 flextrack was cemented in place with Powergrab adhesive.

As described in the video, a wash of diluted India ink was sprayed onto the butte to darken cracks and crevices before final painting was done. Inexpensive craft acrylics were used to complete the paint job. Colors like raw sienna, red oxide, burnt umber and unbleached titanium were applied wet into wet, working from darker to lighter tones.

I masked off the diorama and painted the track flat black with some Krylon spray paint. Next the ties were painted with a light tan acrylic. I used Apple Barrel "Khaki." Then the rails were painted with rust colored chalks suspended in 70% isopropyl alcohol. The final step was to give everything a good dusting with black and dark brown chalks. There's no power going to this track so I didn't bother to clean the paint off of the railhead. On powered track I'd use a Bright Boy or paint thinner to clean the railhead after painting.

The basic ground cover is Polyblend Sanded Grout. I mixed it up with a little water to form a thick paste and then just stippled it on with a cheep paintbrush (don't use a good brush for this! You'll never use it again). The erosion lines were pressed in with a pencil. The grout does a good job of representing soil while also filling and smoothing any remaining gaps in the foam base. This color is called "Sandstone," appropriately enough, and it dries a couple of shades lighter than it goes on. The wet grout generally stays where you put it but I also wet it down with a misting of diluted matte medium to lock it in place.

Once the grout had set overnight, the final coloring was done with light washes of acrylics to blend and unify the grout layer with the rock carving.


Real dirt and rocks were sprinkled on and then glued in place with white glue and diluted matte medium. Then the track was ballasted with local sandstone, held in place with more diluted matte medium.

Woodland Scenics "Field Grass" was used to make clumps of desert grasses and weeds, held in place with dabs of Aleene's Tacky Glue. Any loose fibers were later cleaned up with a shop vac. Then a few more bushes and desert plants were added to finish the diorama. The juniper bushes are Super Trees from Scenic Express covered in Noch dark green foliage. Clumps of gray sage were made with Woodland Scenics medium green bushes, lightly sprayed with gray primer. The prickly-pear cacti are castings from Pegasus Models.

Building the Lone Rock diorama was a quick, fun and rewarding project. Even if you don't have room for a full layout, I encourage anyone to try their hand at a small diorama like this. It can be finished in a week or so, and it's a great way to learn new techniques or to experiment with scenery ideas.

The Lone Rock Diorama was completed back in early 2016 and was later featured on the cover of Railroad Hobbyist Magazine. Today, it is being incorporated into a new HO layout I'm building at the studio called the Rio Lobo & Western and there'll be more on that in a future post. But that's it for this time. Thanks for checking in, amigos. Adios for now!