Category: roadbed

Bandit Canyon Railway | Roadbed, Track and Power


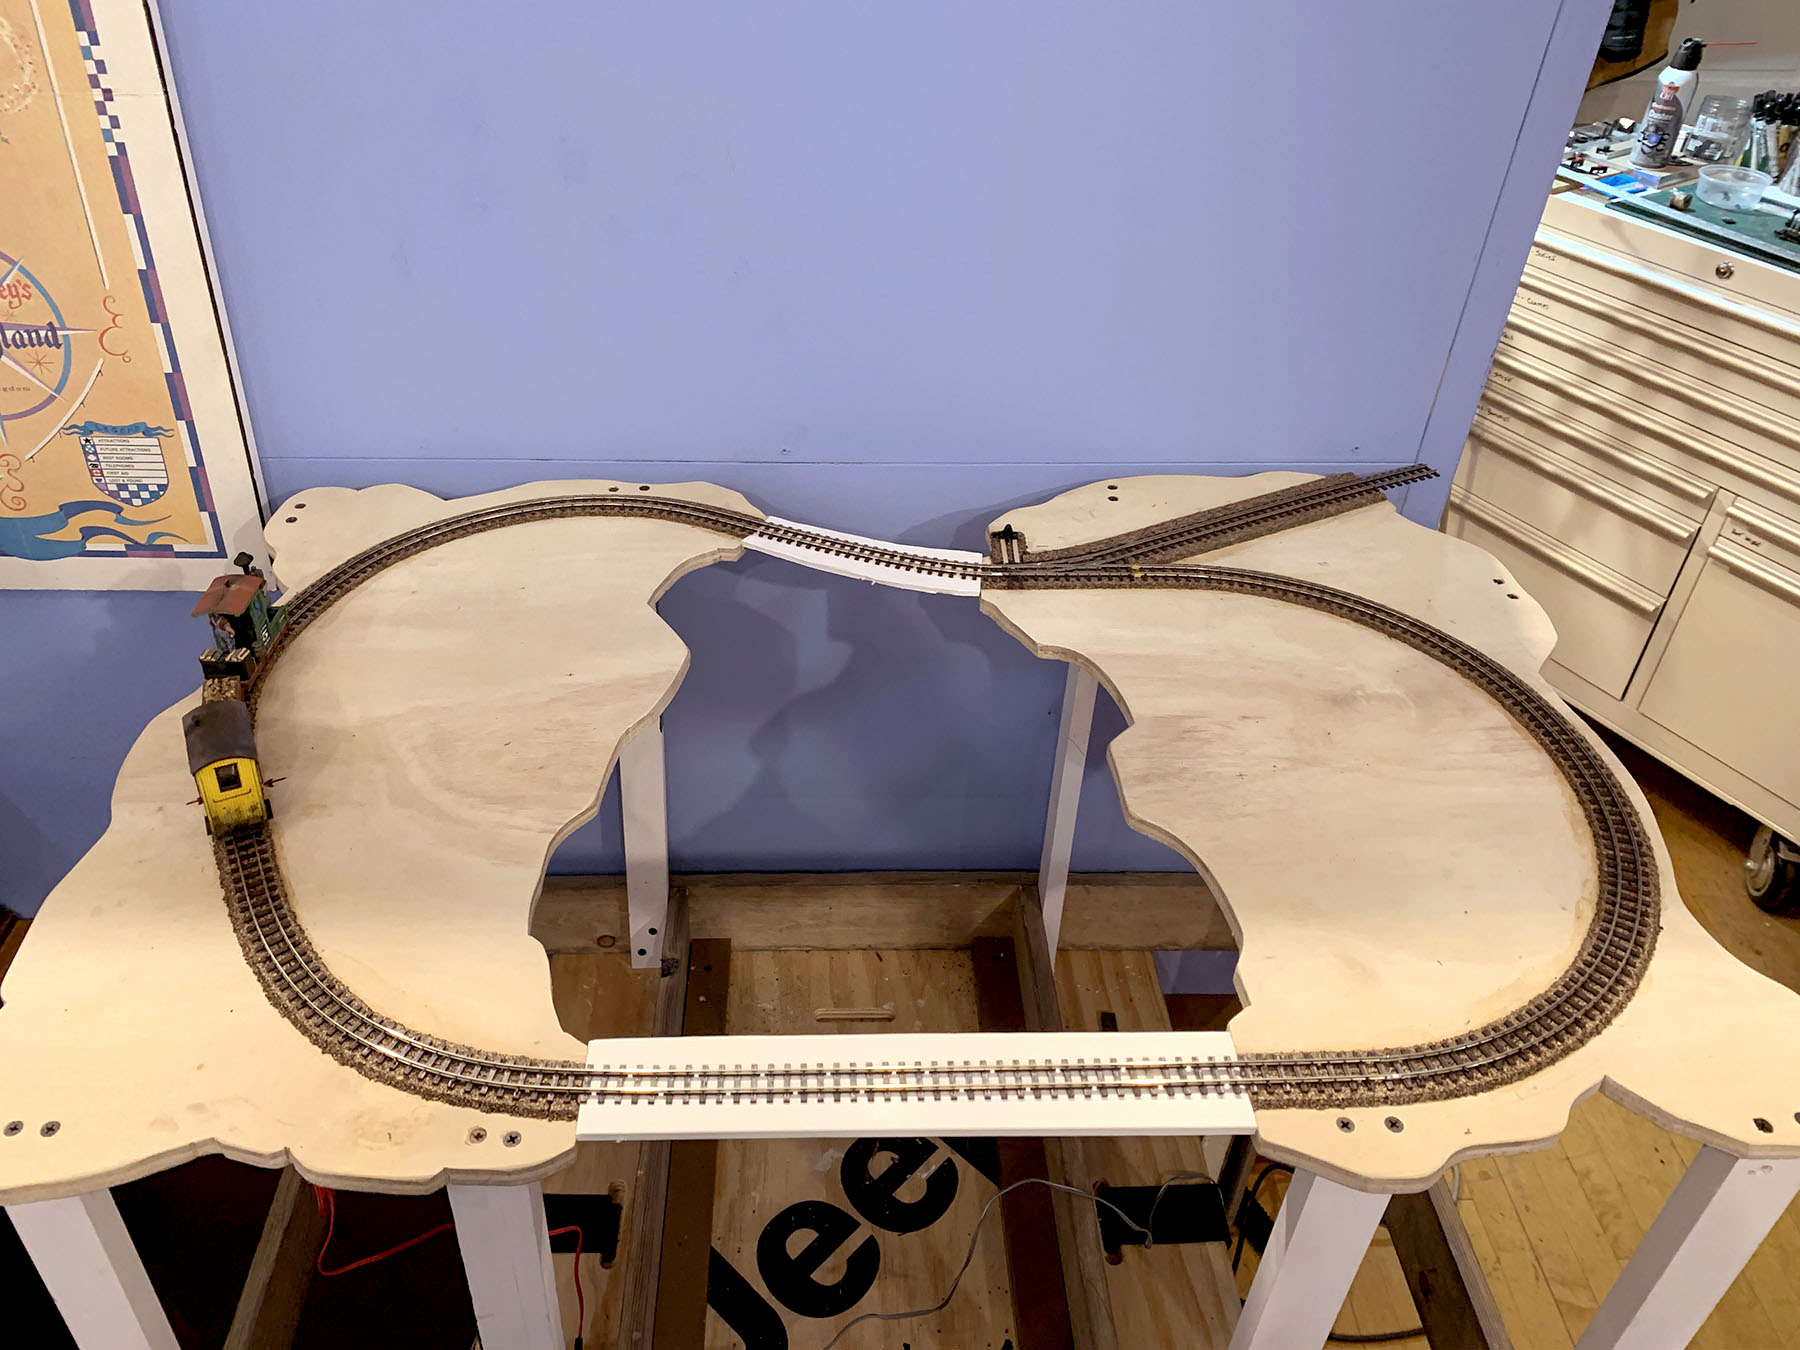
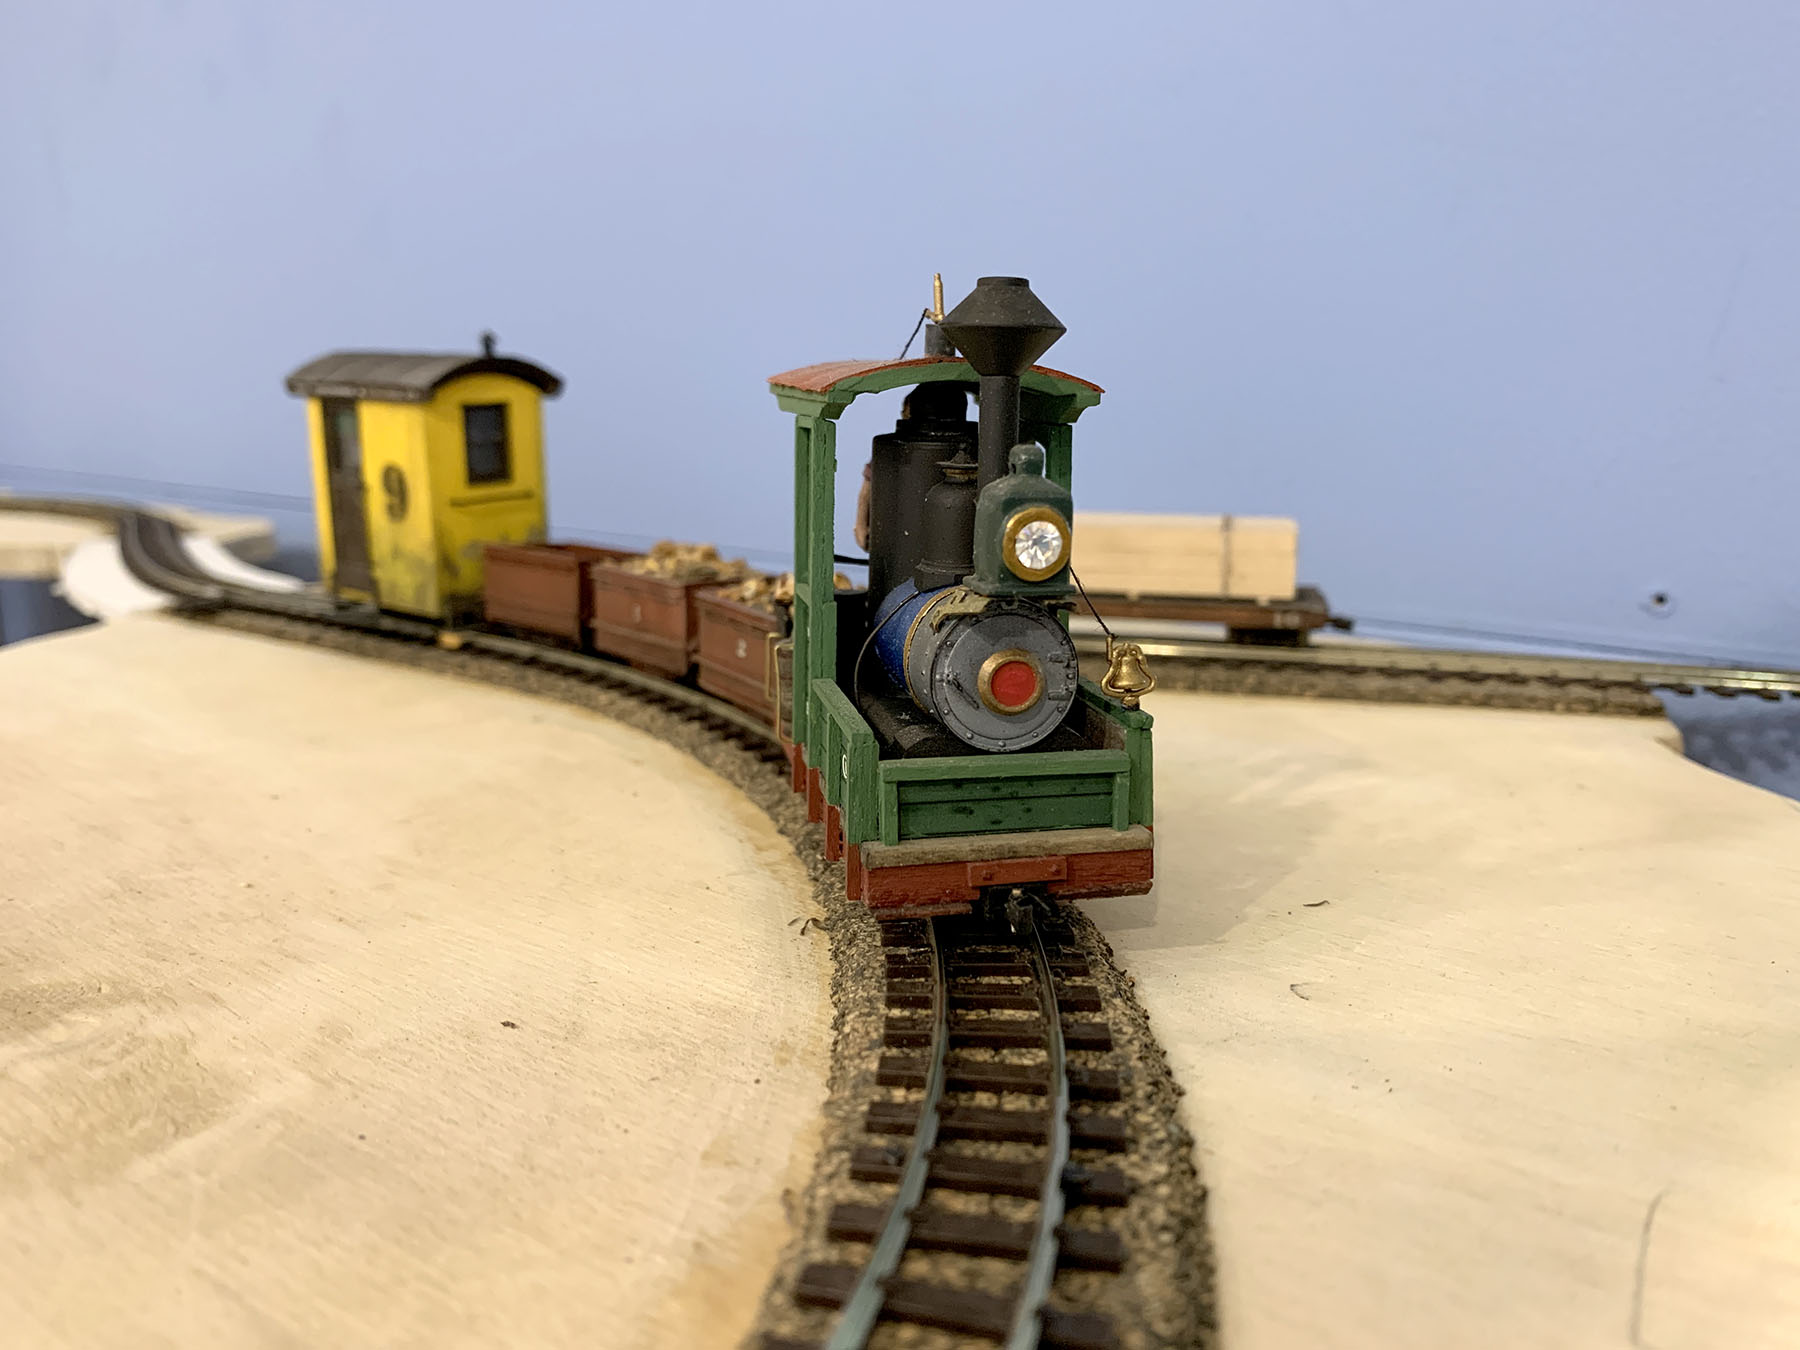
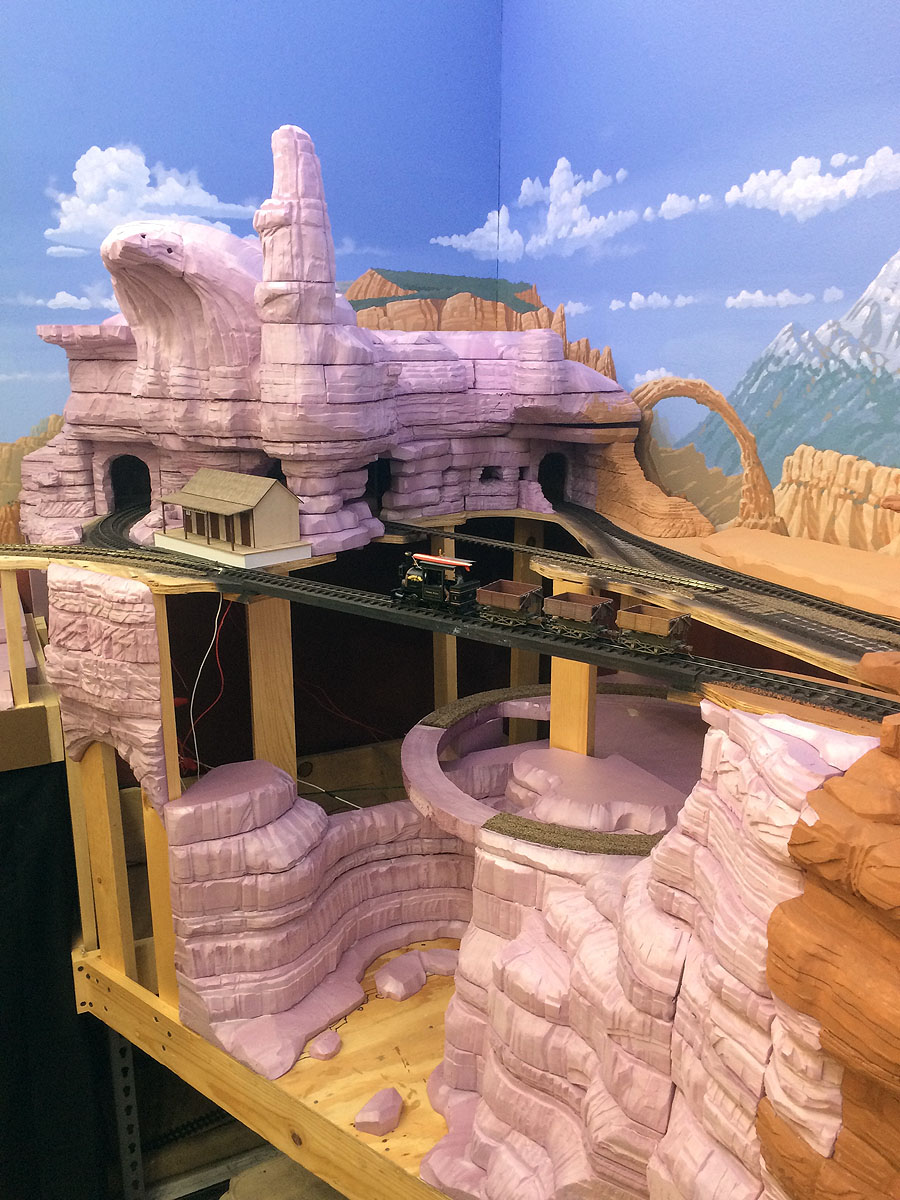
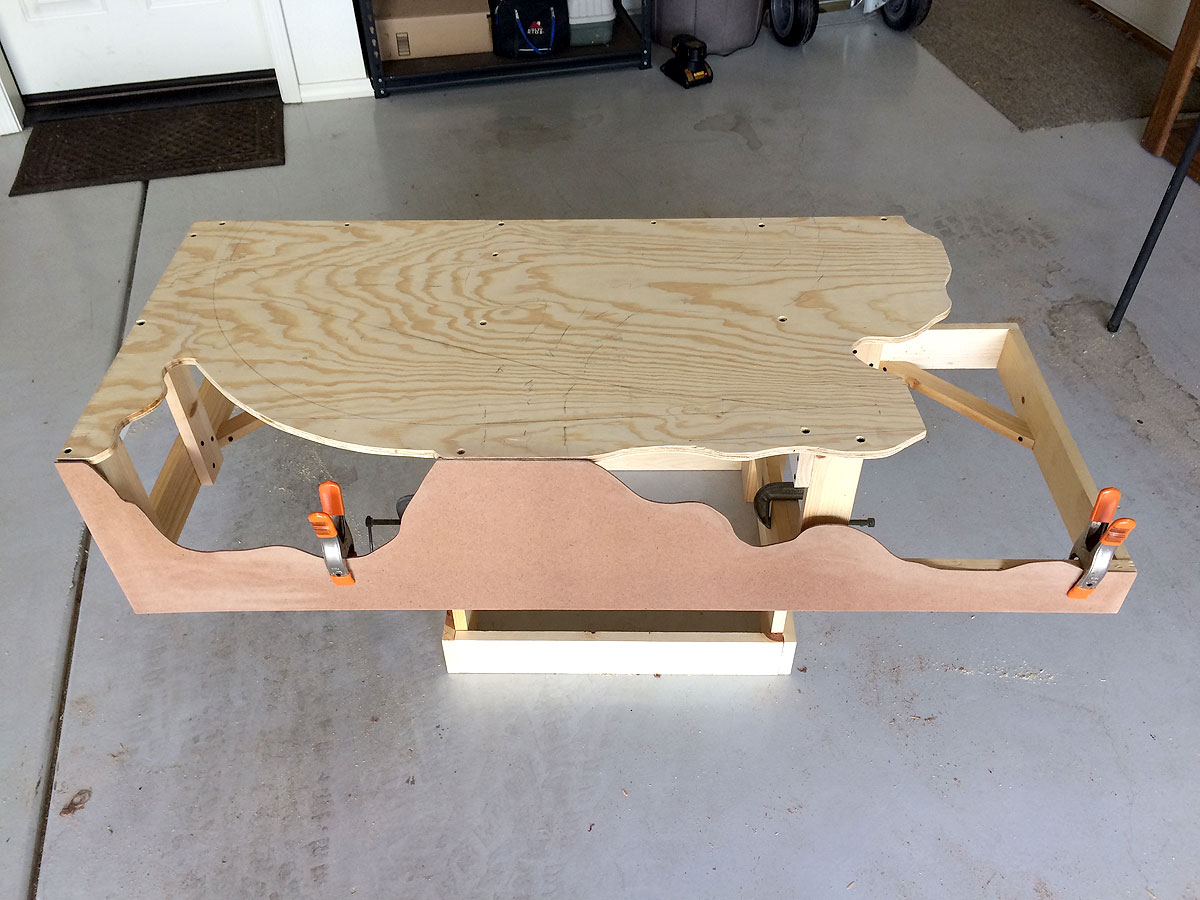
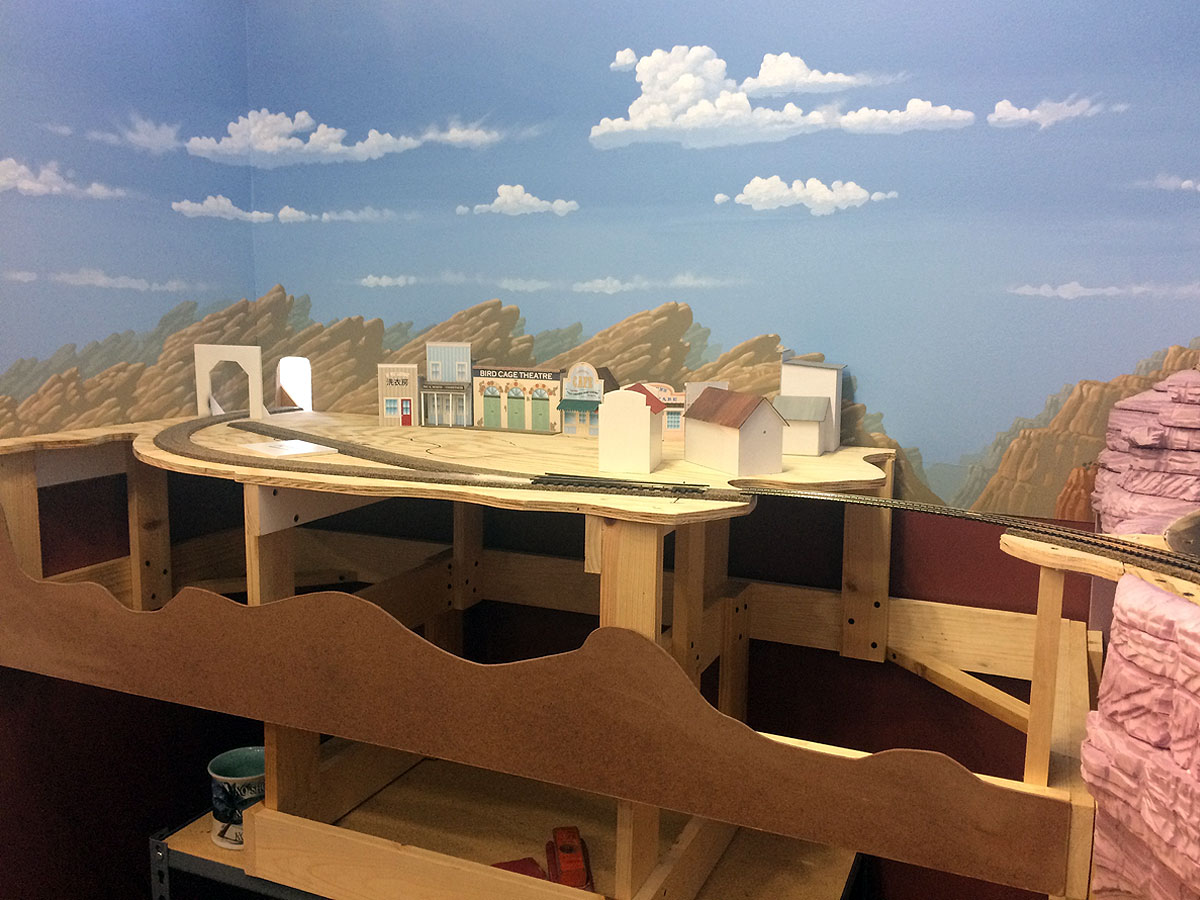
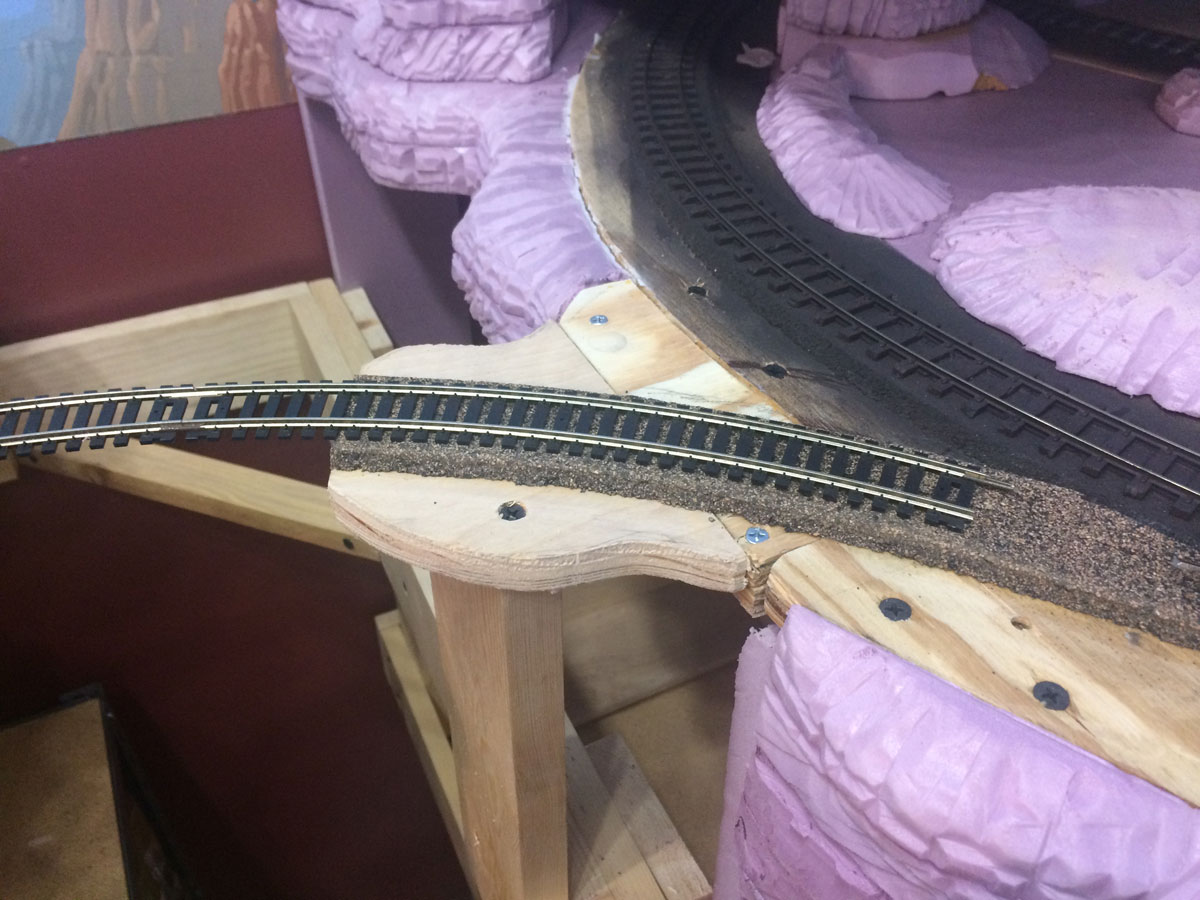
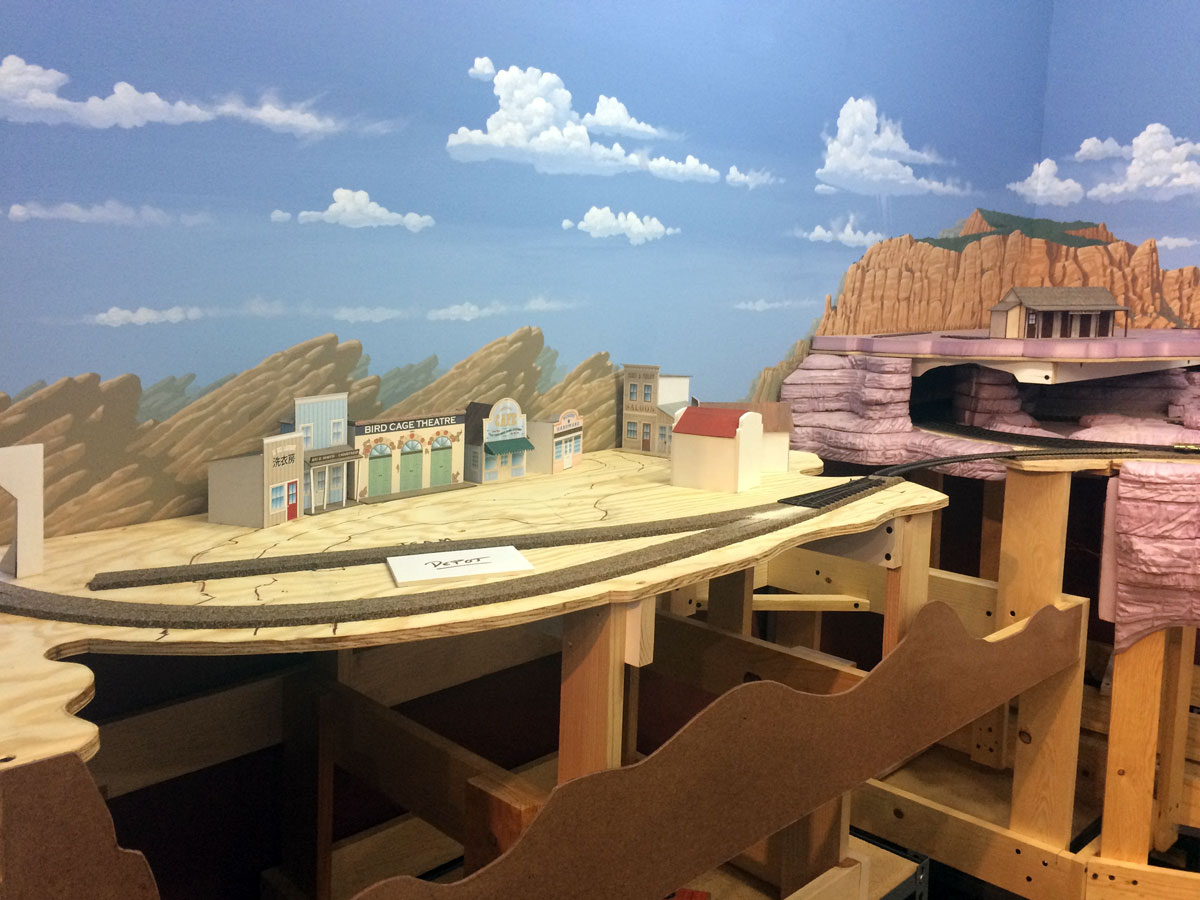
BCRy Part II. Work continues on my On18 Bandit Canyon Ry micro-layout! This week, I add risers to raise the plywood sub-roadbed up to the desired height, then it’s time for cork roadbed, laying some Peco flextrack, building a simple manual turnout linkage, and hooking up the DC power. Join me as I bring the BCRy to life for the first time and explain a few tips and tricks learned over the years to make all of these tasks a little smoother and easier.

Thanks for watching, amigos!
Dave

Foam Benchwork and Laying Track on Gruesome Gulch – GGRR Part 4


It’s time to finish the benchwork and get some trains running on my On30 Gruesome Gulch mini-layout! In this installment, I build both benchwork and roadbed from layers of lightweight extruded polystyrene foam (XPF), then lay down some On30 flextrack on the upper and lower loops. Some tips on soldering track connections with a butane torch too, and a little track cleaning to keep everything running smoothly. More to come!

Thanks for watching, amigos!
Dave

Calico Mountain Expansion Part 4: On18 Track Levels


In episode 4 of the Calico Mountain Expansion how-to series we get the On18 trains running on two levels! Some changes are made to the original plan, with a second mid-height loop of On18 track added to increase the fun and visual interest. Don't forget to subscribe and hit that notification bell so you don't miss a single episode. Thanks for tuning in, amigos! Dave

How to Paint & Ballast On30 Track


Here's my "How-To" on a much requested topic: painting and ballasting model railroad flextrack and turnouts. These are the methods I've used throughout the On30 Thunder Mesa layout for many years with good results. Though the focus here is On30, the same techniques can also be used for other scales like HO and N.

Thanks for tuning in, amigos!
Dave

Calico Mountain Expansion Part 2: Roadbed, Track & Wiring


Welcome to the second episode in this series on building the Calico Mountain Expansion to the Thunder Mesa model railroad layout! In this episode we'll install the cork roadbed, lay On30 flextrack and turnouts, and wire everything up to run trains with DCC control - including installation of an auto-reverse unit! In future episodes, we'll get the On18 track running, begin building scenery and structures, do some backdrop painting, and so much more.

Thanks for tuning in, amigos!
Dave

Modeling Canyon Country Scenery with Foam

Building the Diorama

The one question I am asked more than any other is, "How do you model your rocks?" I've done a couple of videos that explain my methods in detail, and this one, originally created for Joey Riccard's Trackside Scenery YouTube Channel is among the best. I've re-edited my segment of that video to make things a bit clearer, and added it to my own ongoing series of "How To" videos.

The Lone Rock diorama featured in this video began with an email from Joey Ricard. He asked if I might be interested in contributing to an upcoming video about modeling rocks and I was happy to agree. Joey's videos are always fun and informative, focusing on both tried-and-true and new-and-innovative techniques. Just my kind of project. Most of the build is covered in the resulting video, so this post focuses on a few additional details that may have been glossed over.

The 12" x 24" diorama started with a simple frame of 1" x 2" MDF and three layers of 1.5" white polystyrene bead-board. Some 1" thick gold polyurethane foam (Balsa Foam) was roughly shaped to form a single, towering butte. 1/2" plywood was cut to shape for track sub-roadbed and glued in place atop the foam. The white foam was shaped with a hot-wire cutter, and a small stone culvert made from Balsa Foam was created to bridge the gully. I used Loctite Power Grab construction adhesive to glue everything together.

The butte was carved from hard density Balsa Foam. This is a commercial version of the same gold urethane carving foam used by Walt Disney Imagineering and Hollywood special effects model builders. It's available through better stocked art and craft dealers.

A short section of the 1/2" plywood sub-roadbed was cut away and a chunk of 1" thick Balsa Foam was used to form a small stone culvert. The arch was created with sandpaper wrapped around a small bottle, and the stones were carved with a hard 5H pencil.

Using photos of rocks from Monument Valley, Moab and Sedona, Lone Rock Butte was carved from Balsa Foam using mostly a #2 hobby knife. The butte was then glued to the base with Loctite Powergrab adhesive. Four bamboo skewers between the butte and the base add additional strength.

Sculptamold was used to blend the butte into the base and to form an embankment along the sub-roadbed right of way. A soft, wet brush was used to smooth the Sculptamold and blend it with the different foams.

Since there would be scenery below it, the stone culvert was finished early and installed flush with the sub-roadbed. It was painted with acrylics and the mortar lines were filled with spackling paste. Midwest HO scale cork roadbed was glued down with yellow carpenter's glue, then just about everything on the diorama was given a base coat of golden-tan flat latex house paint. When that was dry, a length of Peco On30 flextrack was cemented in place with Powergrab adhesive.

As described in the video, a wash of diluted India ink was sprayed onto the butte to darken cracks and crevices before final painting was done. Inexpensive craft acrylics were used to complete the paint job. Colors like raw sienna, red oxide, burnt umber and unbleached titanium were applied wet into wet, working from darker to lighter tones.

I masked off the diorama and painted the track flat black with some Krylon spray paint. Next the ties were painted with a light tan acrylic. I used Apple Barrel "Khaki." Then the rails were painted with rust colored chalks suspended in 70% isopropyl alcohol. The final step was to give everything a good dusting with black and dark brown chalks. There's no power going to this track so I didn't bother to clean the paint off of the railhead. On powered track I'd use a Bright Boy or paint thinner to clean the railhead after painting.

The basic ground cover is Polyblend Sanded Grout. I mixed it up with a little water to form a thick paste and then just stippled it on with a cheep paintbrush (don't use a good brush for this! You'll never use it again). The erosion lines were pressed in with a pencil. The grout does a good job of representing soil while also filling and smoothing any remaining gaps in the foam base. This color is called "Sandstone," appropriately enough, and it dries a couple of shades lighter than it goes on. The wet grout generally stays where you put it but I also wet it down with a misting of diluted matte medium to lock it in place.

Once the grout had set overnight, the final coloring was done with light washes of acrylics to blend and unify the grout layer with the rock carving.


Real dirt and rocks were sprinkled on and then glued in place with white glue and diluted matte medium. Then the track was ballasted with local sandstone, held in place with more diluted matte medium.

Woodland Scenics "Field Grass" was used to make clumps of desert grasses and weeds, held in place with dabs of Aleene's Tacky Glue. Any loose fibers were later cleaned up with a shop vac. Then a few more bushes and desert plants were added to finish the diorama. The juniper bushes are Super Trees from Scenic Express covered in Noch dark green foliage. Clumps of gray sage were made with Woodland Scenics medium green bushes, lightly sprayed with gray primer. The prickly-pear cacti are castings from Pegasus Models.

Building the Lone Rock diorama was a quick, fun and rewarding project. Even if you don't have room for a full layout, I encourage anyone to try their hand at a small diorama like this. It can be finished in a week or so, and it's a great way to learn new techniques or to experiment with scenery ideas.

The Lone Rock Diorama was completed back in early 2016 and was later featured on the cover of Railroad Hobbyist Magazine. Today, it is being incorporated into a new HO layout I'm building at the studio called the Rio Lobo & Western and there'll be more on that in a future post. But that's it for this time. Thanks for checking in, amigos. Adios for now!

Calico Canyon Unit of the Horse Thief & Never Mine Ry.

A Simple On18 Loop

This may be a case of the name of a model railroad being longer than the line itself, but I had to call it something, right? The Calico Canyon Unit of the HT&NMRy is a simple loop of 9mm gauge track about a foot below the Thunder Mesa mainline in Calico Canyon. It emerges from a mine tunnel, crosses Calico Creek on a high trestle, then passes behind a waterfall before ducking back into another tunnel. Round and round it goes, bringing a little more kinetic energy to the canyon scene. The circle is 11" radius and uses Peco HOn3o track for the visible areas, and Atlas N scale snap track for the hidden parts of the loop. Power comes from a well used Kato DC power pack under the layout.

The idea began with earlier plans for Calico Mountain and evolved into a loop inside the canyon when I started roughing in the scenery there. I started by creating a circular sub-roadbed from pink extruded polystyrene foam, and then building the canyon walls up with more foam around it. Midwest HO cork roadbed was glued to the foam with yellow carpenter's glue and allowed to dry overnight before track laying began. Using sectional track in the hidden areas allowed me to leave some rail joints un-soldiered, always a good idea since nickle-silver rail shrinks and expands with changes in temperature.

Calico Creek will cascade down the canyon in a series of dramatic falls, over and under the On18 and On30 tracks. Up top on the TMMC mainline, a new mine headframe and hoist house will be built near the backdrop, giving the illusion that the On18 tracks below are part of a large mine complex.

Progress on this little loop is tied in with progress on the larger scenes of Calico Canyon and Calico Mountain. The next big jobs will be building a mine complex trackside and all of those bridges across the canyon. Then there's the canyon scenery itself to finish and the cascades and falls of Calico Creek. In the meantime, here's a quick video of the On18 loop in action. Stay tuned, Amigos!


An Update on Calico and This Week’s Video Log

Studio Update - Aug 19, 2017

Progress in Calico Town

It's been a busy week at Thunder Mesa Studio with the new Calico town section well underway. After taking precise measurements at the studio, plans were drawn up for the new 22x56" module and for the future 8' long staging yard to be built behind the backdrop and above my workbench. Click on this week's video log above to see some of the work being done on Calico town.

I built the module in my garage workshop, using dimensional kiln dried stock with a 1/2" thick plywood deck. It's my usual "box and stilts" method of construction, with 1x3 risers supporting the plywood sub-roadbed above a square and sturdy box built of 1x4's. It's strong and relatively lightweight; the same formula that has served me well on multiple layouts over the years, and remains the favored method of benchwork construction on the TMMC.

Installation up at the studio was relatively quick and easy, with everything fitting and lining up with the existing layout just the way it was supposed to. What can I say? I get lucky sometimes. The module is supported by a base built from 1x4's that sits atop some sturdy metal shop shelves. I built a little wiggle room into the base allowing the module to be adjusted to sit level and flush with the deck of the neighboring Canyon Section. The most challenging aspect was building a short piece of new roadbed on the existing layout to connect with the new module. Like most of the layout, track height in this new module will be about 52" above the floor.

When viewed from across the aisle, I want an unbroken vista of canyon scenery so I took particular care in planning the height and placement of the fascia. After testing sight lines, the fascia was cut from 1/8" thick Masonite and glued in place with a pro-grade construction adhesive.

With the module firmly in place, I turned my attention to cutting a "mouse hole" through the Masonite backdrop. This hole will allow trains to enter the layout from a new staging yard to be built "backstage" above my workbench. I used a spade bit in my drill, a small electric saw, utility knife and other hand tool to cut the hole, making sure that there was plenty of clearance allowed for trains to pass without getting hung up. A tunnel portal and some rocky scenery will be built to hide the opening on the layout side, while a simple, black-painted box will block the light and views from backstage on the staging yard side.

The final project I had time for this week was gluing down some HO scale Midwest cork roadbed for the tracks to ride on. Yellow carpenter's glue and a large helping of thumbtacks were used to get this done. Once the glue dried, a sanding block was used to make everything nice and smooth for track laying.

My plan for the town of Calico is for something like a cross between Knott's Berry Farm's Ghost Town, and the real, restored ghost town of Calico that's out near Barstow, CA. There will be some structures inspired by both locations, but unlike Knott's, my Calico town will be built up the side of a hill to add some visual interest to the scene. For now, I've mocked up the town with a few paper model structures to get a feel for how things will come together. The scenery here will evoke a strong Mojave Desert vibe, distinguishing it from the red sandstone, Colorado Plateau look on the Thunder Mesa side of the layout. I'll probably also tweak the backdrop painting here a bit to look more like the rugged scenery around the real town of Calico.

Next up will be extending the DCC electrical bus to the new layout sections and then laying some track. I'll probably get the track laid through Calico and make a good start on the scenery before diving into the staging yard - mostly because I haven't quite figured out how its going to be supported yet. Then there are all of the other ongoing projects like the Thunder Mesa Riverfront, the big canyon section, Calico Mountain On18 mini-layout, Balancing Rock Canyon, Hanging Rock, and the still unfinished portions of Rainbow Caverns. All in all, enough to keep me busy for quite awhile!

Don't forget to save the date for Thunder Mesa's next Open Studio & Train Day, coming up on Labor Day weekend, Saturday, September 2 from 2pm to 6pm. That's going to wrap it up for this week, amigos. Adios for now!