


Be it ever so humble
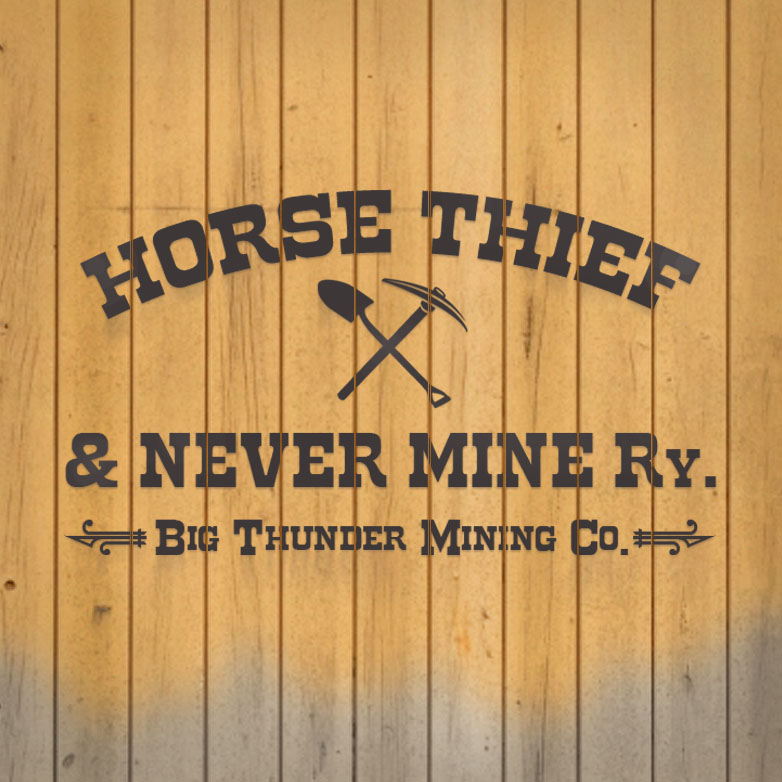
This little miner's shack was built for Big Thunder Camp and sits along the right-of-way for the On18 Horse Thief & Never Mine Ry. Made from wood, foamcore, and a few Grandt Line castings, it was a fun and relatively simple project to build. The footprint is about 16x12 scale feet (4x3"). The shack was basically designed as an elaborate lamp for flickering LED lanterns, and I'll show just how to build and install those in the photos and captions below.
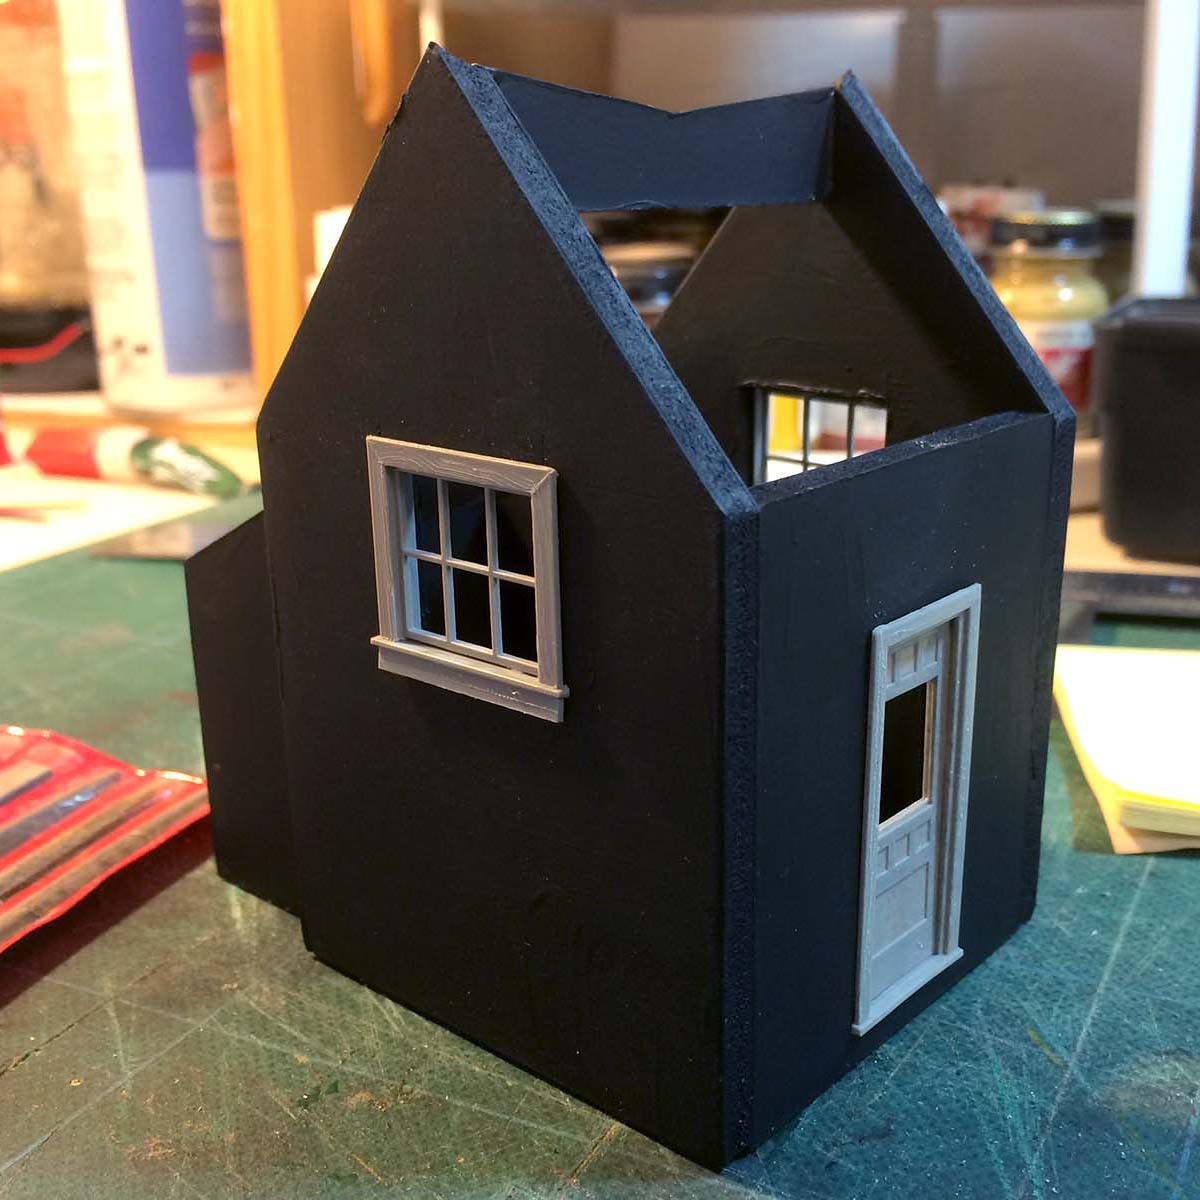
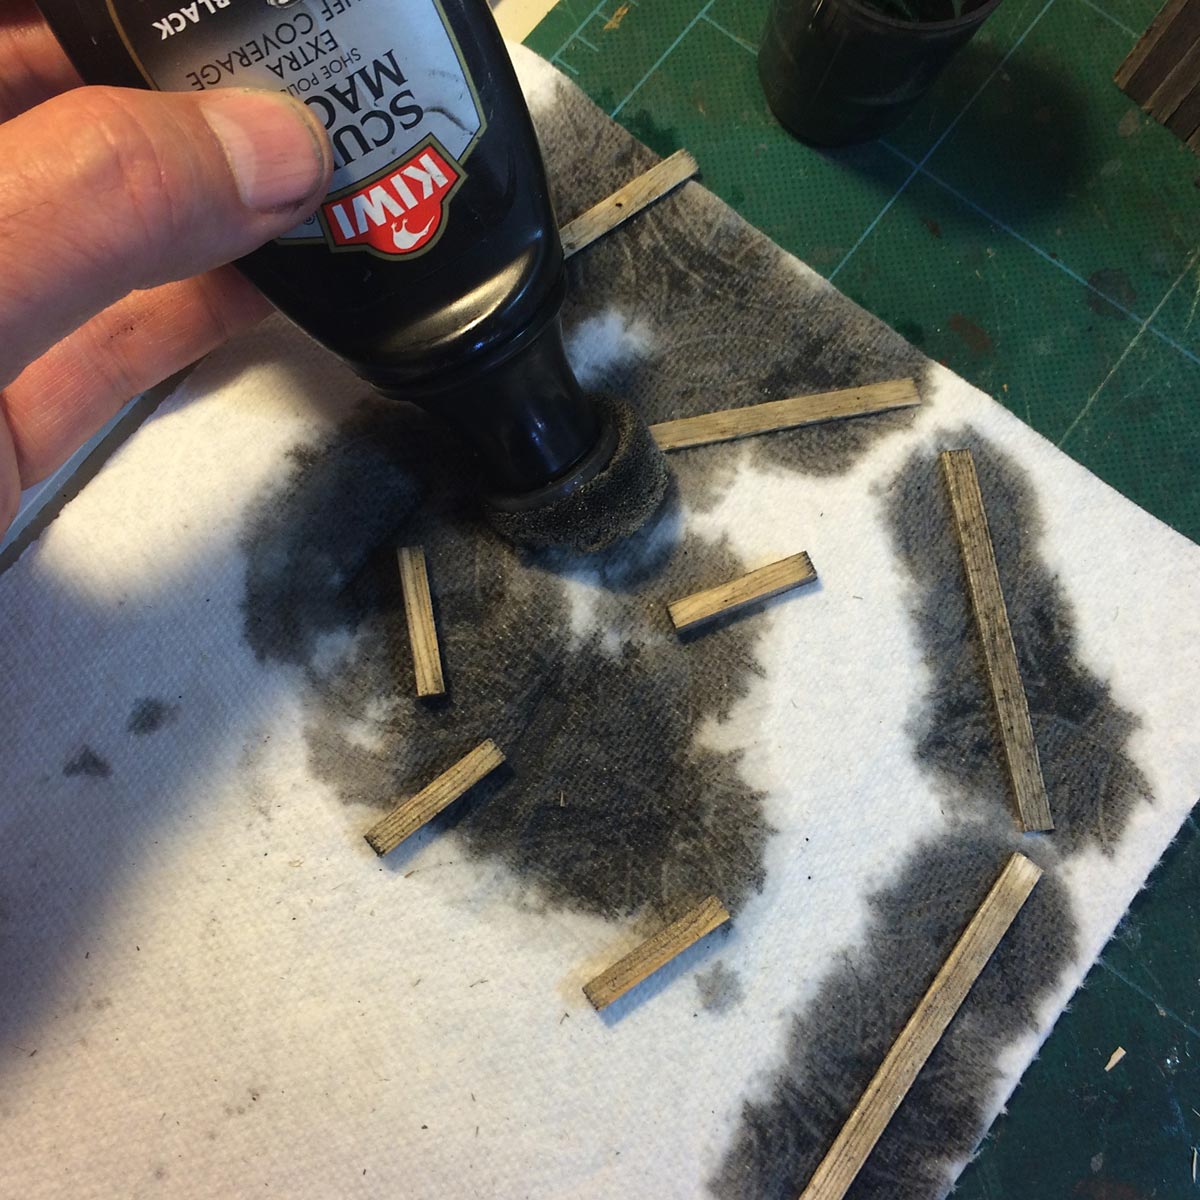
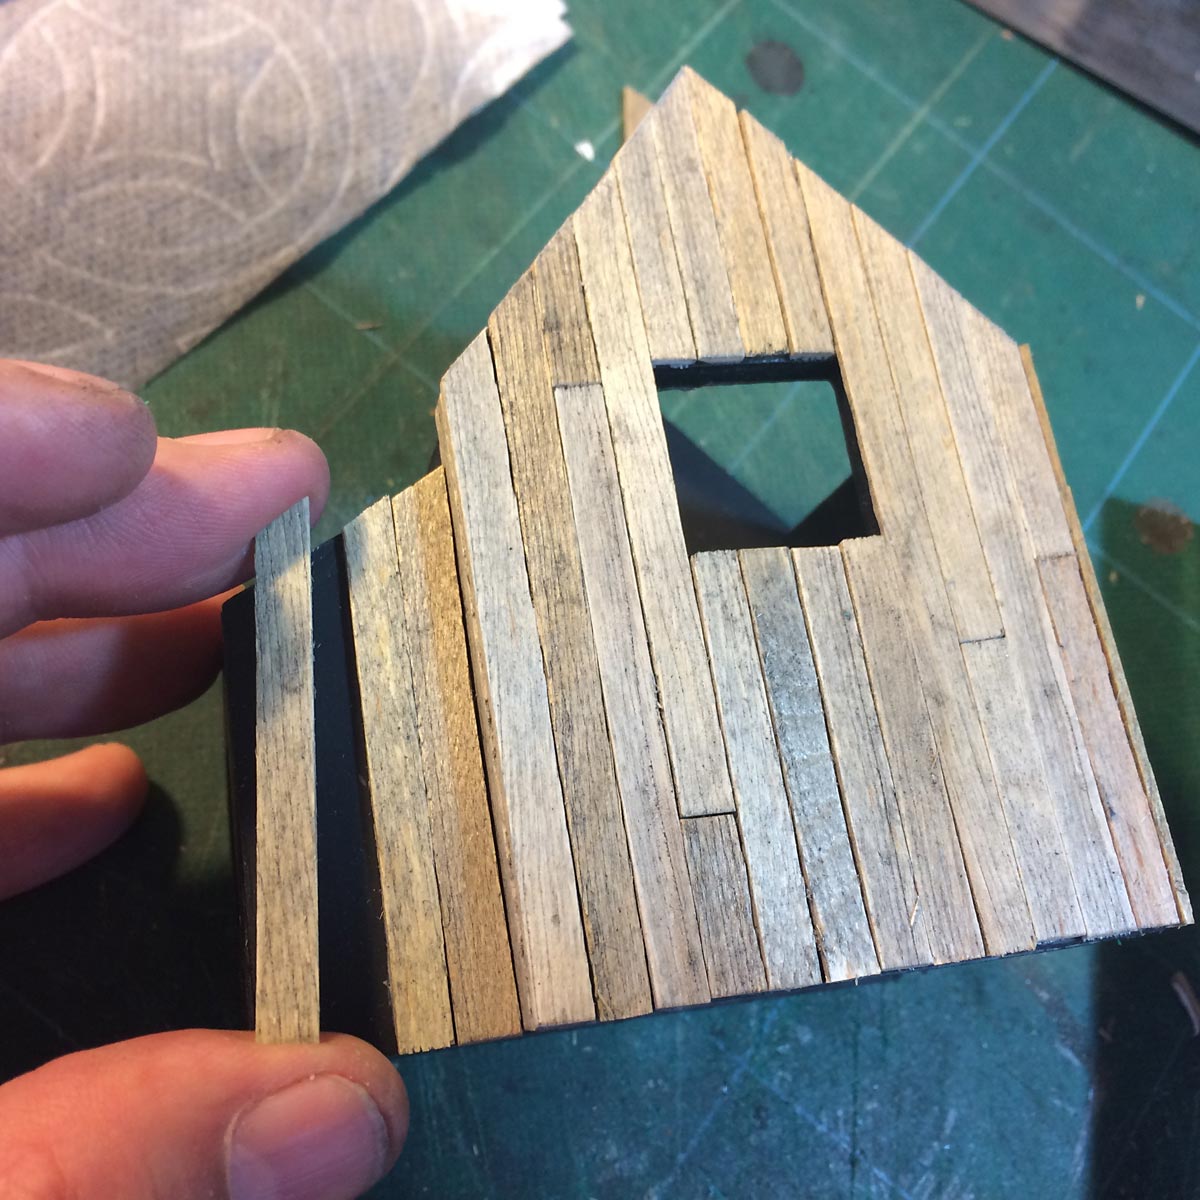
A black foamcore box forms the basic shell of the structure that will be clad in wood siding. The ridge line dips on purpose for a built in sag in the roof. The doors and windows are modified Grandt Line castings. The wooden siding is coffee stir sticks from my local craft store, and I purposefully made them a little uneven. Each board was stained with a 10:1 alcohol and shoe-dye mixture and custom fit to its place the structure.
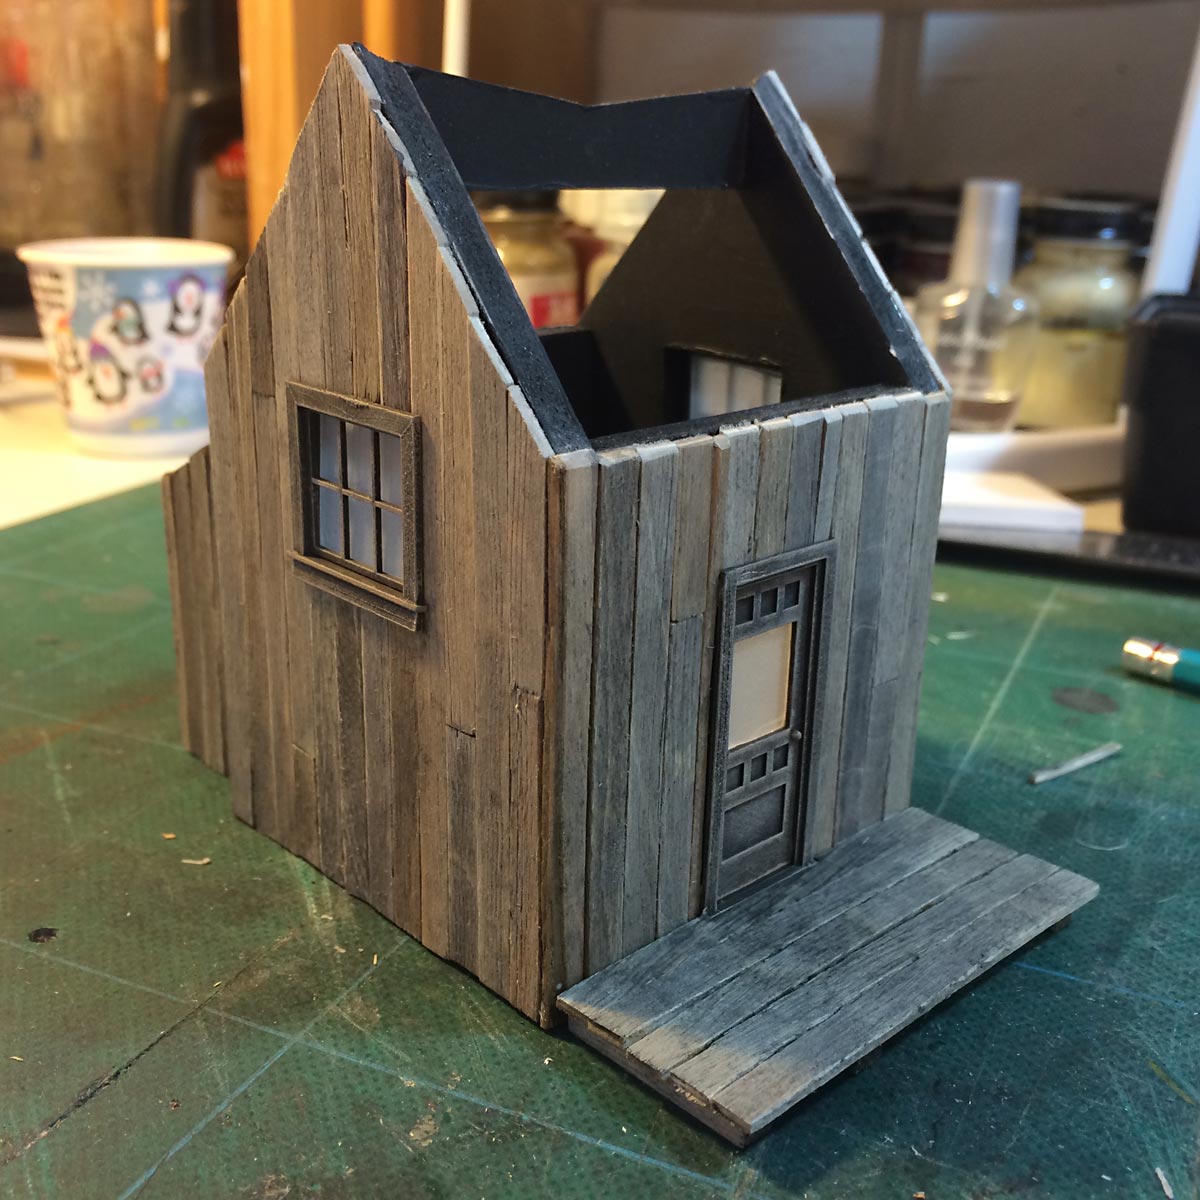
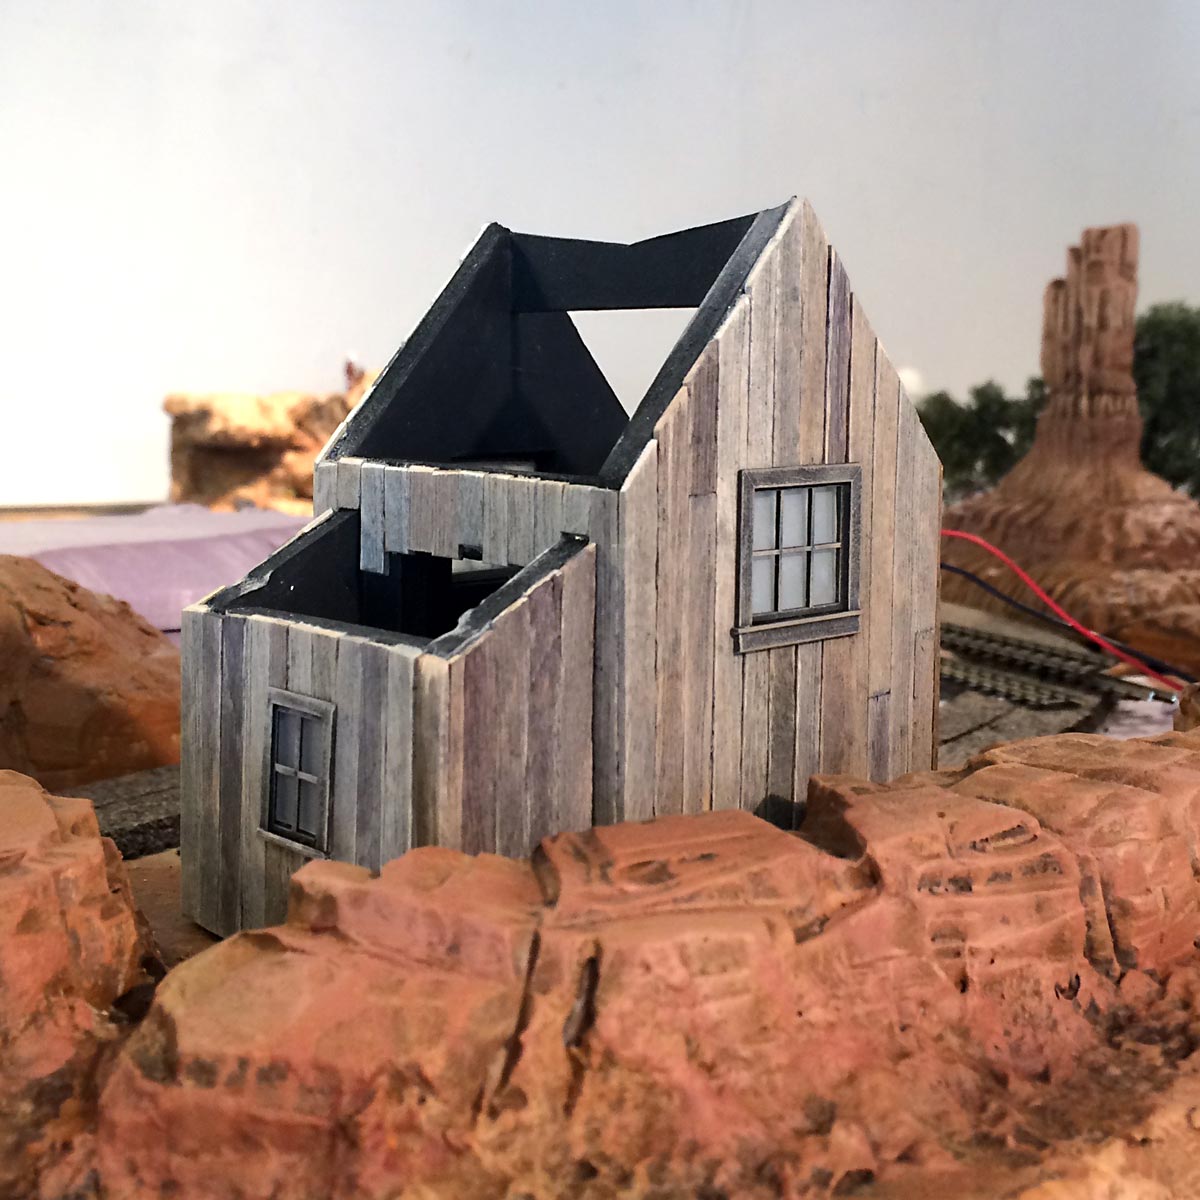

The Grandt Line doors and windows were primed and then drybrushed with craft acrylics to match the distressed look of the wood siding. The clear glazing has been "fogged" with Avery inkjet labels - a nifty trick I picked up. With the walls finished, I tested the fit in its intended location before starting on the roof. Roofing on the shed portion is black gaffer's tape, which does a good job of simulating tarred canvas in this scale. I also installed a cardstock ceiling to prevent light leaks around the roof.
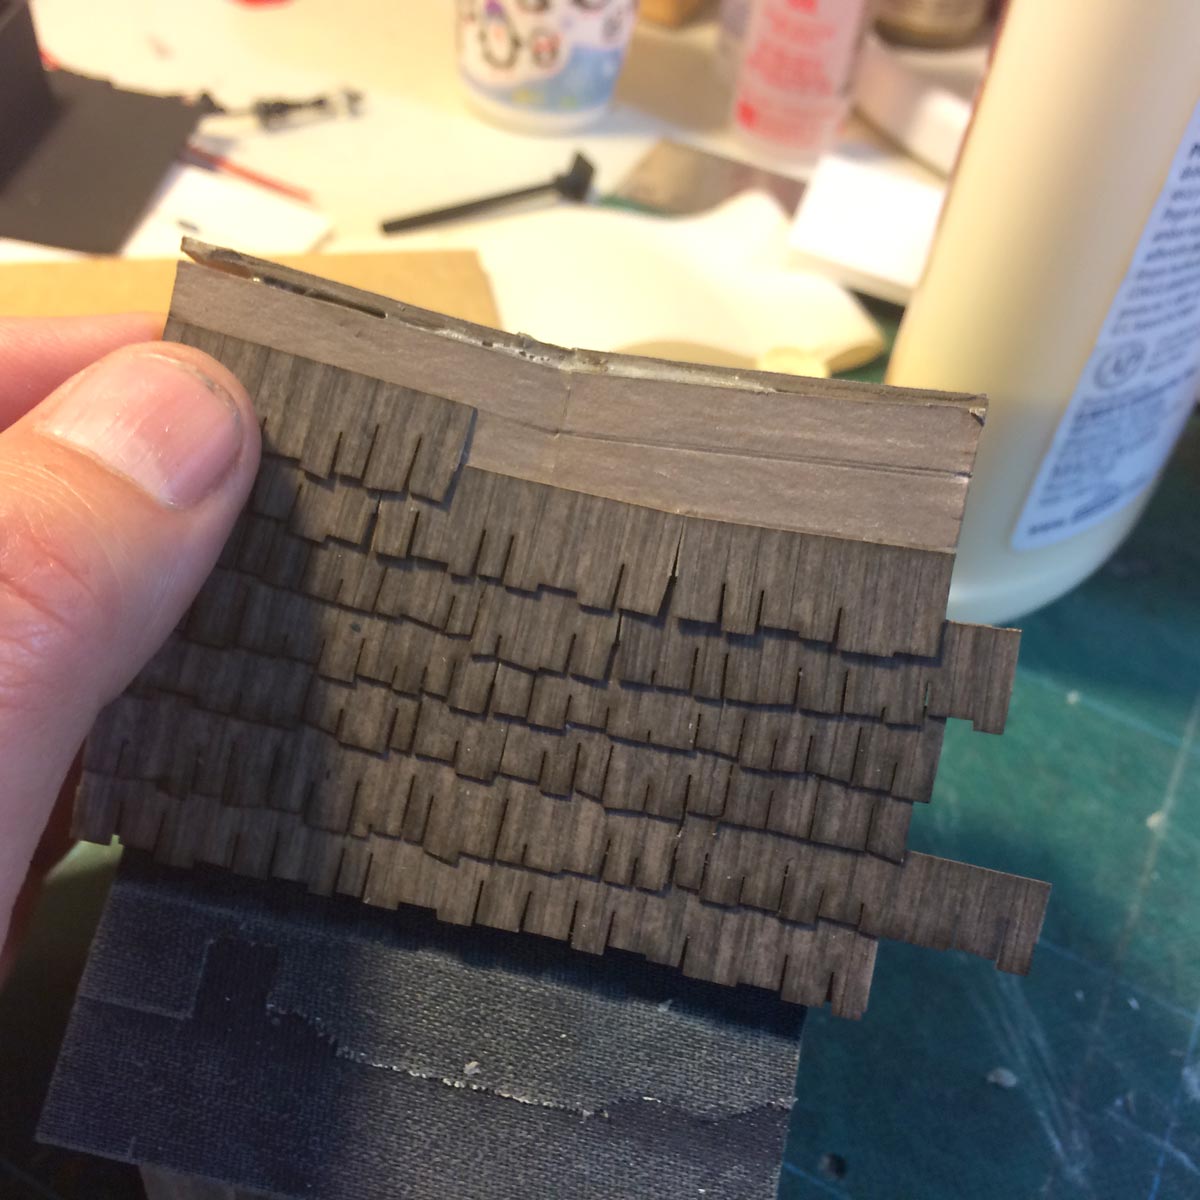
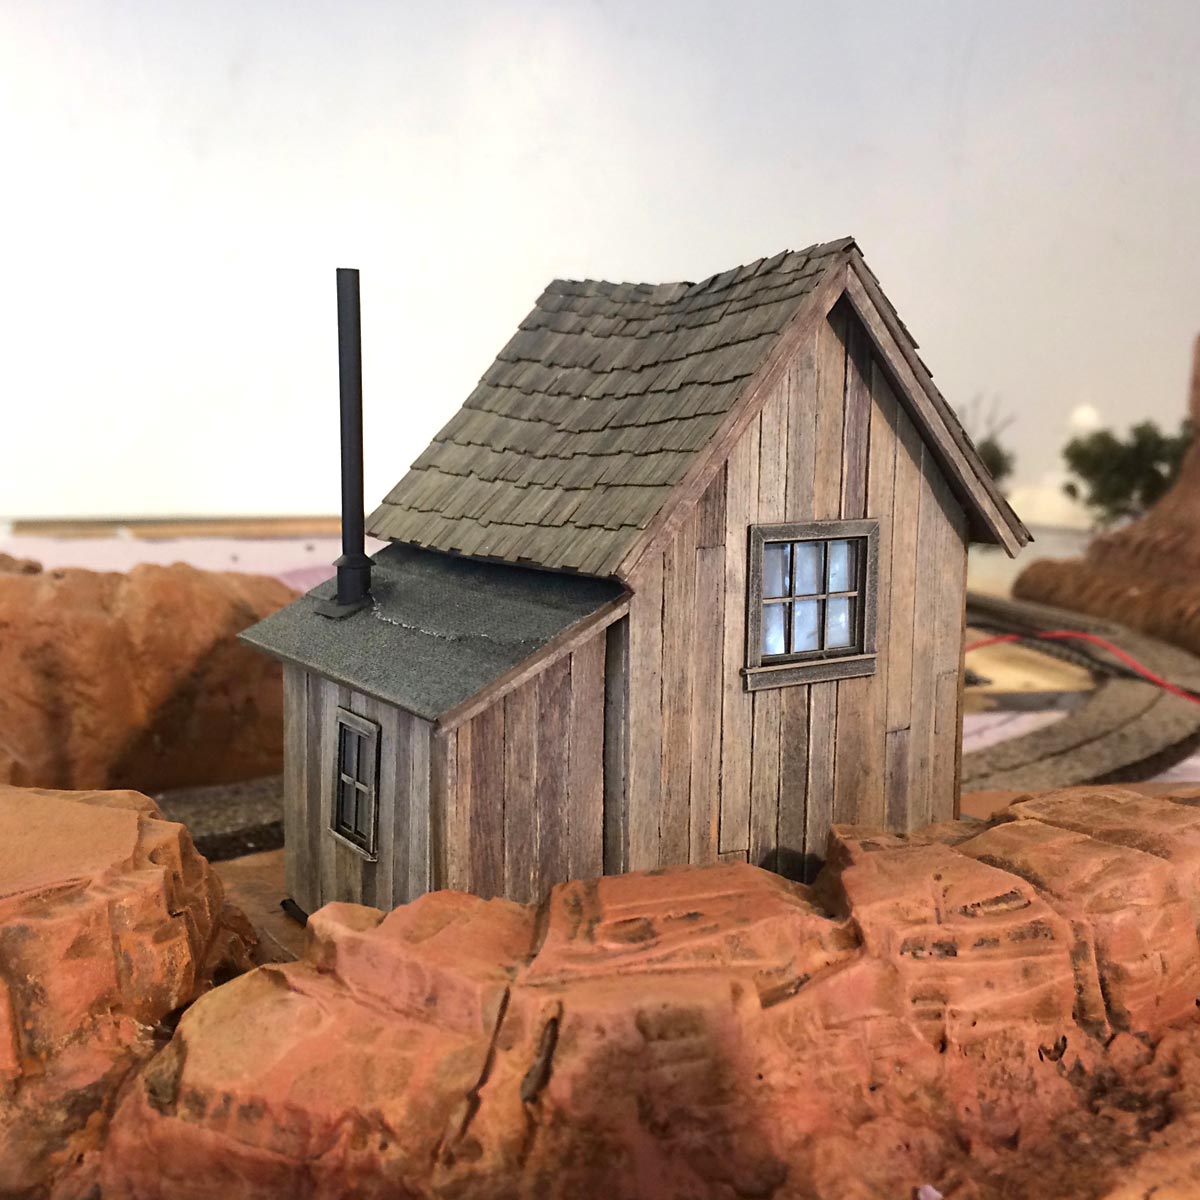
The built-in roof sag was accomplished by carefully scoring and then folding the cardstock roof panels to match the ridge line. Excess material at the top was then trimmed away to match the sag. I drew lines on the roof 3/8" apart and applied the Bar Mills paper shingles with yellow glue. The smoke-jack is another Grandt Line casting.
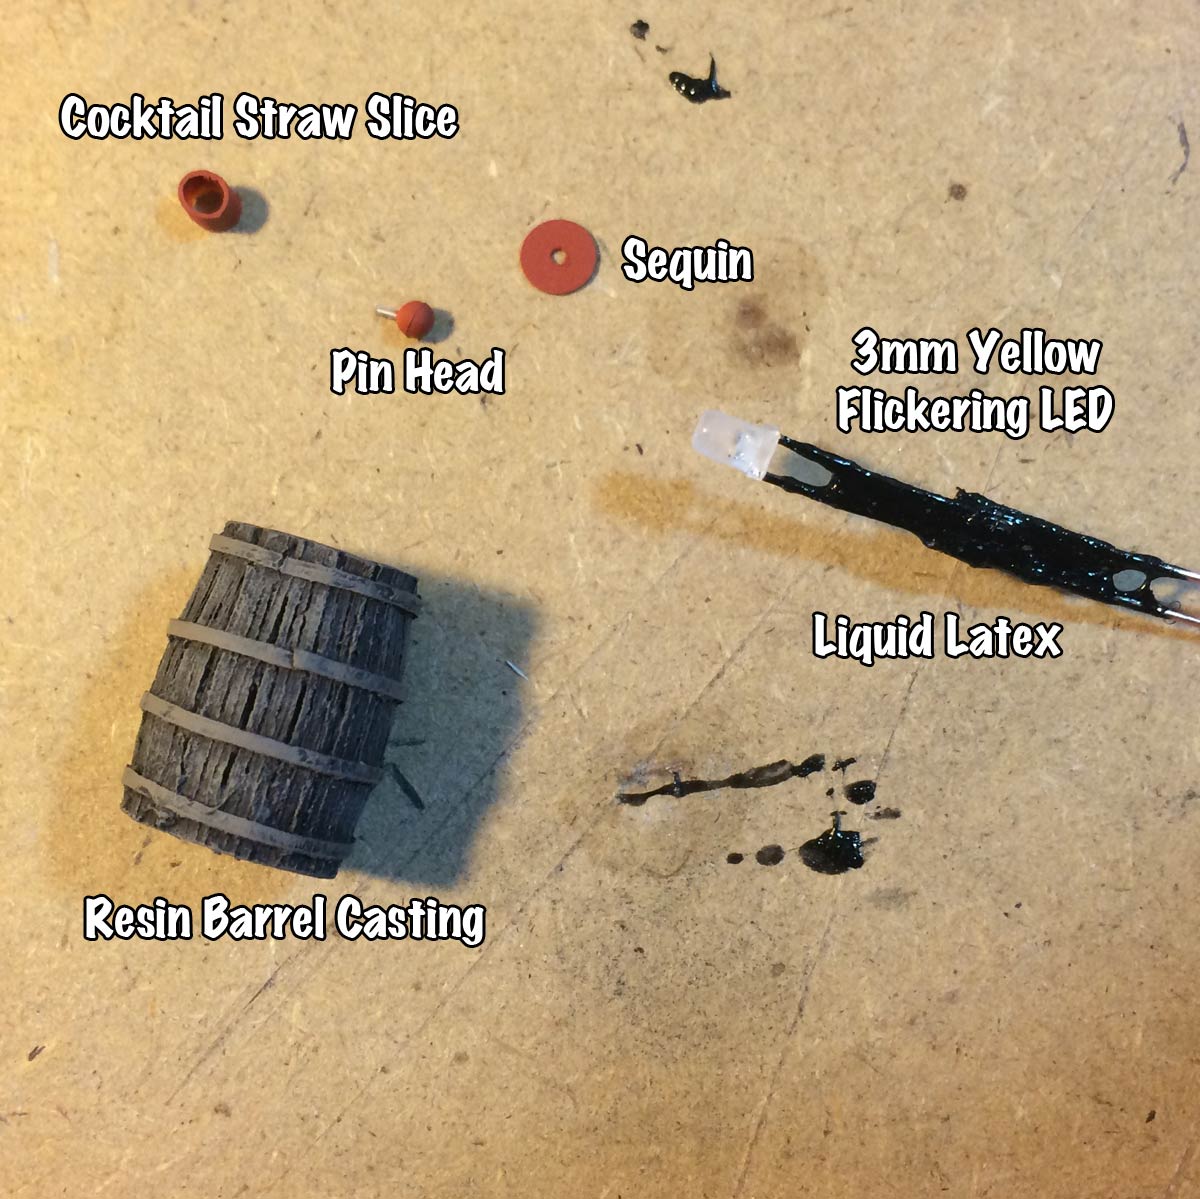
With the structure complete, it was time to move on to the lighting. The basic materials for a flickering lantern are shown above. I purchase the 3mm yellow flickering LEDs in bulk on eBay. I like the yellow color for kerosene lamps, and flickering amber LEDs for simulating fire. On these newer LEDs the flicker is already built in and no special circuitry is required. The liquid latex is sold as Liquid Electrical Tape at the local hardware store. I used it to insulate the diodes and copper wires inside the barrel where the space is too small for tape or heat shrink tubing.
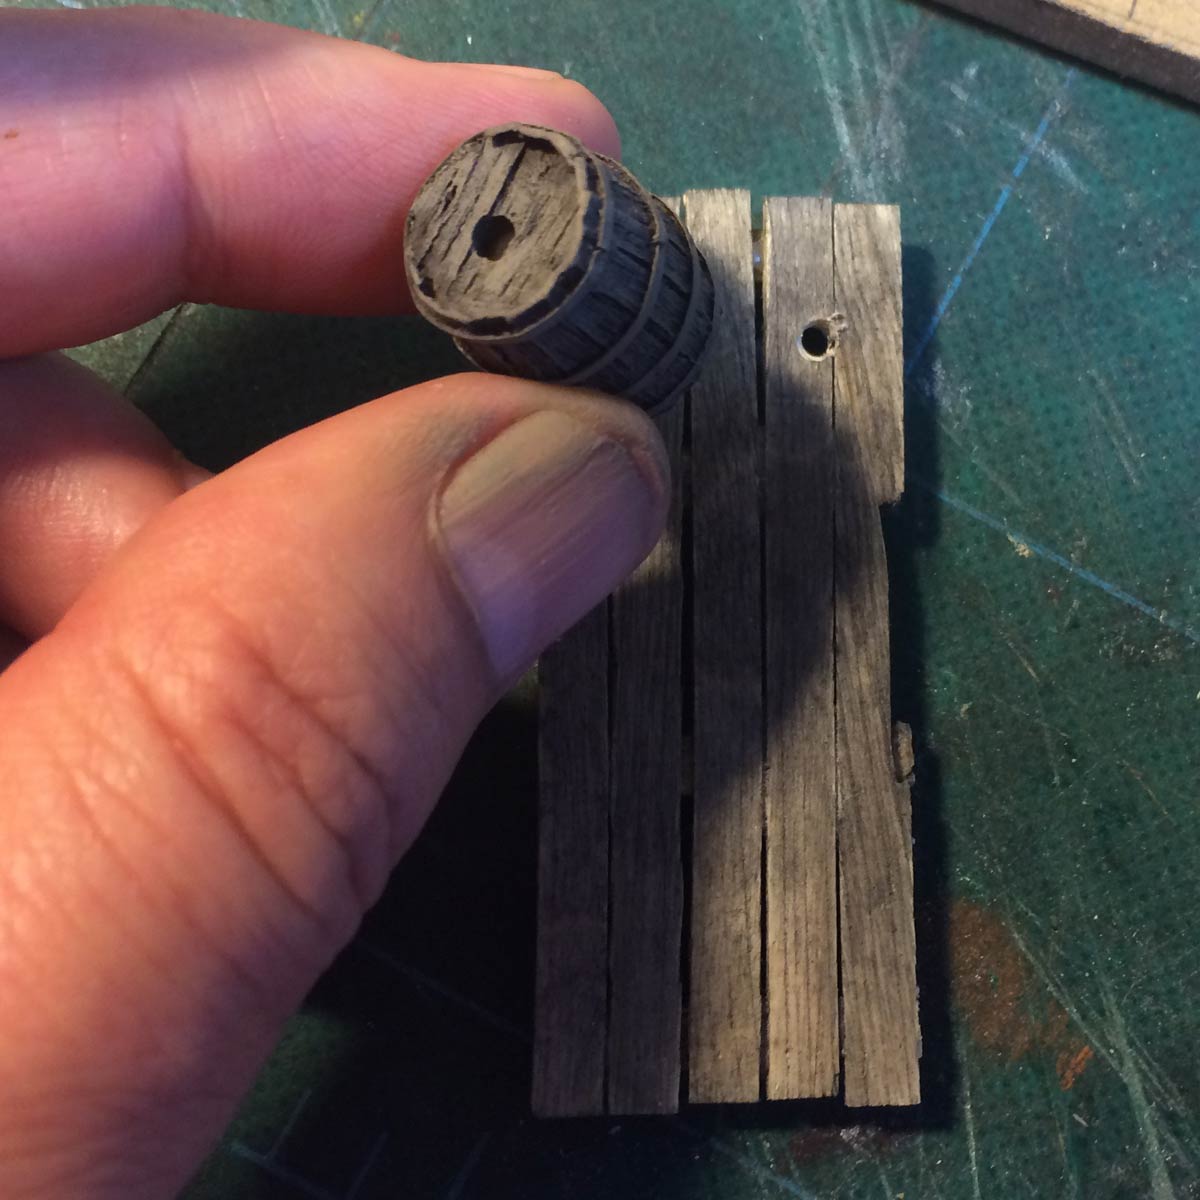
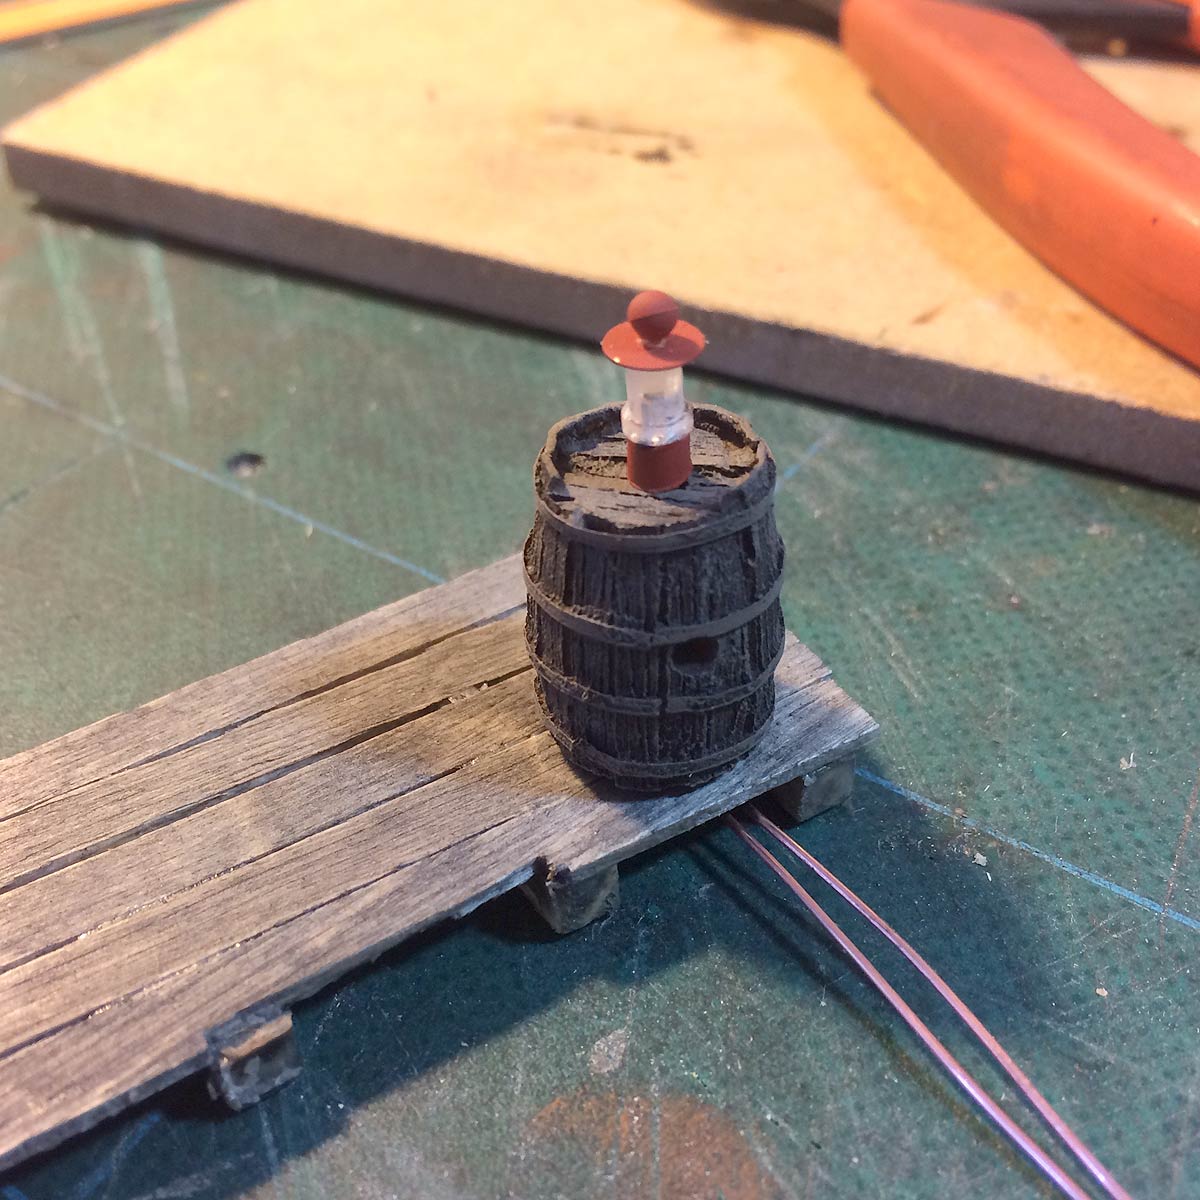
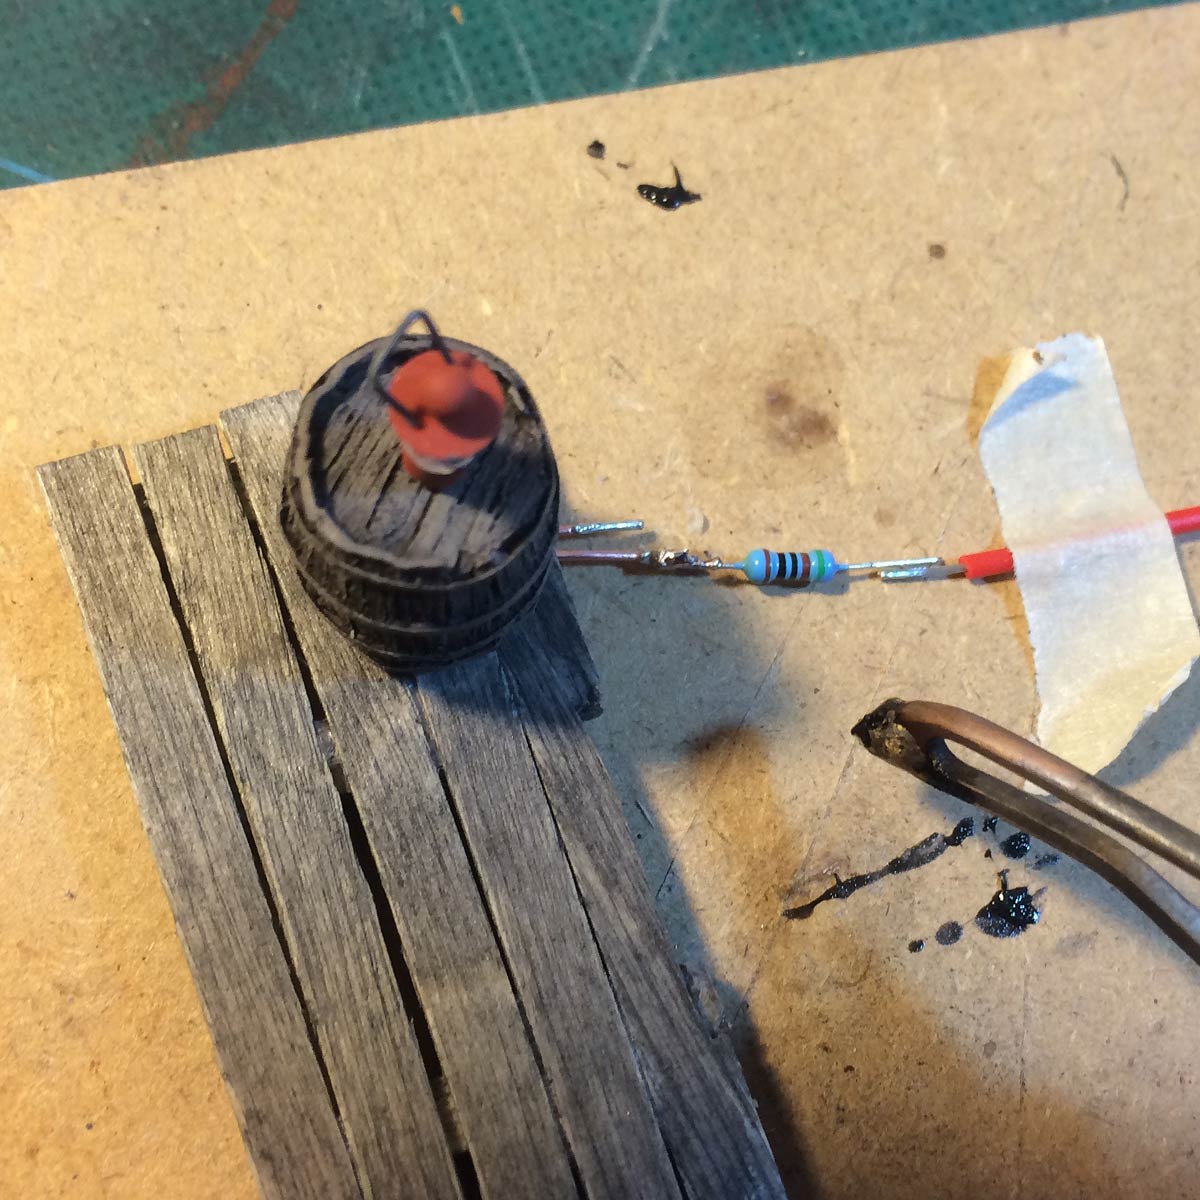
These photos show the complete lantern assembly for the front porch. A 1/8" hole was drilled through both barrel and the porch. The barrel is a resin casting from Rusty Rails. It was painted with acrylics and glued in place on the porch. The lantern pieces were painted red and assembled atop the barrel as shown. Because of the tight space, bare copper wire was soldered to the diode leads and then threaded through the barrel and porch. Thus the need for the liquid latex. A 510 Ohm 1/4 Watt LED resistor was soldered to the positive lead and then 20 AWG wires were soldered to bring power. After soldering, everything was protected with heat shrink tubing.
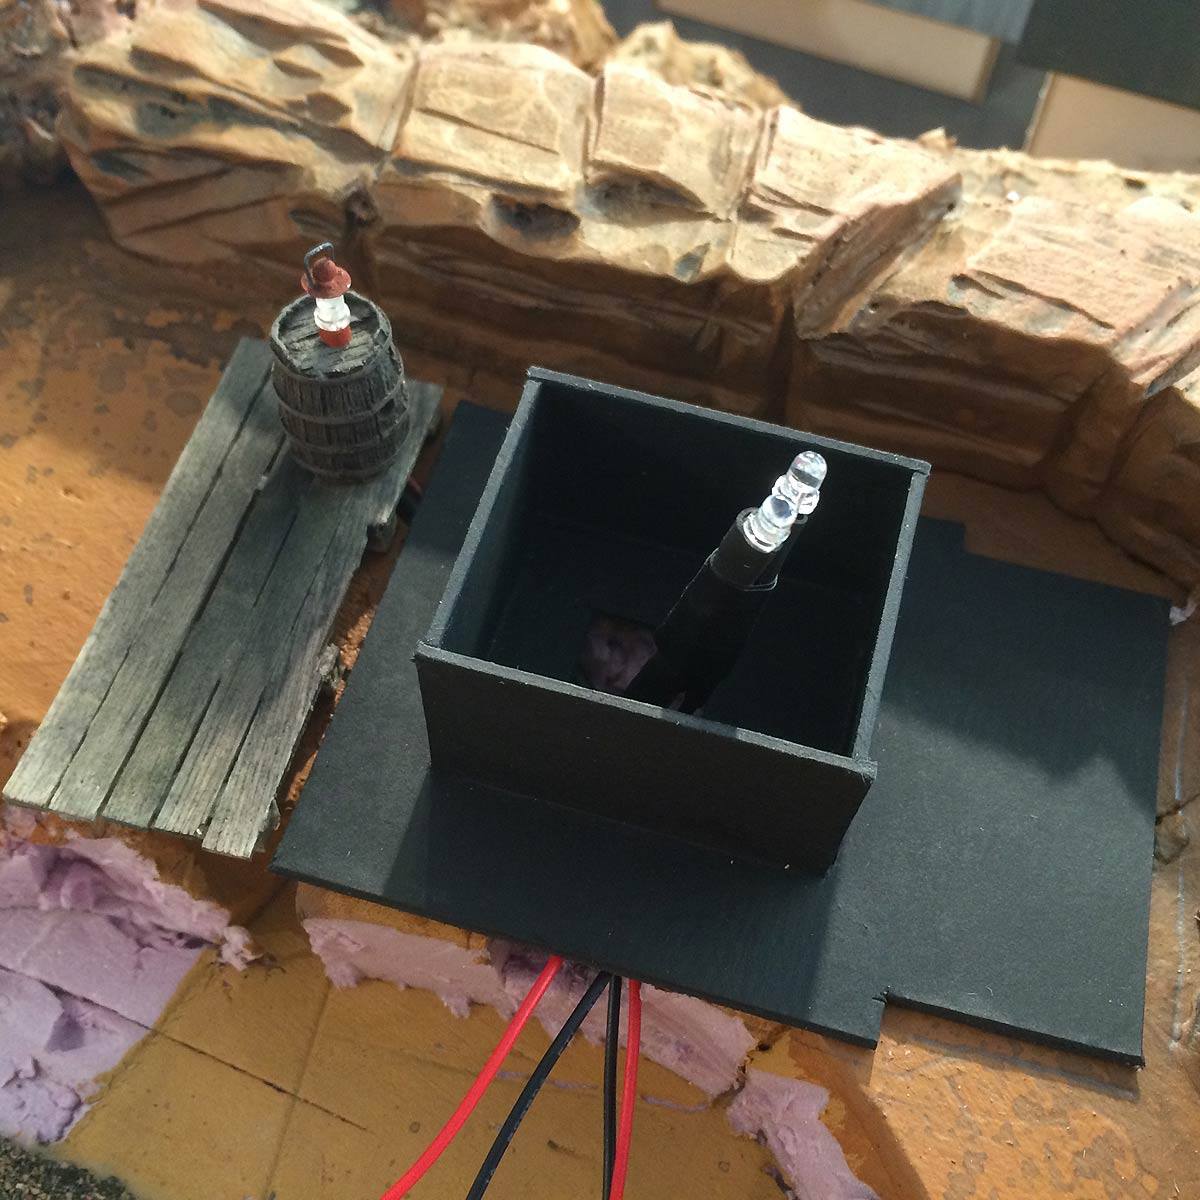


In the finished lighting set up, the wiring runs down through gaps cut in the foam base. One flickering and one non-flickering LED light the interior of the cabin. An interior black foam-core box was created to house the lighting and prevent light leaks, and the shack slides down on top of this black box. The last two photos and the video below show how the lamps look when illuminated. A 9v DC transformer provides power for these and other lights on the layout.
Flickering Lanterns in the Miner's Shack
Thanks for following along, amigos. Registered users can leave questions and comments below so, please, join in the conversation!
All the best,
Dave
I love the sagging roof line. It “ages” the building from afar before you can even see the weathered details. But I realized I have never noticed the rock wall supporting the foundation before. That’s a detail that shows you’re in hill country without much effort! Dave, you’re always teaching. Thanks.
Thanks Jim! The rock wall was done with caved EPF foam and the mortar between the stones is spackling compound.
Dave, what a stunning little building! Very simple but loads of character, but the techniques aren’t out of reach of us mere mortals haha. And the building would scale well to any other scale too. Thanks for posting this!
Thanks Michael!
GREAT JOB Dave!! I especially like the small details like the lantern. GREAT TIP on the construction of the lantern tutorial.
Thanks Kevin!
Dave,
I wish I had half of your artistic talents and imagination. This is one shack I think I can do for my mining model railroad. Miners have to live somewhere! Keep the Thunder Mesa in business. Your modeling style is what encourages me in my efforts.
Den
Thank you so much, Dennis. I hope you enjoy building one of your own!