Year: 2019

The Saga of Geyser Gulch – Part 2

A Scene 7 Years in the Making

I first began work on Geyser Gulch back in early 2013 and wrote a little about it on the old Thunder Mesa blog. In this three part series, I'm revisiting and elaborating on some of those old posts, and describing the planning and building of the Gulch right up to the present day. Click here to read Part 1.

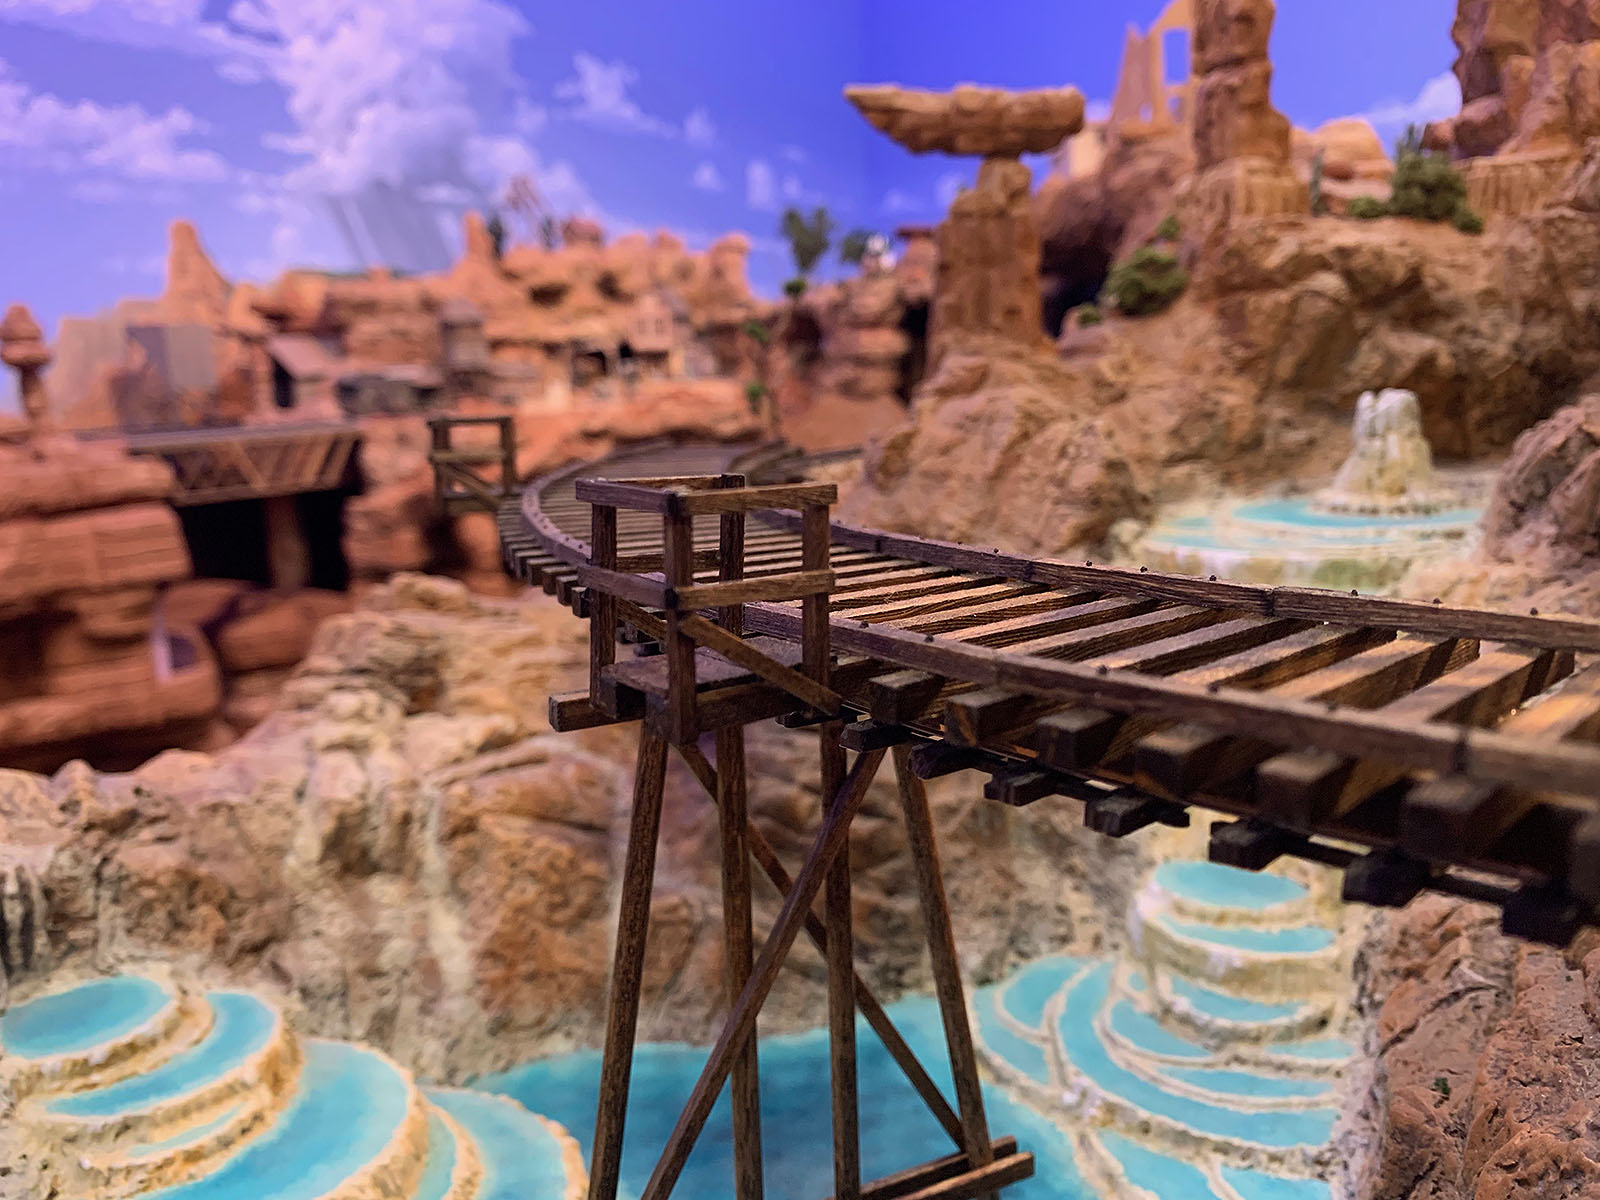
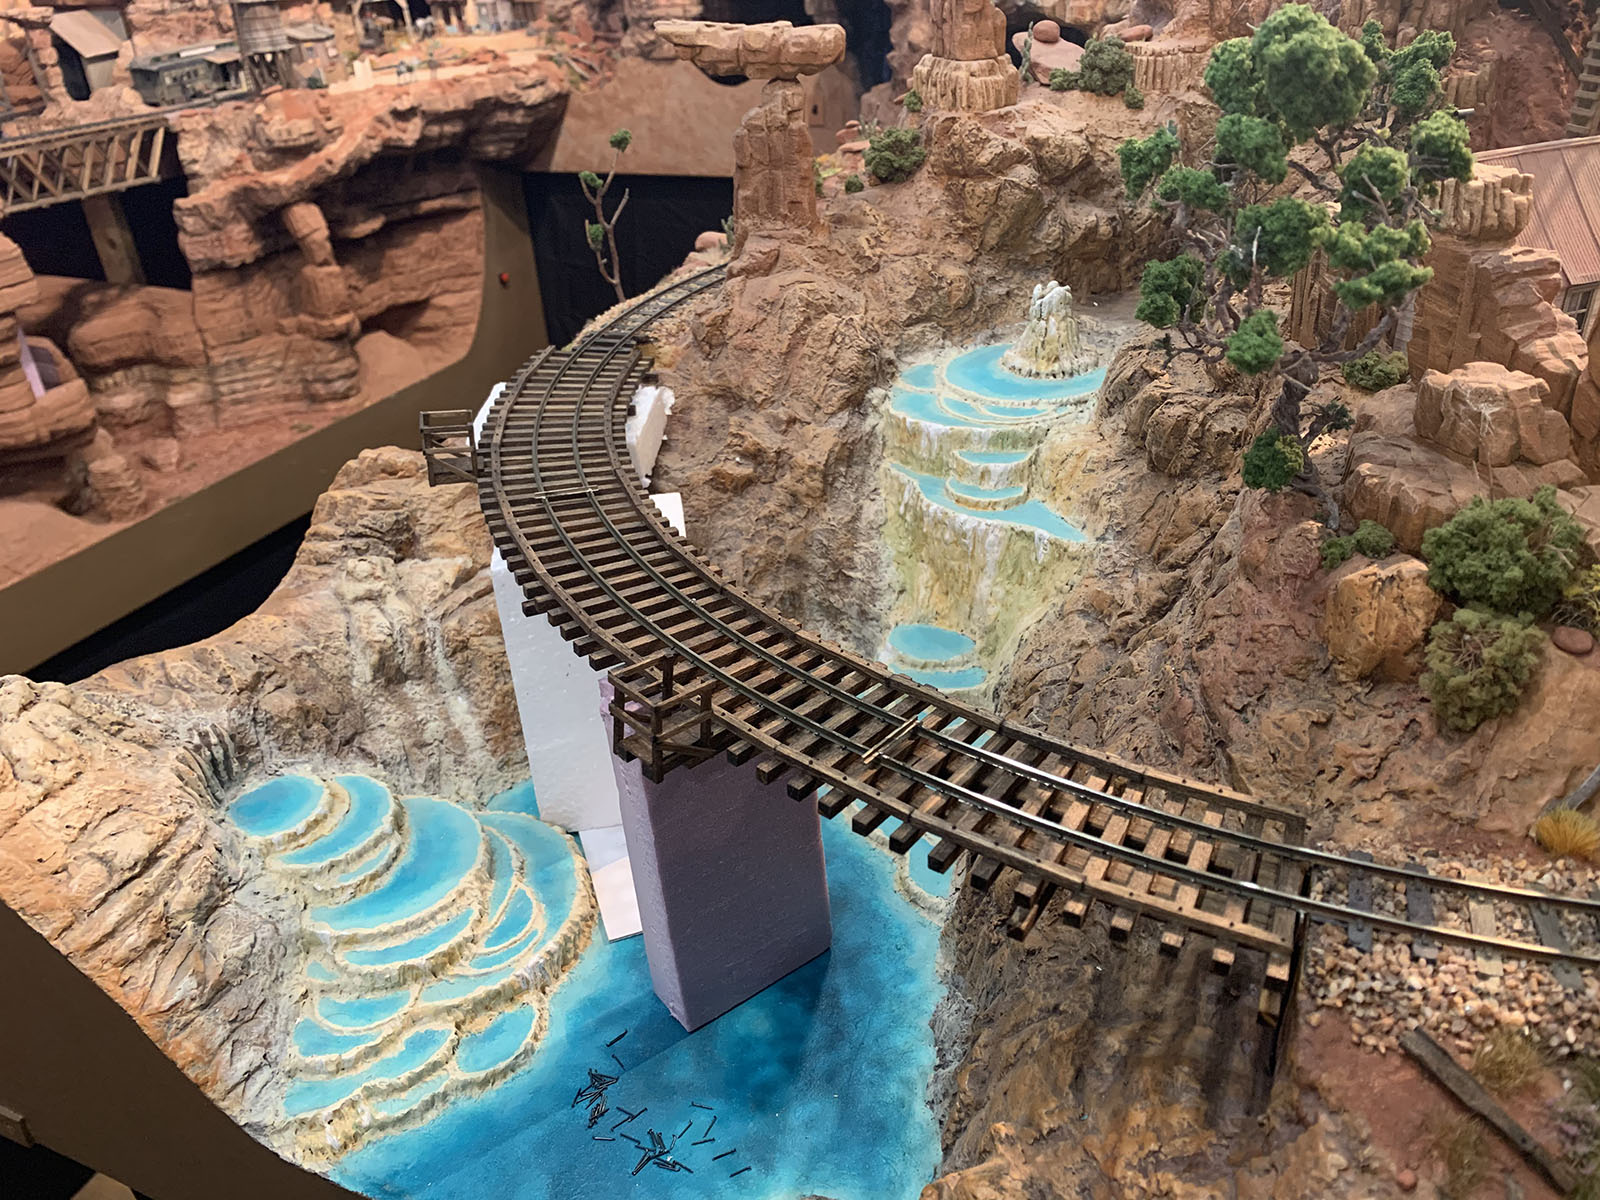
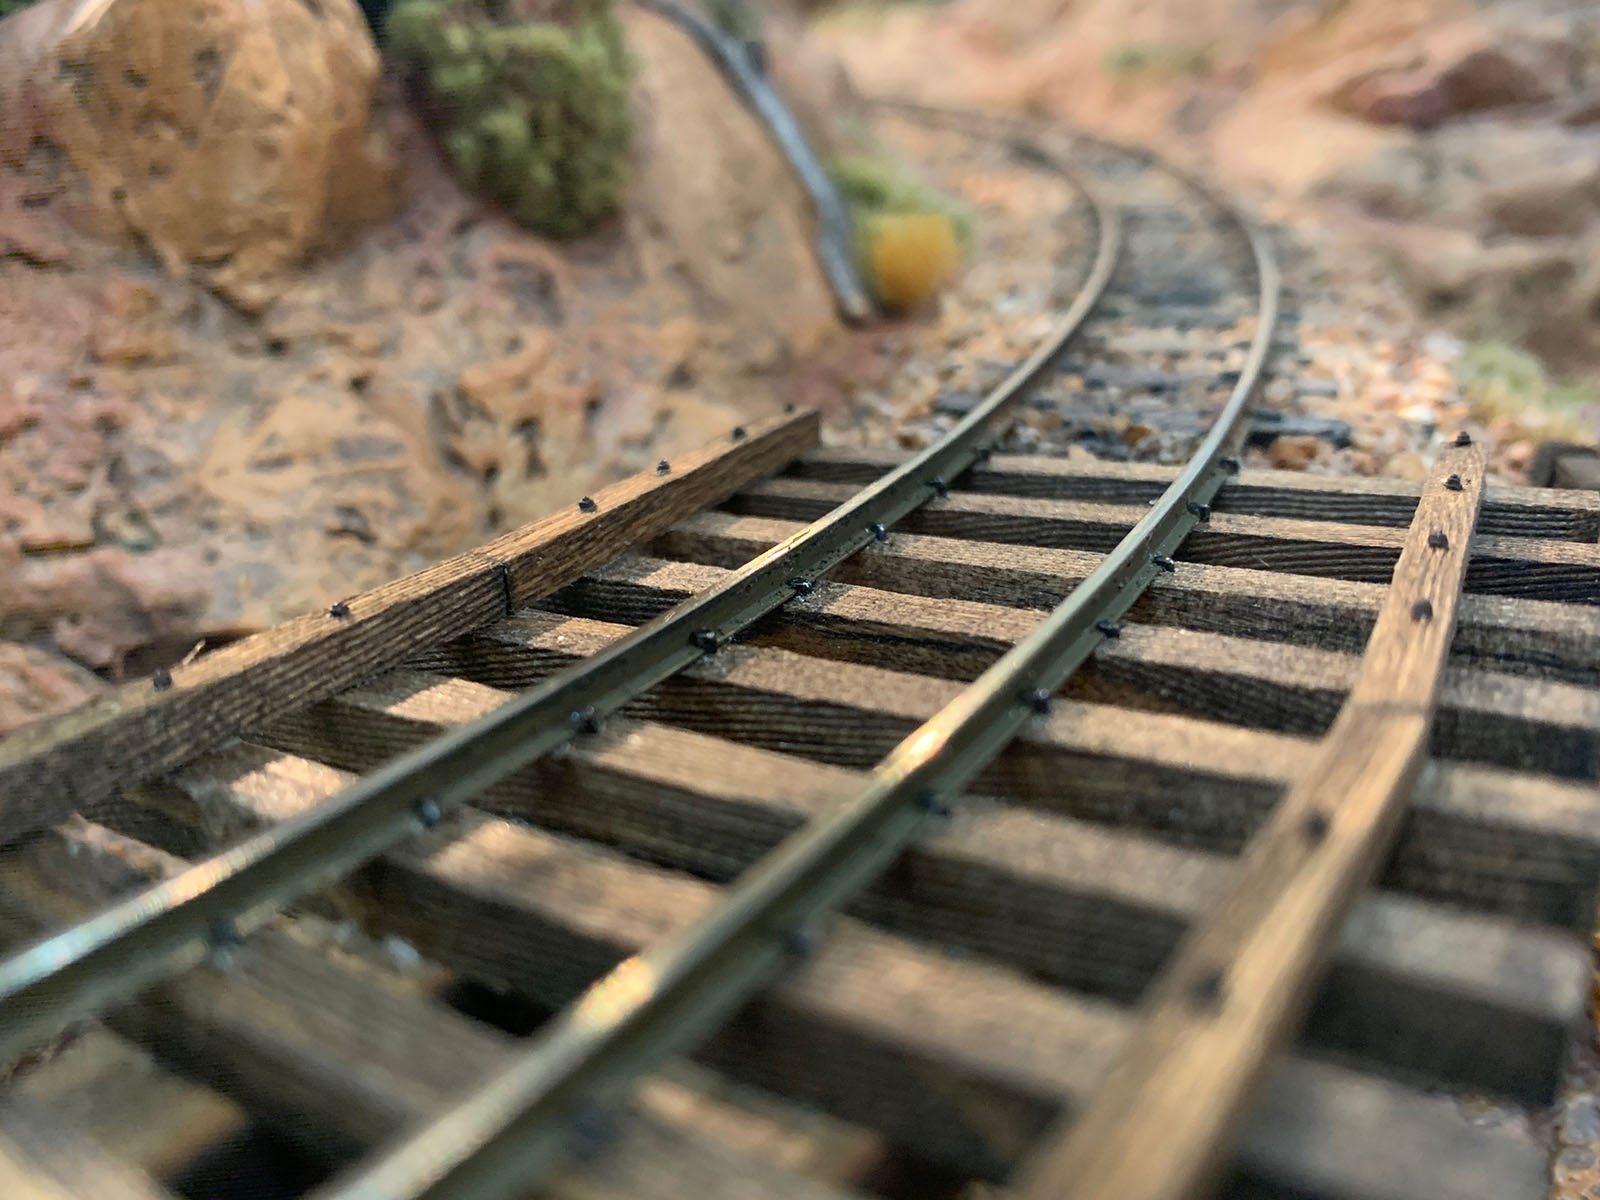
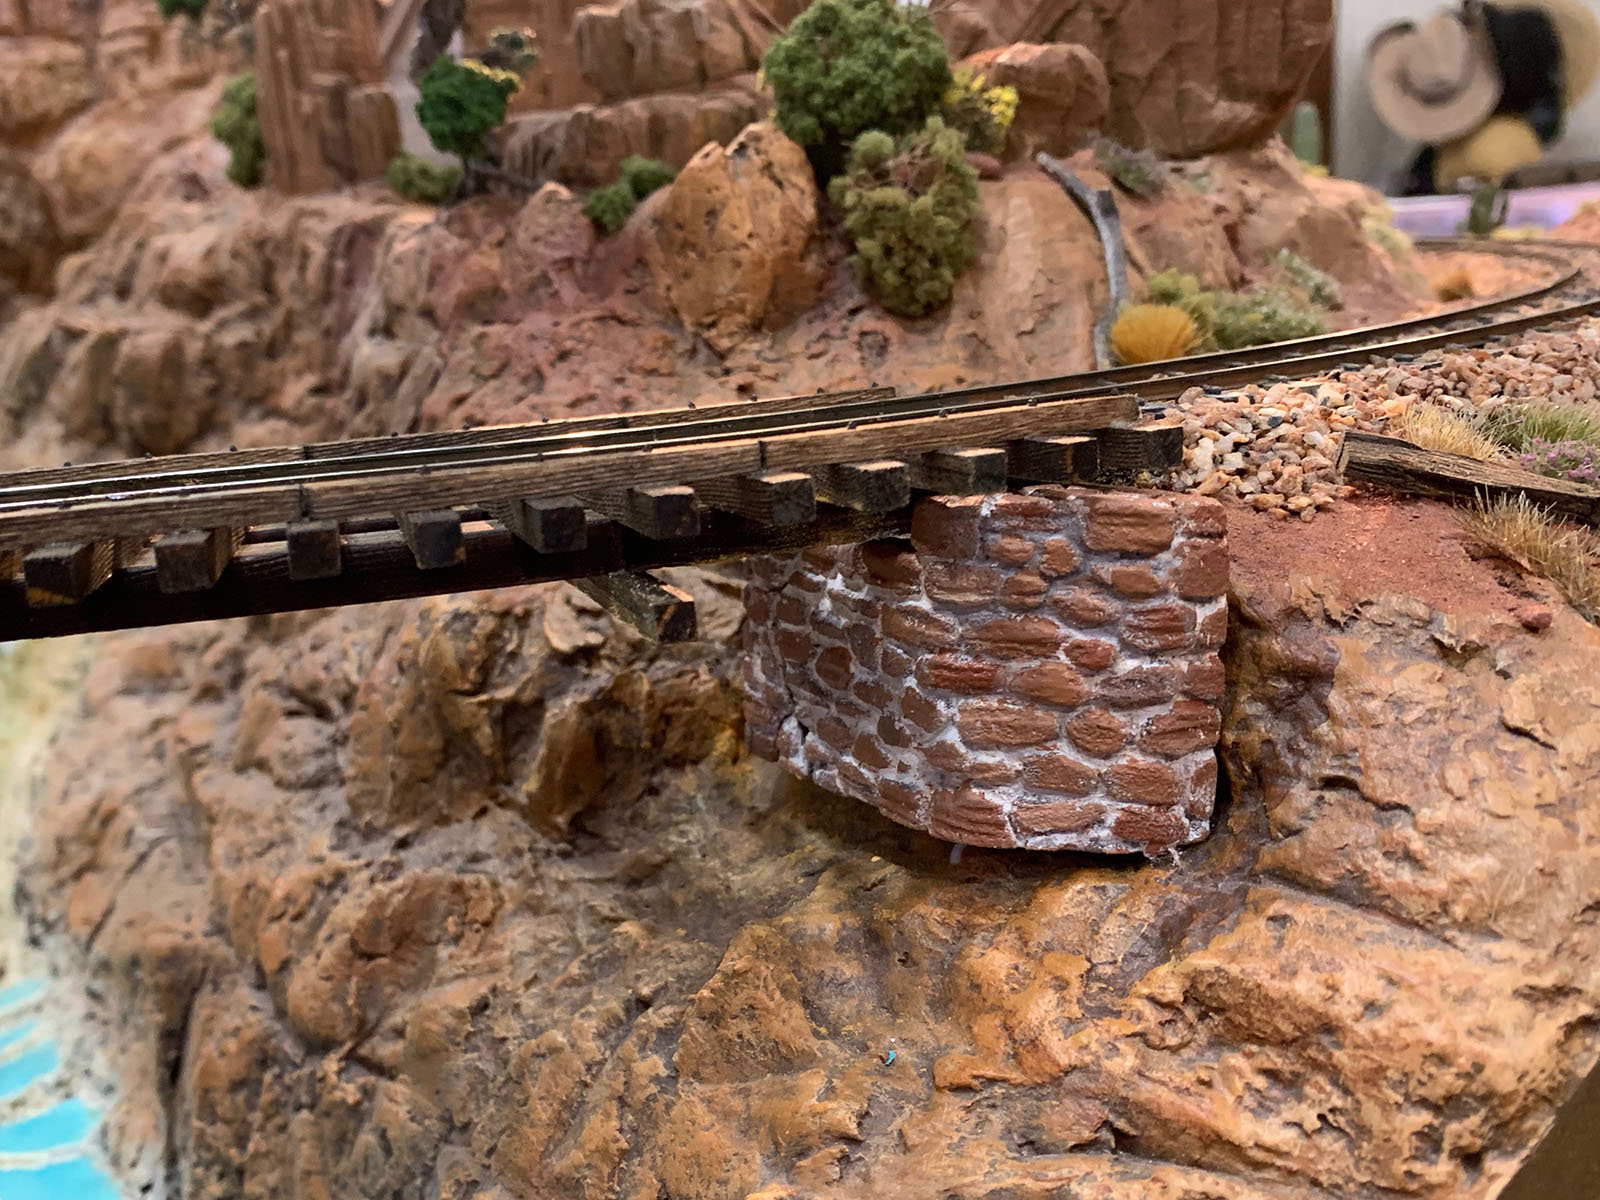
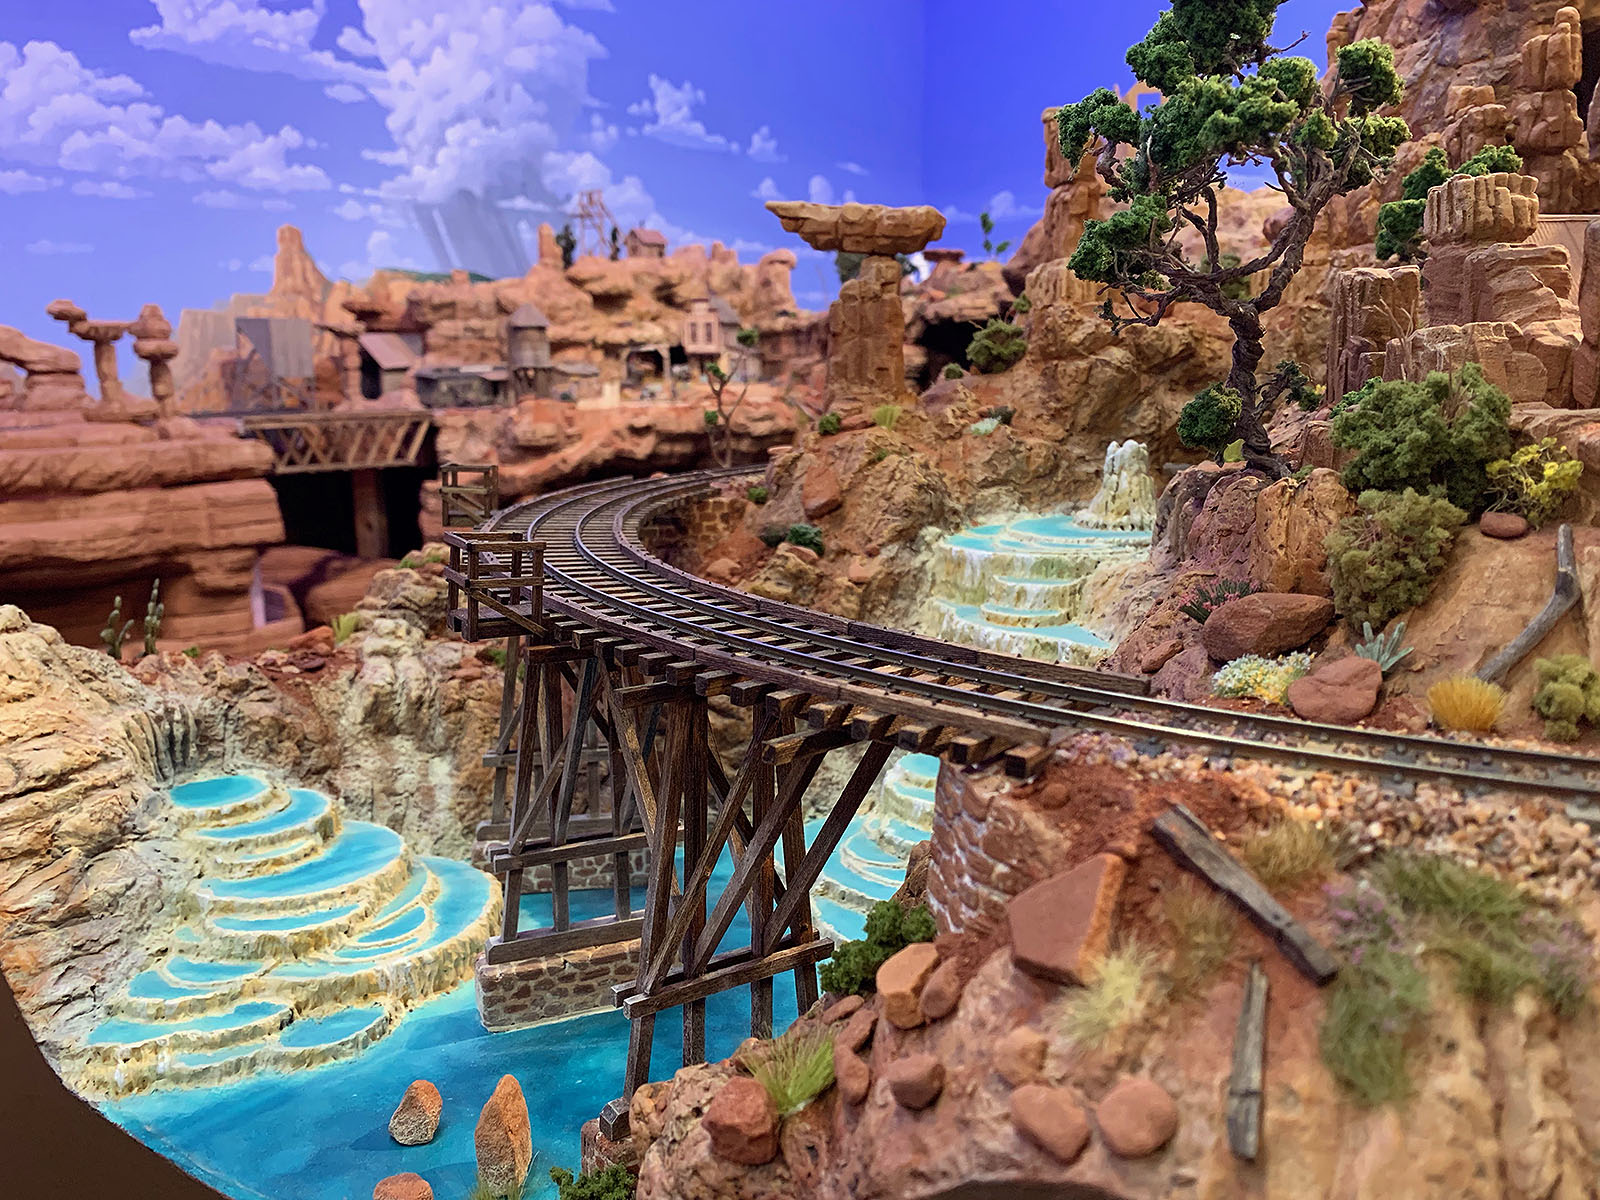
This temporary trestle bent was built to see if a bridge using lighter 8″ x 8″ posts would be convincing in the scene. It worked so well at supporting the track that the scene didn’t progress much beyond this point for nearly seven years!

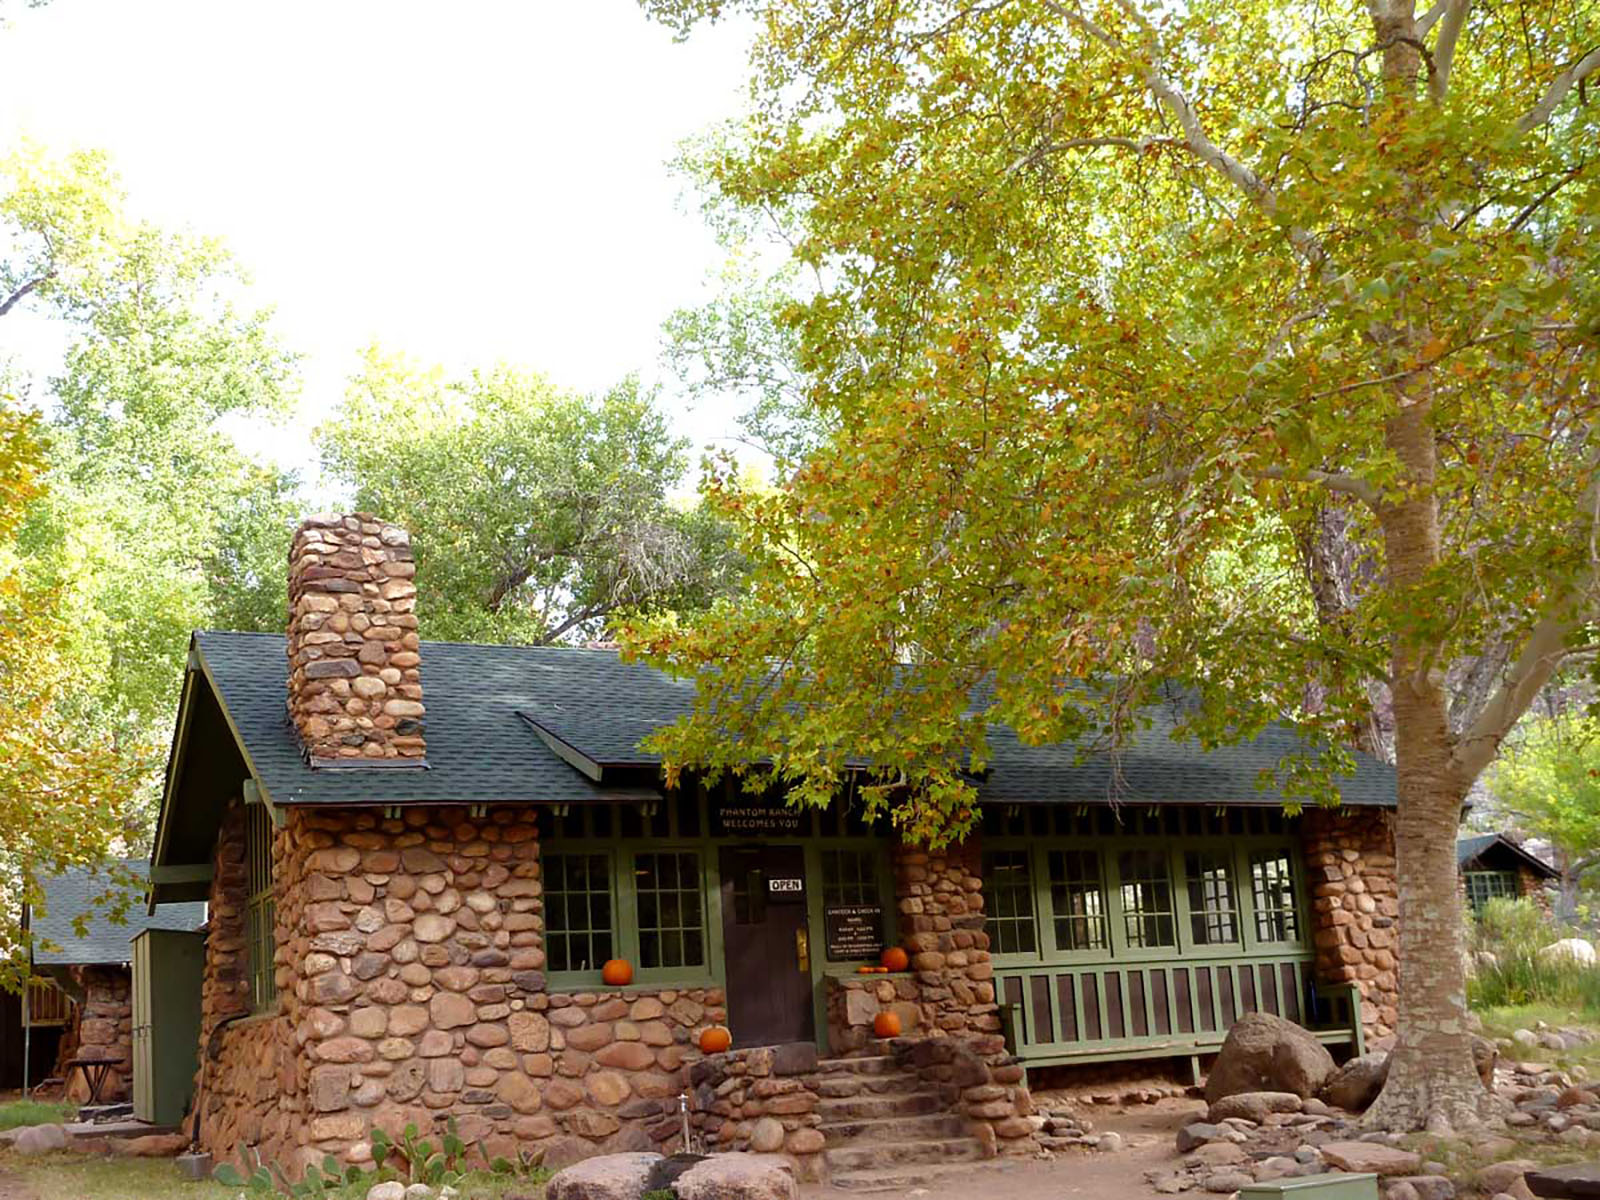
Phantom Ranch Canteen, Grand Canyon National Park. Designed by Mary Elizabeth Jane Colter.

Part 2: Geyser Gulch Trestle

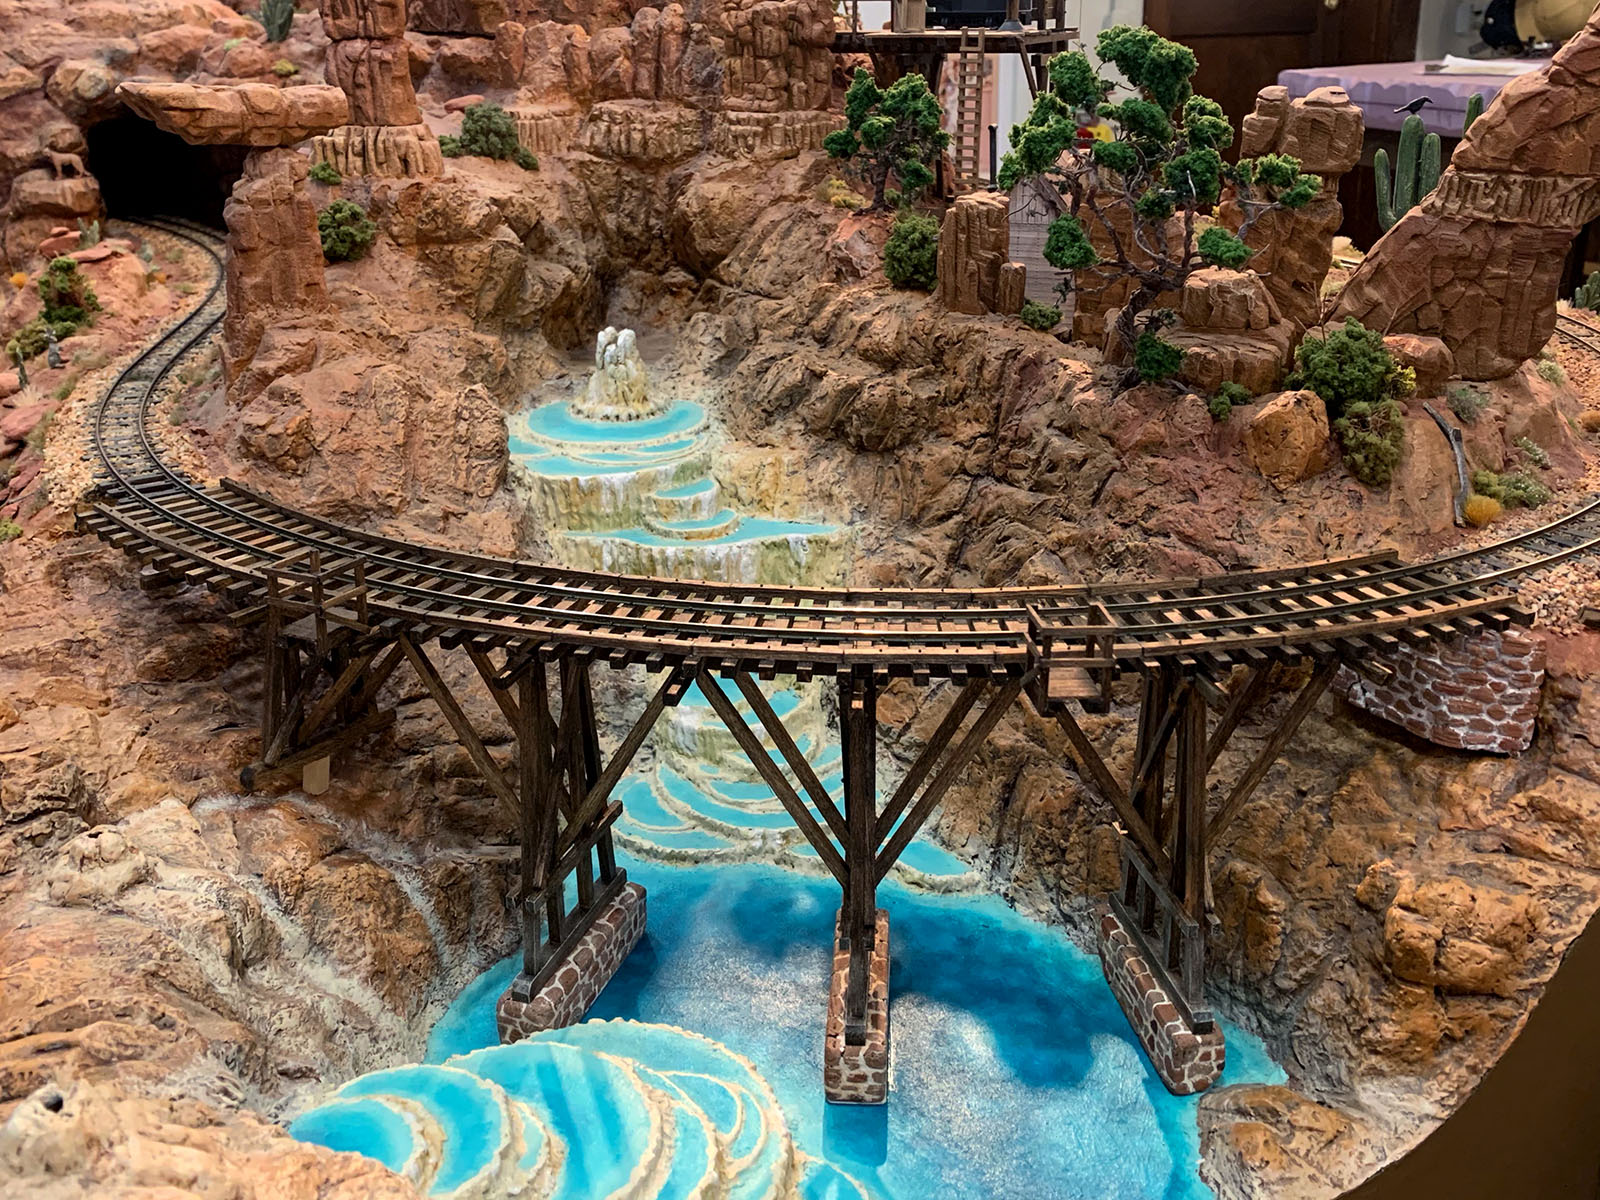
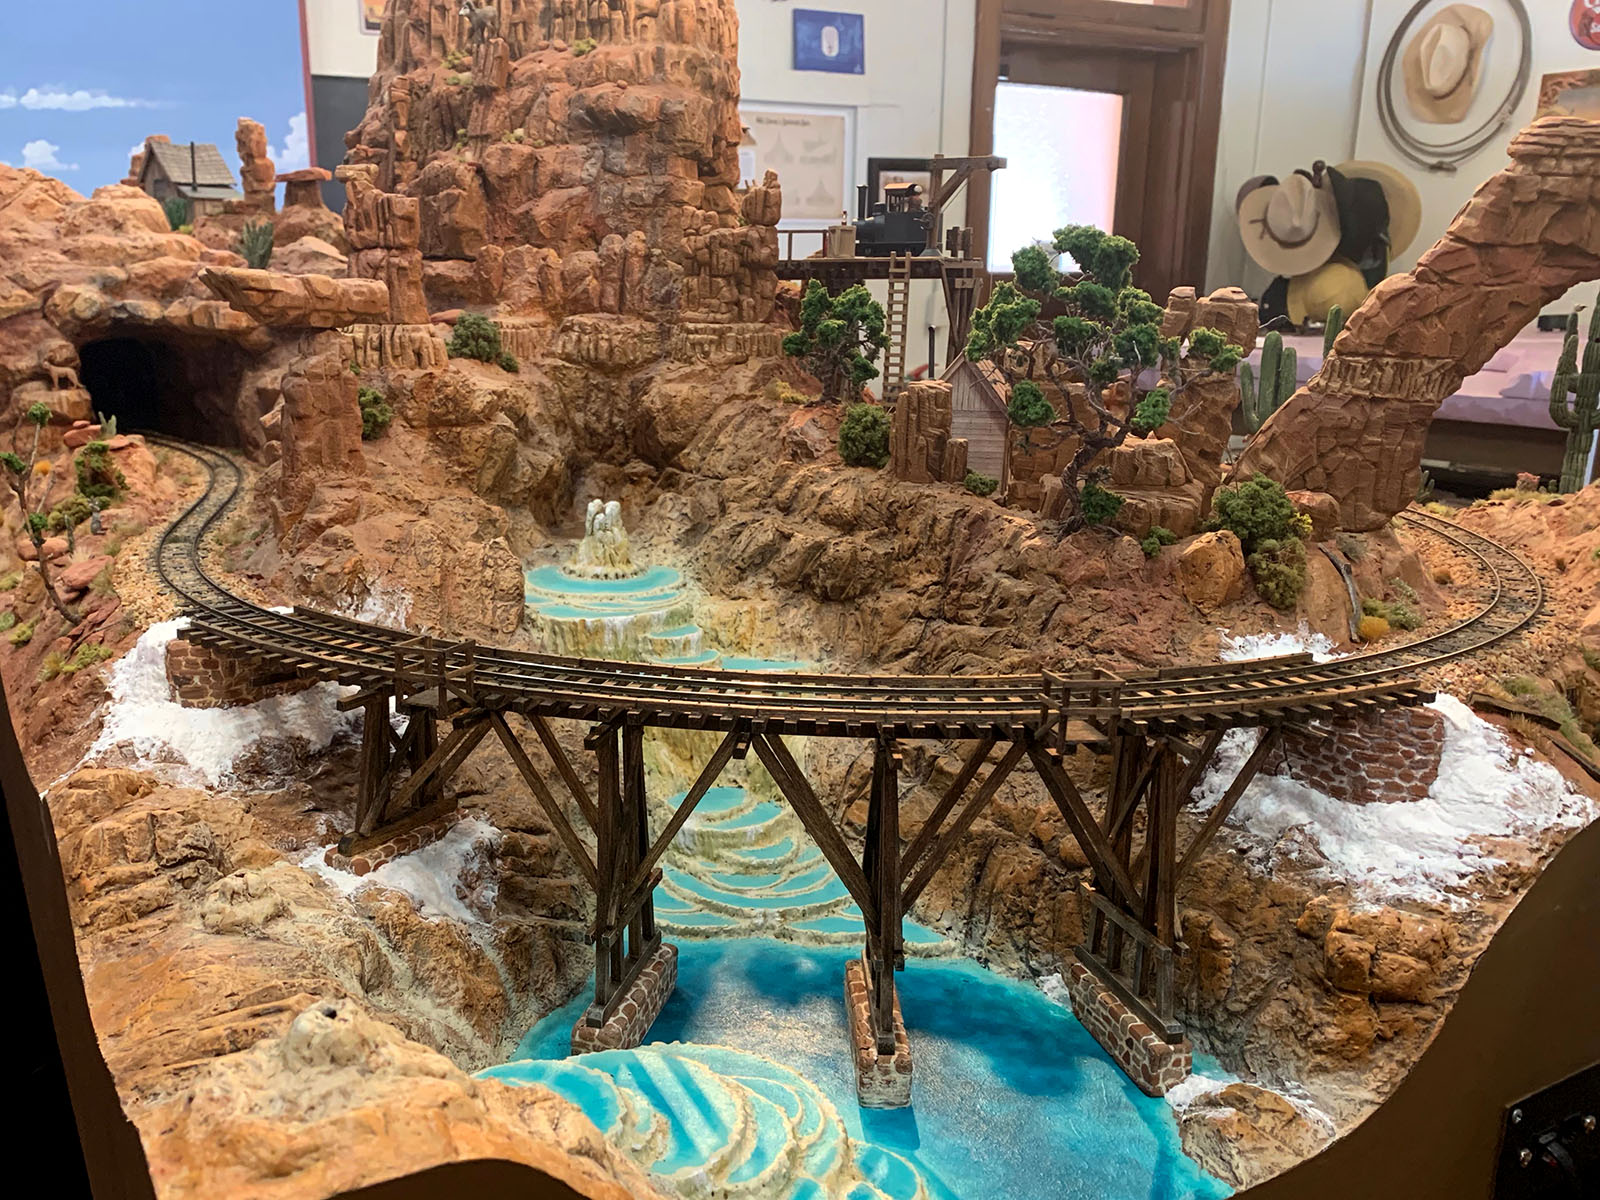
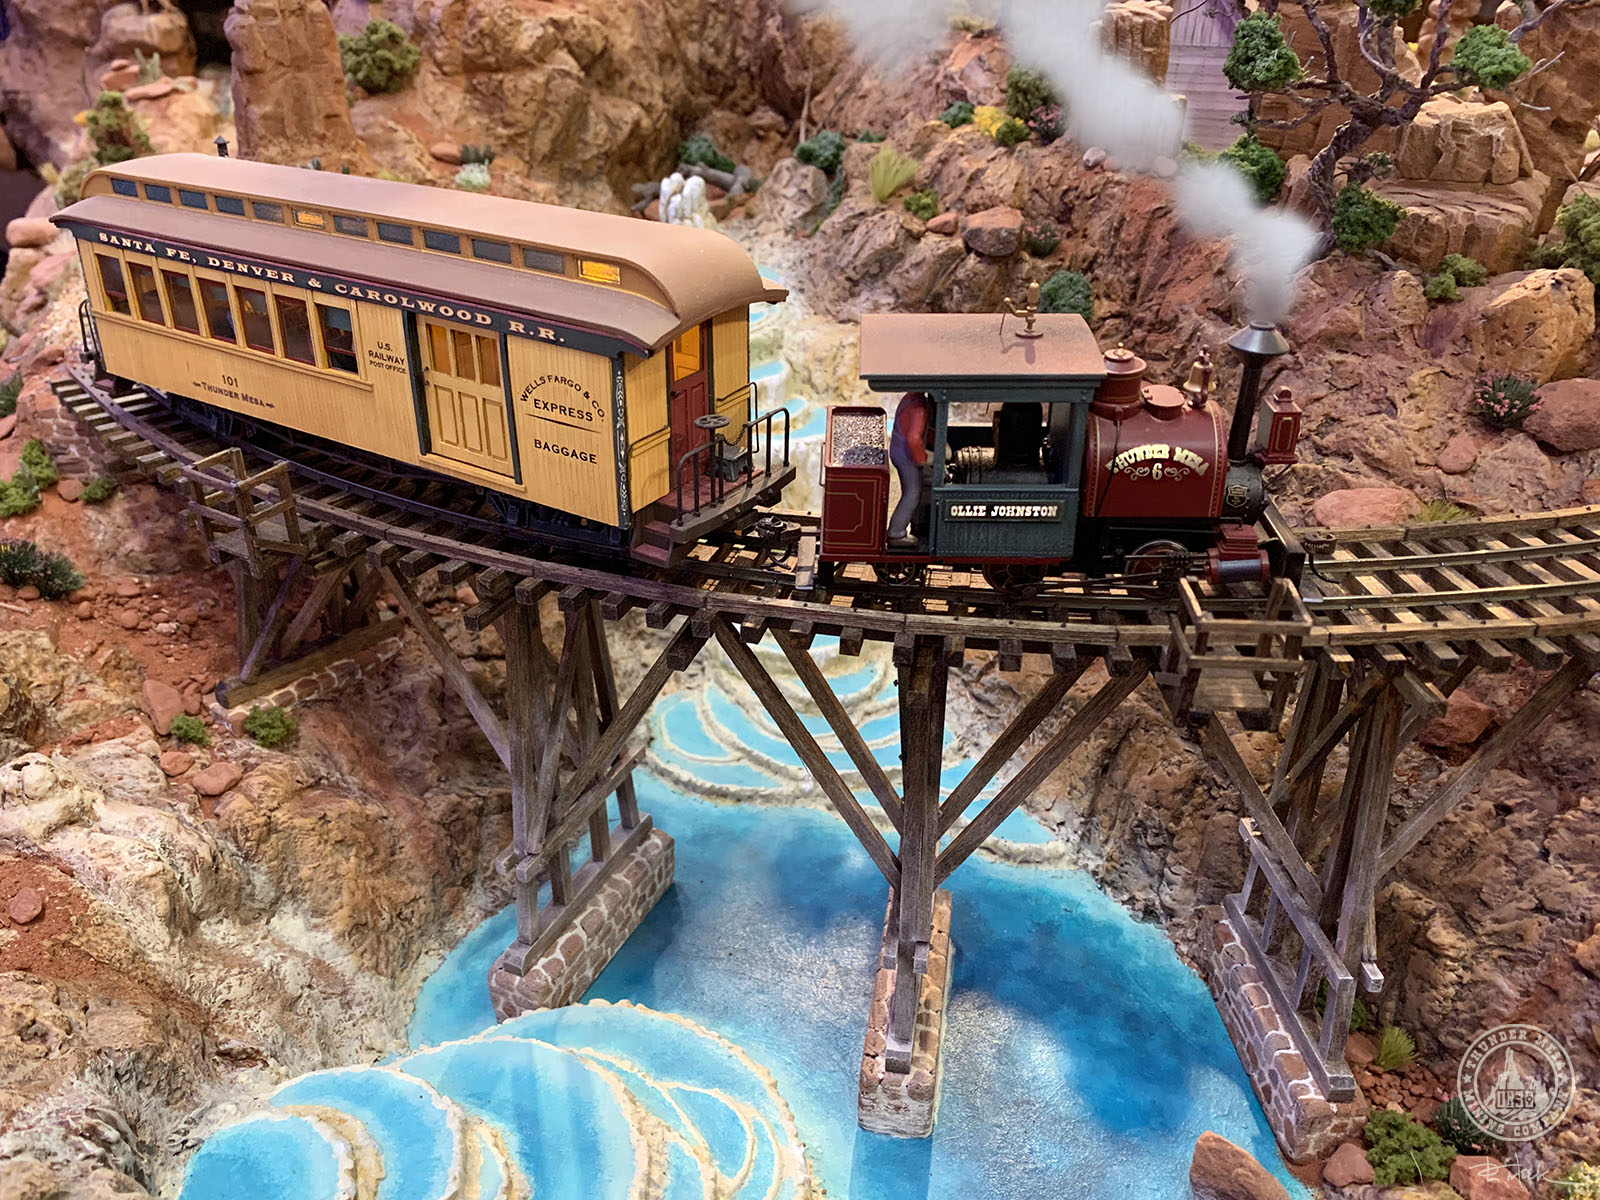
It's always exciting when trains cross over water and as Geyser Gulch is such a focal point on the layout it required a very special bridge. Coming up with a pleasing design was a bit of a challenge since I wanted a wooden bridge, but at the same time didn't want it to obscure or distract from the scenery in the Gulch. Then there were the purely logistical problems of engineering a trestle for a tight 15" radius curve while trying to make something that might be believable in the real world. I wanted something light and airy looking, but also sturdy.

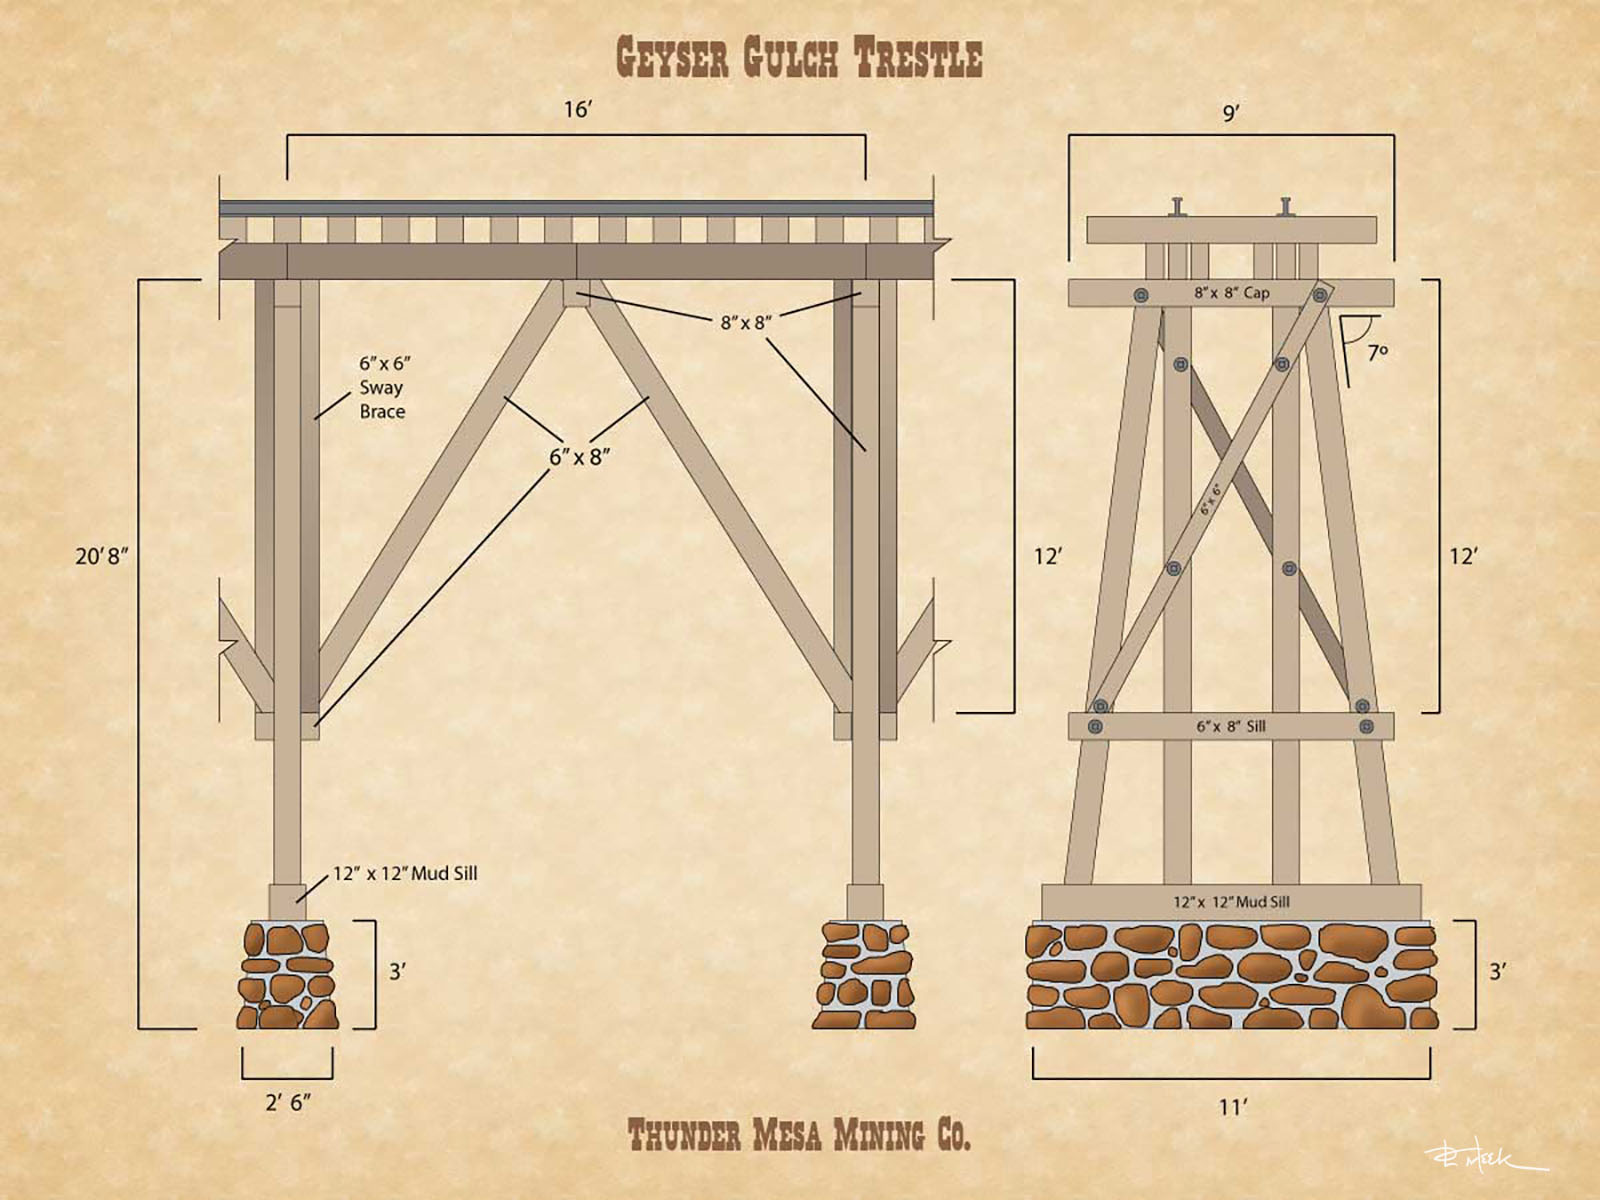
My first design decision was to use scale 8" x 8" timbers for the posts and sills instead of the more prototypical 12" x 12"s. This reduces the "visual mass" of the bridge right away and gives a nice spindly look to the bents. The next decision was to reduce the angle of the outside posts, adding to the tall, narrow look. Next I opted for a rather unusual butterfly truss arrangement between the bents instead of the usual straight stringers which allowed for a wider spacing of the bents than would otherwise be possible on such a tight curve. This arrangement is modeled after a bridge in Franklin New Hampshire and makes for a beautiful and graceful looking trestle in my opinion.

Placing wooden timbers directly into water is never a good option and most railroads avoided it whenever possible. It might be cheeper in the short run to use a pile driver and smash the posts into the stream bed, but it's a temporary solution at best. Corrosive minerals, flash floods, and wood rot would greatly shorten the life span of such a bridge. We try to build things to last on the TMMC, so the decision was made to use footing made of local stone to support the wooden bents above the water.

Using stone rather than concrete footings was a purely aesthetic decision. I have always been a great admirer of National Park architecture, particularly the native wood and stone buildings of Mary Elizabeth Colter at Grand Canyon and other Southwestern parks. Since Nature's Wonderland shares so much in common with our National Parks, it was obvious that what I wanted was a bridge that looked like it might have been designed by Mary Colter.

With that in mind, I tried to design a bridge that would compliment and reflect its surrounding, rather than detract from them, using local Ponderosa Pine timbers from the top of Thunder Mesa and local sandstone and limestone for the footings and abutments.

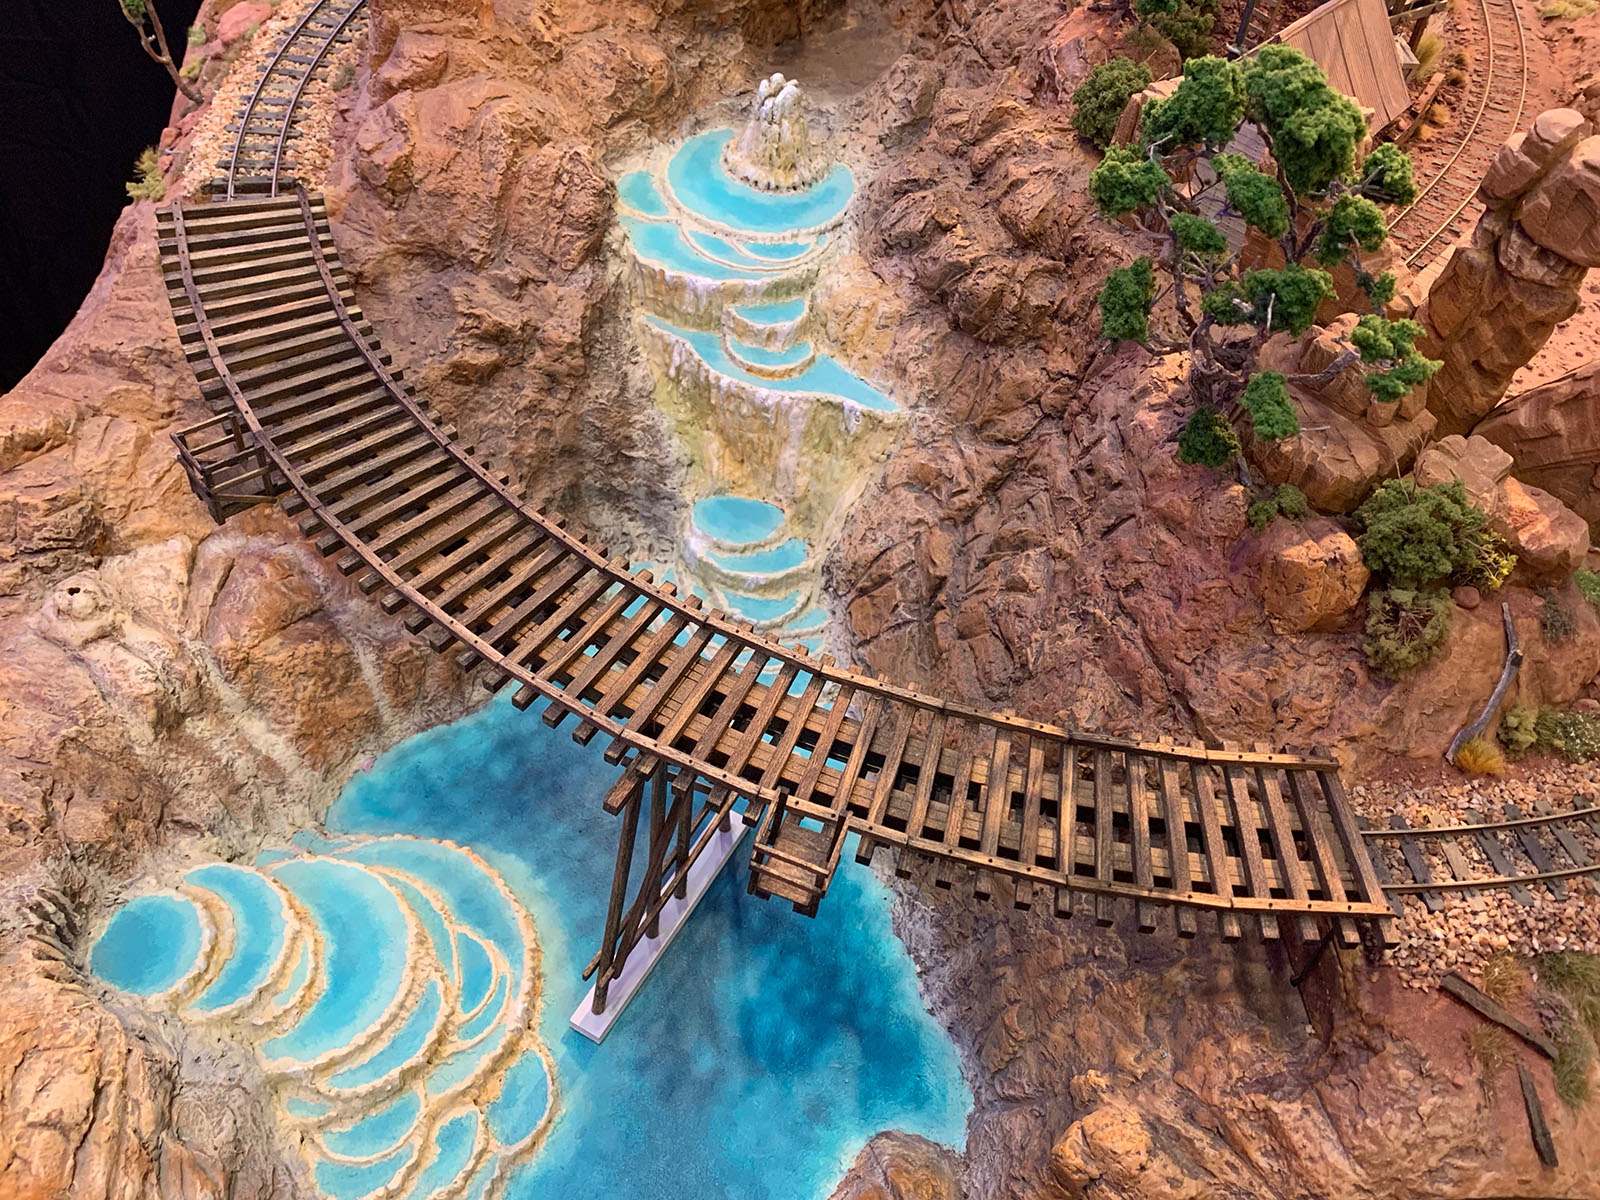
Mixing light and airy construction with sturdy stone piers, this butterfly truss design requires only four bents to cross the water at Geyser Gulch. During construction, I added about a scale foot of width to the bents and widened the angles slightly, but the overall look and feel is roughly the same.

Constructing the Bridge

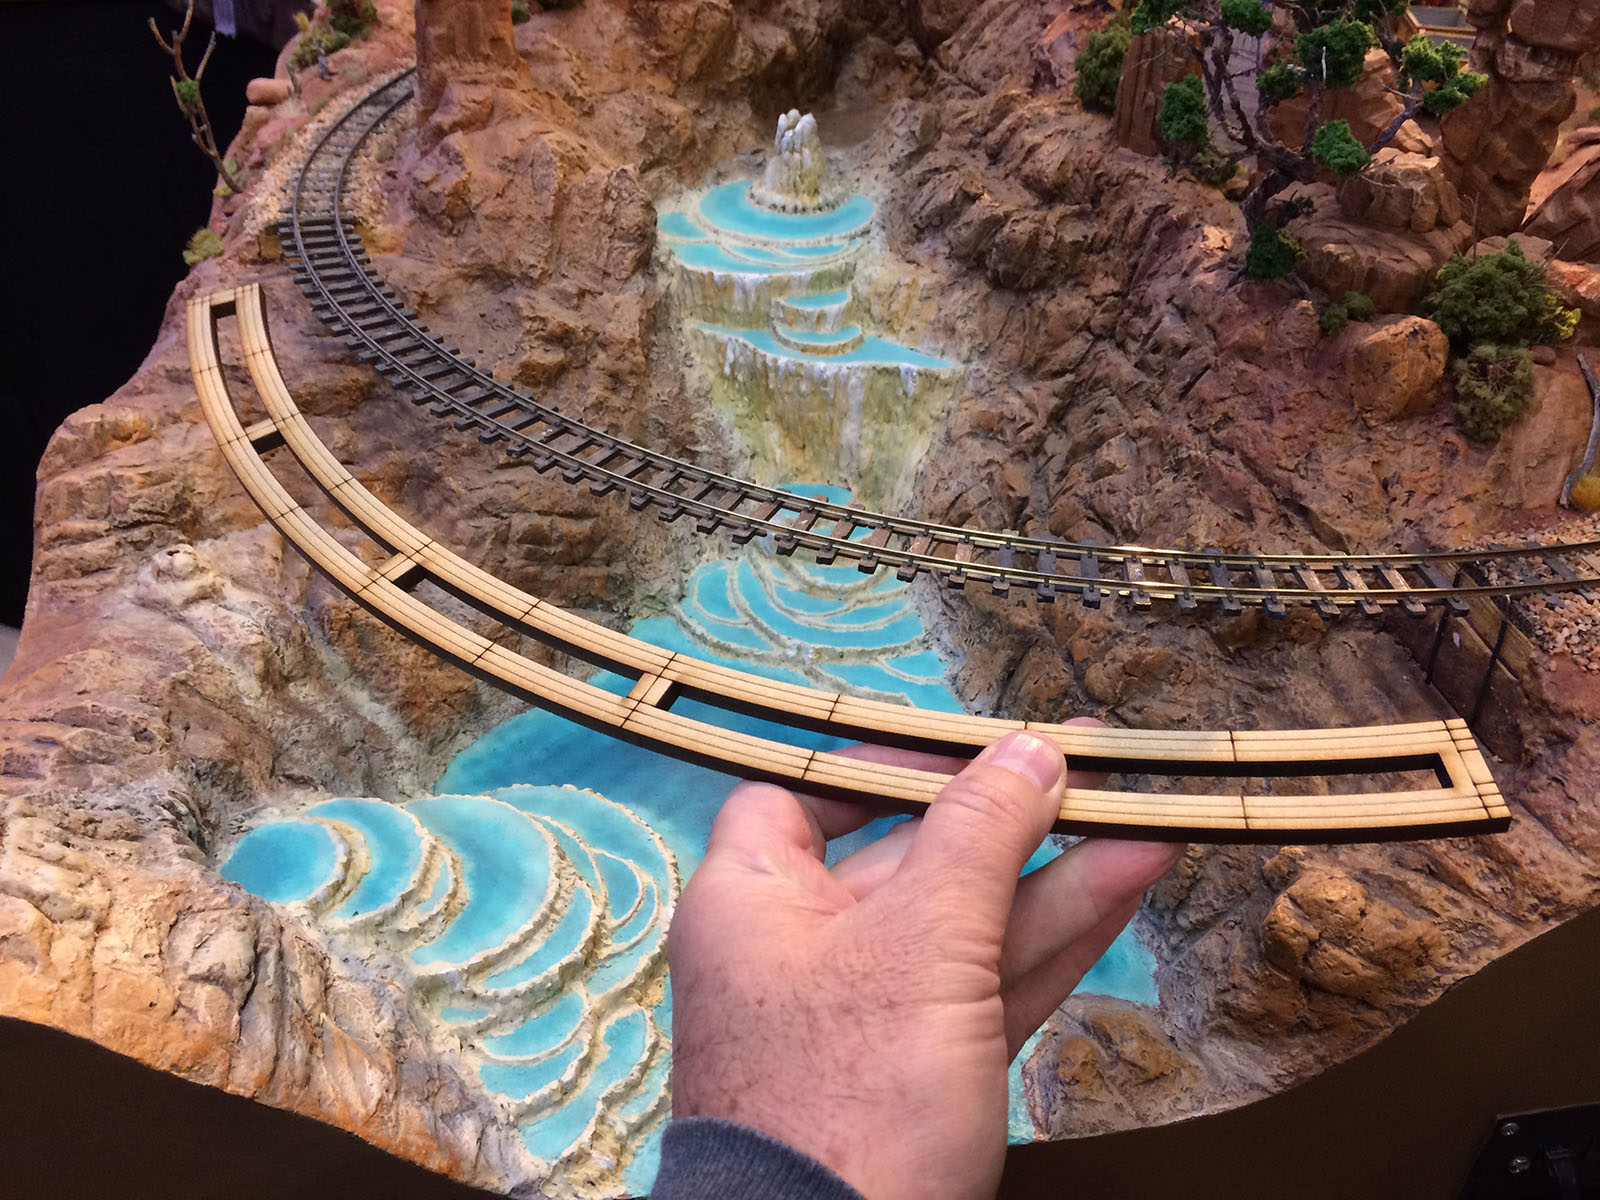
Planning a bridge is one thing, building it in place is another story entirely. Since I had no desire to re-lay the 15" radius curve through existing scenery on either side of the Gulch, my idea was to create the bridge deck first, then install it beneath the existing rails. Then the bents and trusses could be built and installed beneath the deck. This is a little unorthodox, but I was able to pull it off with a little help from my friends.

On real curved trestles, only the rails are actually curved, while the stringers are made up of short straight sections bolted together. Since the curve was so sharp here on Geyser Gulch, I decided to cheat a little and create a trestle that really was curved. I contacted my friend and Crescent Creek Models business partner, Jake Johnson, to find out if it would be possible to laser cut some 1/4" MDF into the shape I had in mind. We put our heads together and came up with a curved, one piece, laser cut stringer that would run the entire length of the bridge and greatly simplify construction.

I designed the one piece curved stringer with a vector drawing program (Adobe Illustrator) to perfectly match the 15″ radius of the existing curve. This was sent off to my friend Jake Johnson who had the part laser cut for me out of 1/4″ thick MDF. Once stained and detailed, the piece does a great job of simulating 12″ thick bridge stringers.

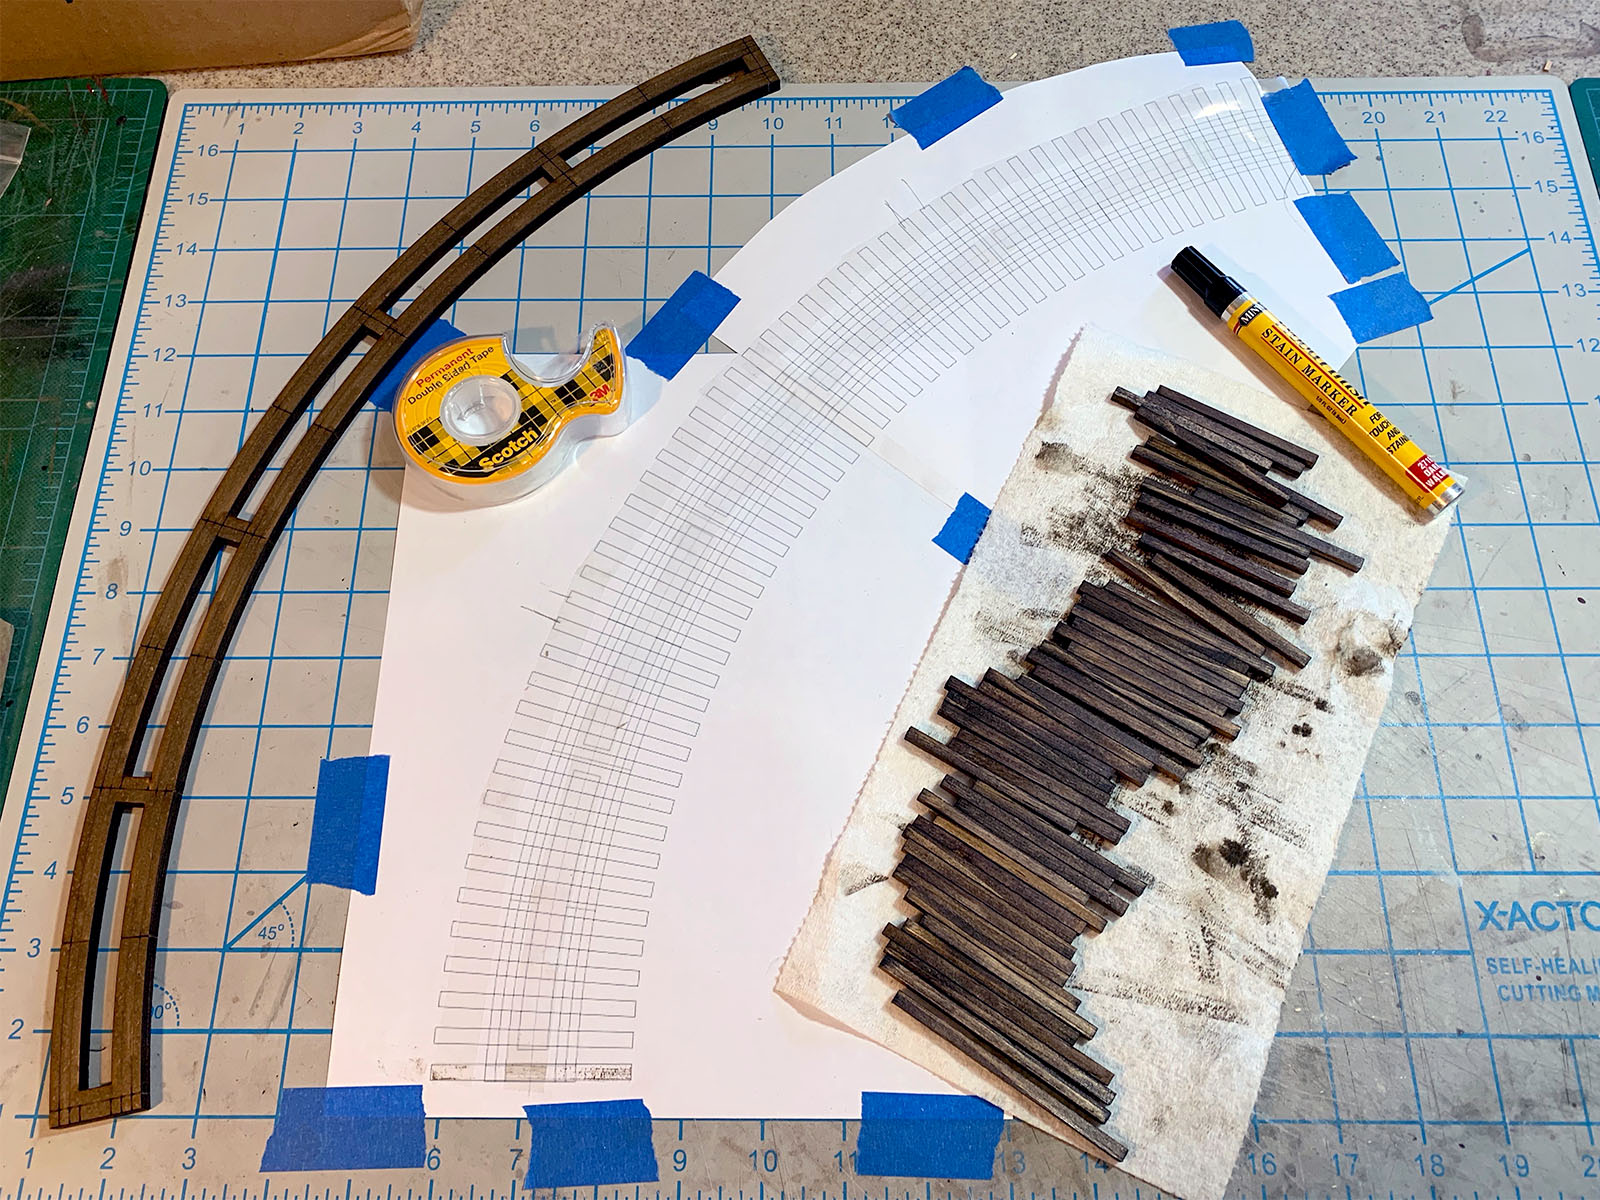
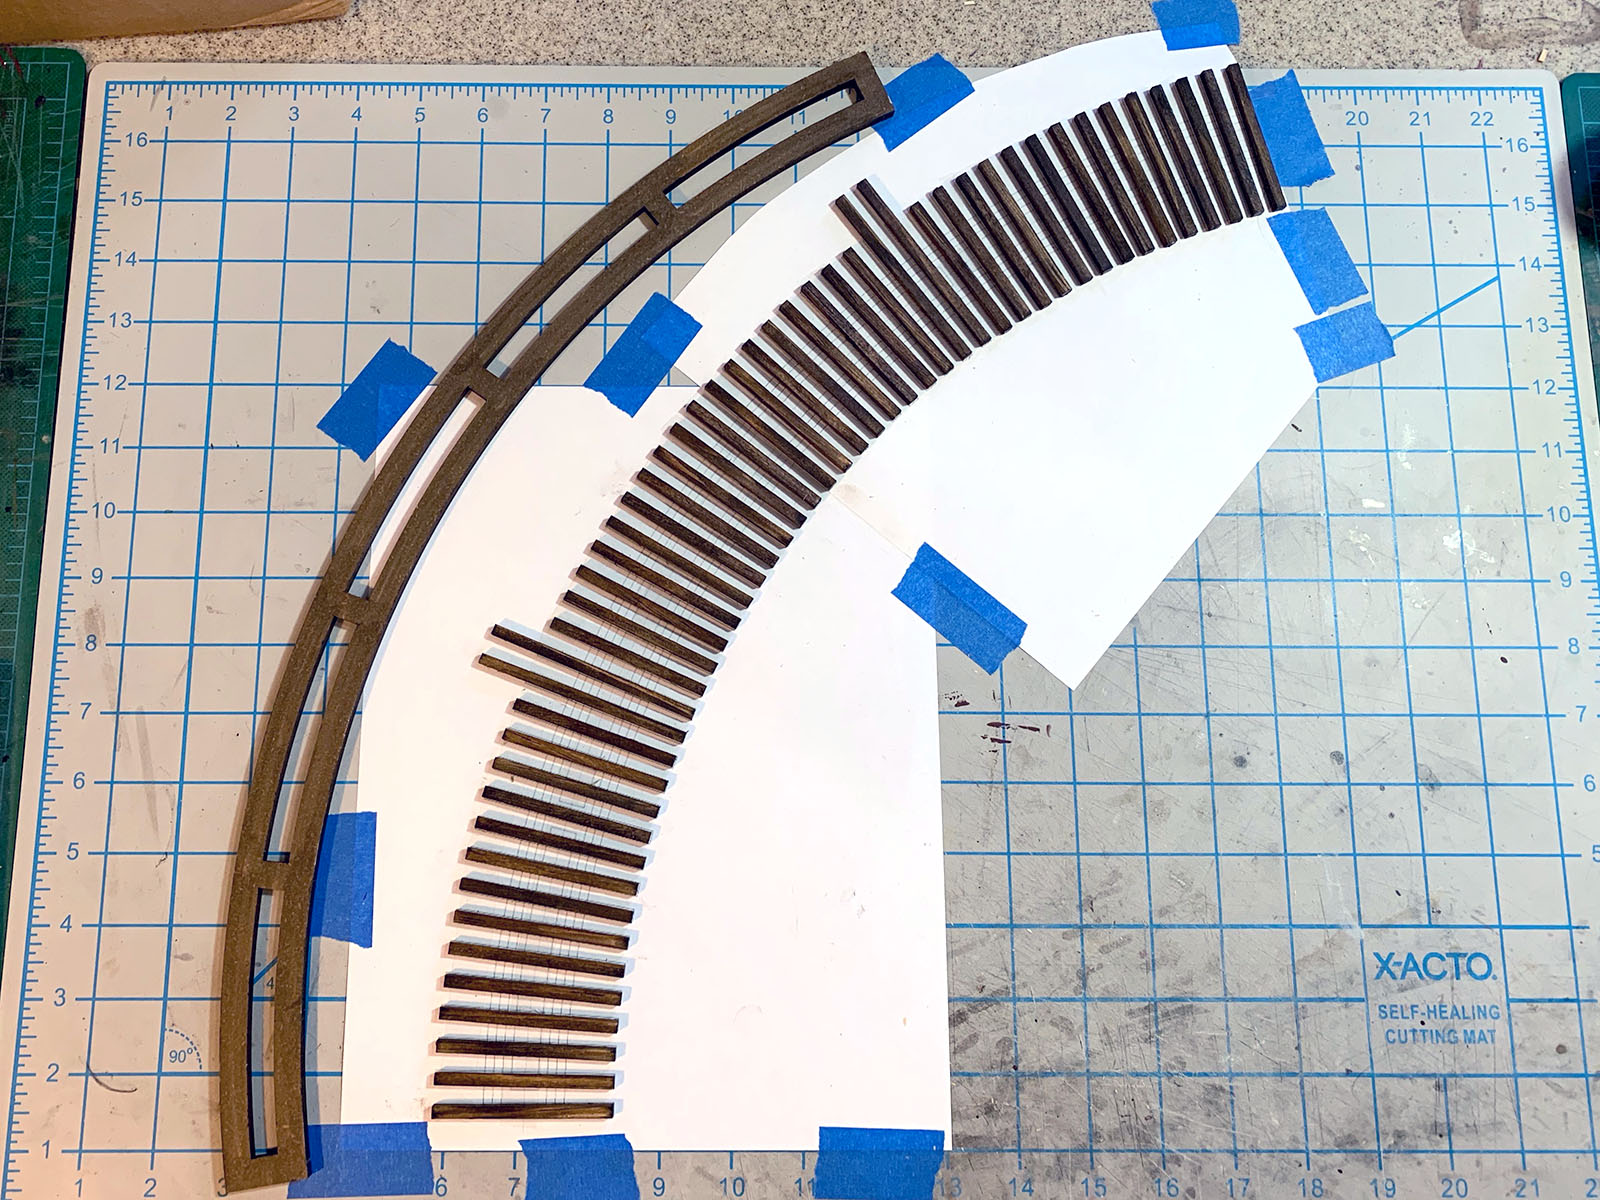
The MDF stringer and Kappler bridge ties were both stained with Minwax Dark Walnut touch-up markers. This color does a nice job of simulating creosoted timbers. I created a full size template in Adobe Illustrator for the proper placement and alignment of the ties.

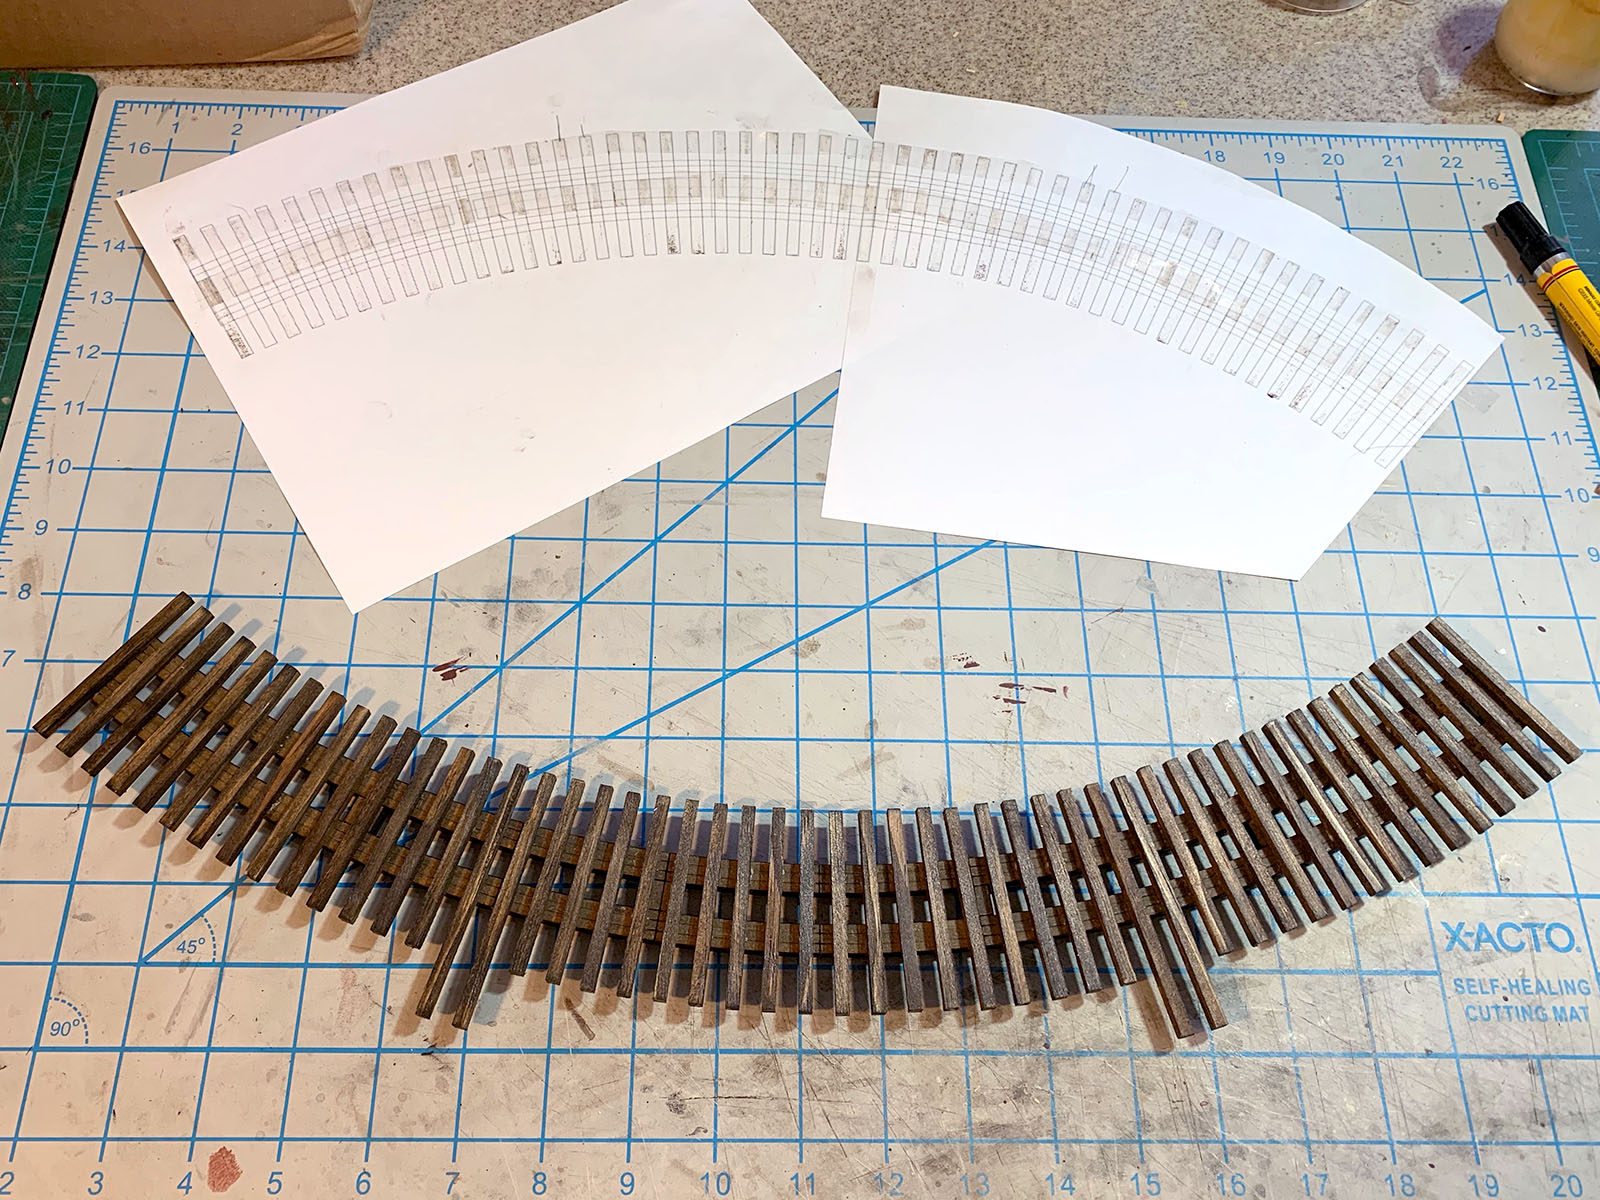
Double stick tape was applied to the template to hold the ties in place. Note the longer 8×8 ties for the two refuge platforms.

Yellow carpenter’s glue was applied to the ties and then the one piece bridge stringer was clamped in place on top. This was allowed to dry overnight.

Scale 6×6 guard timbers were cut to length, stained, and then cemented in place atop the bridge ties. Grandt Line nut-bolt-washer castings were glued into predrilled holes in the tops of the guard timbers.

The trestle refuges were constructed of scale 4×4 and 2×4 stock over a quickly drawn template. The platforms are floored with scale 1×12 boards.

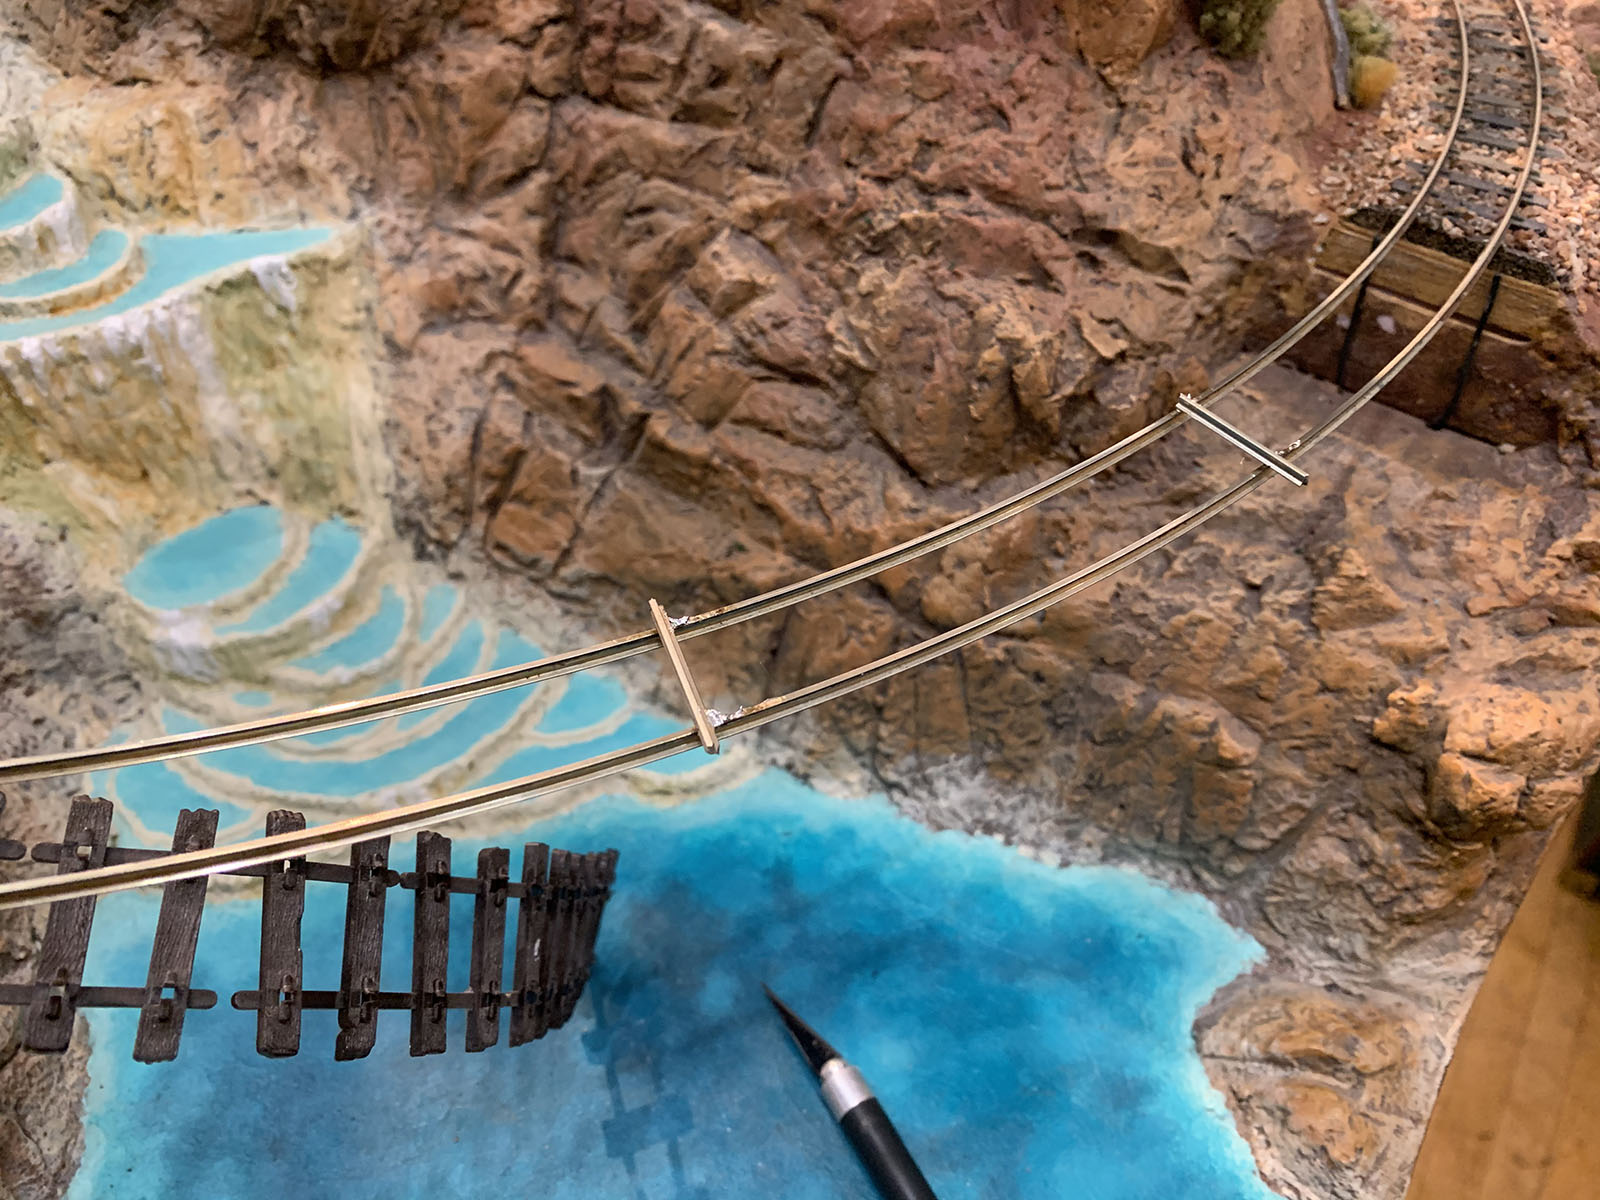
Before the new bridge deck could be installed, the old plastic ties had to be cut away from the Peco flextrack. Short pieces of rail were soldered to the top of the track at intervals to help keep everything in gauge.

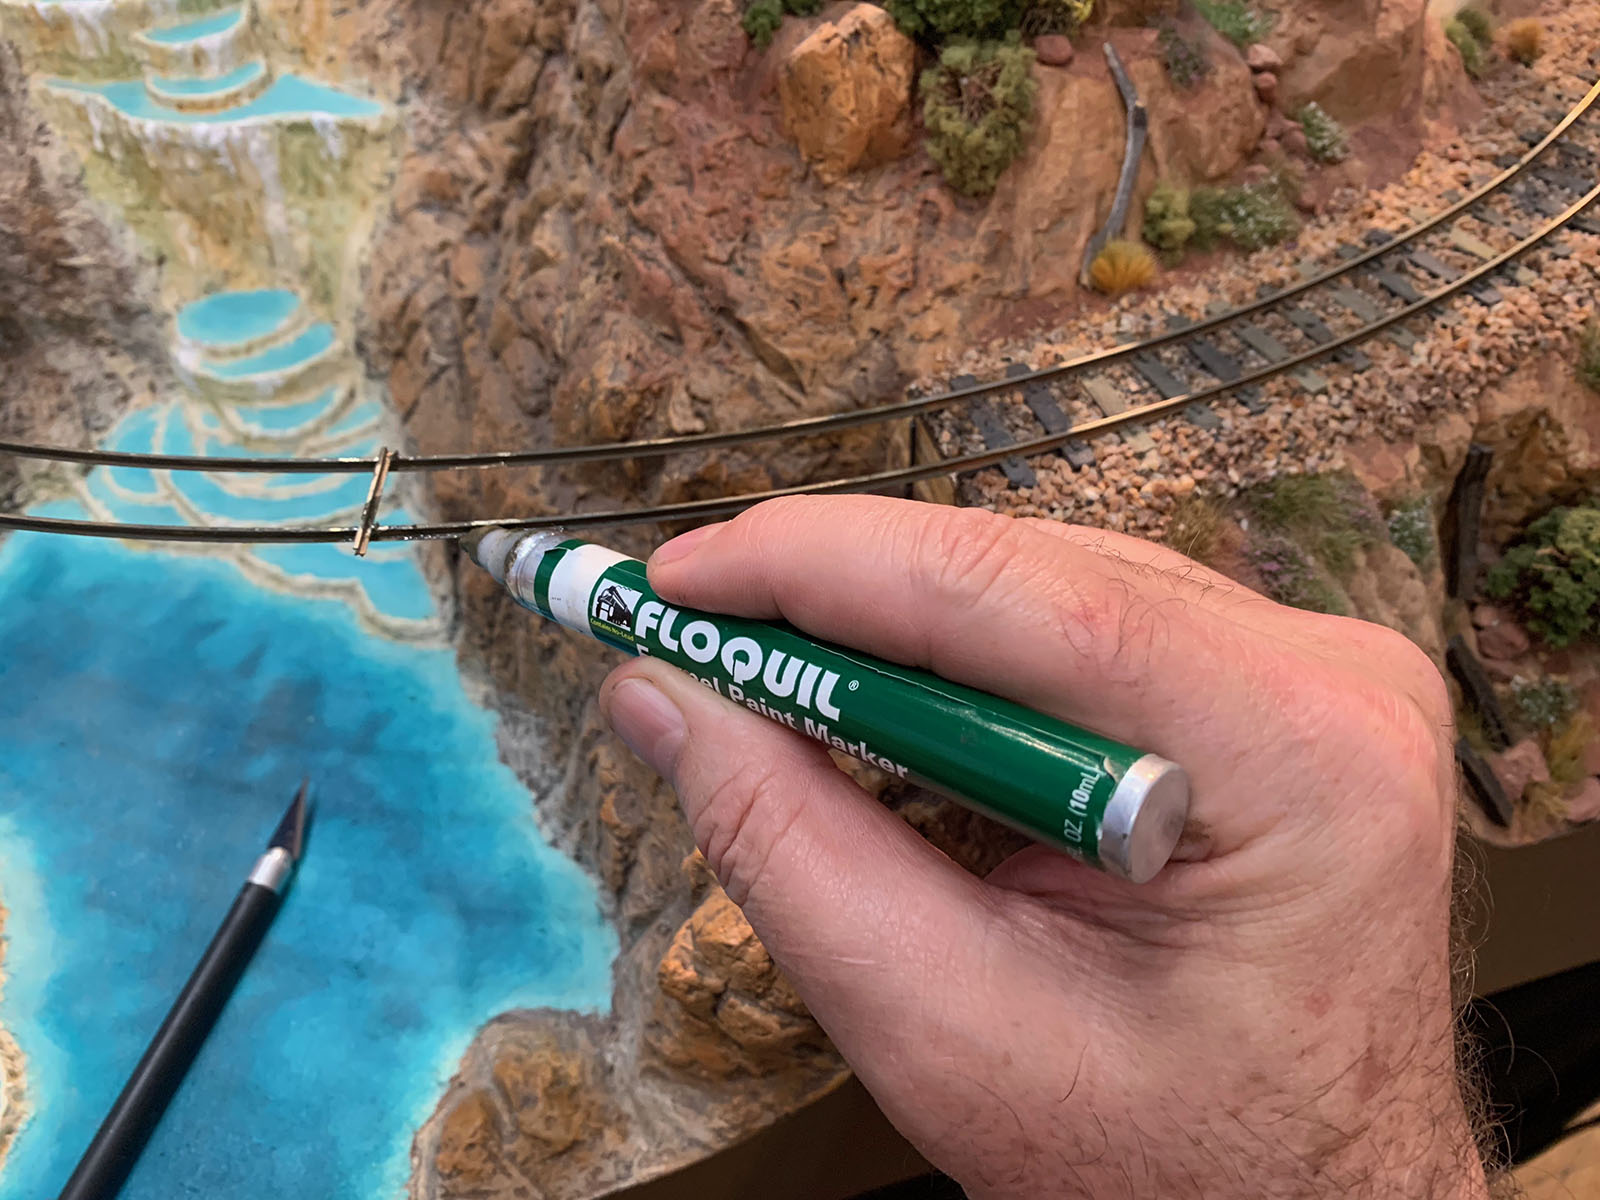
With the plastic ties removed, the rails were painted with a Rail Brown Floquil paint marker. It’s much easier to color the rails now – before the new bridge deck is in place!

At this point I was ready to install the new bridge deck, but there was a small problem. I wanted to use Micro Engineering small spikes for a prototypical look on the bridge but I was completely out of them. To make matters worse, they were also out of stock at all of my usual suppliers. Once again, a friend came to the rescue. Tom Gazsi said he had some small spikes that he'd been holding onto since the early 70's and offered to put them in the mail for me right away. They arrived in a couple days and the TMMC bridge crews were back in business. Many thanks Tom!

Before spiking, contact cement was applied to the bottom of the rails and allowed to dry. Then the deck was held snugly in place with foam blocks while the glue was reactivated with a hot soldering iron. This makes for a tidy job.

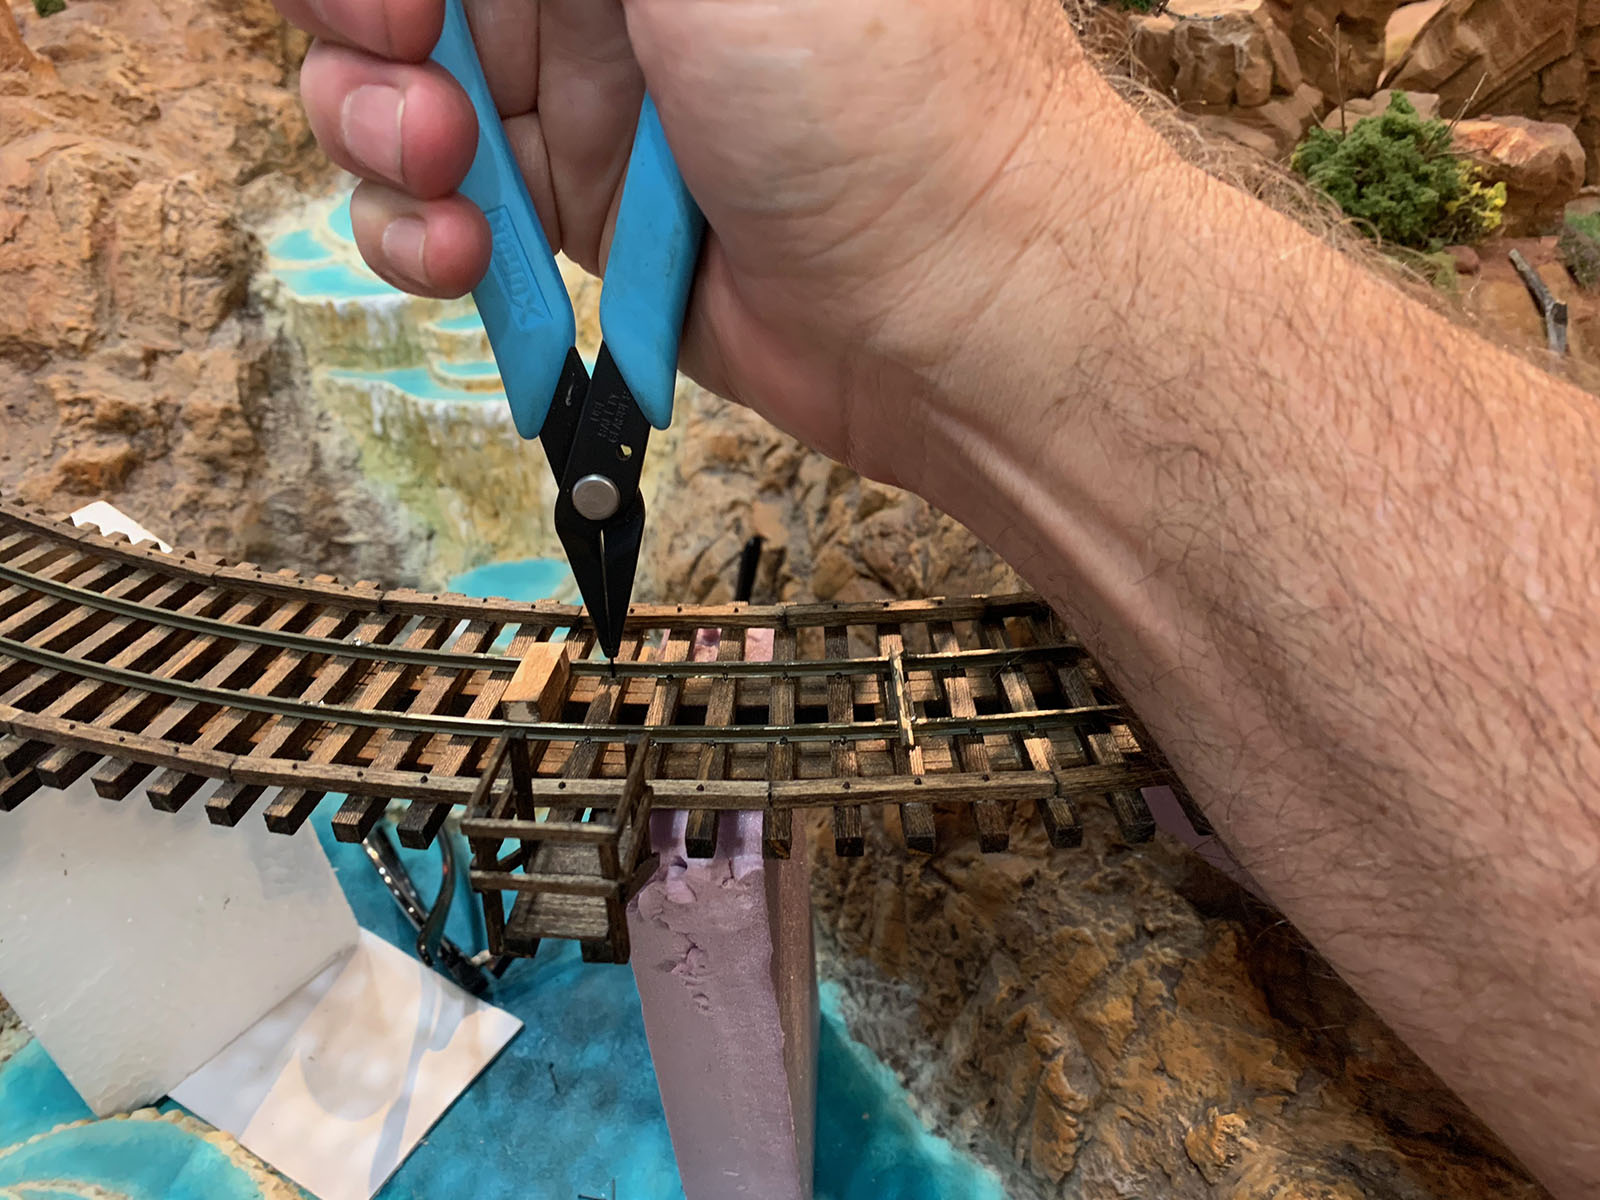
Pilot holes were drilled with a #75 bit in a pin vice and the spikes were pushed into place with a Xuron rail spiking tool. The small wooden block also helps keep the rails in gauge during spiking.

Each tie on the trestle gets 4 spikes. It’s time consuming, but the final look is well worth the effort.

The bridge abutments and footings were carved from Balsa Foam and painted with artists’ acrylics. Grout between the rocks is spackling compound pressed into the nooks and crannies.

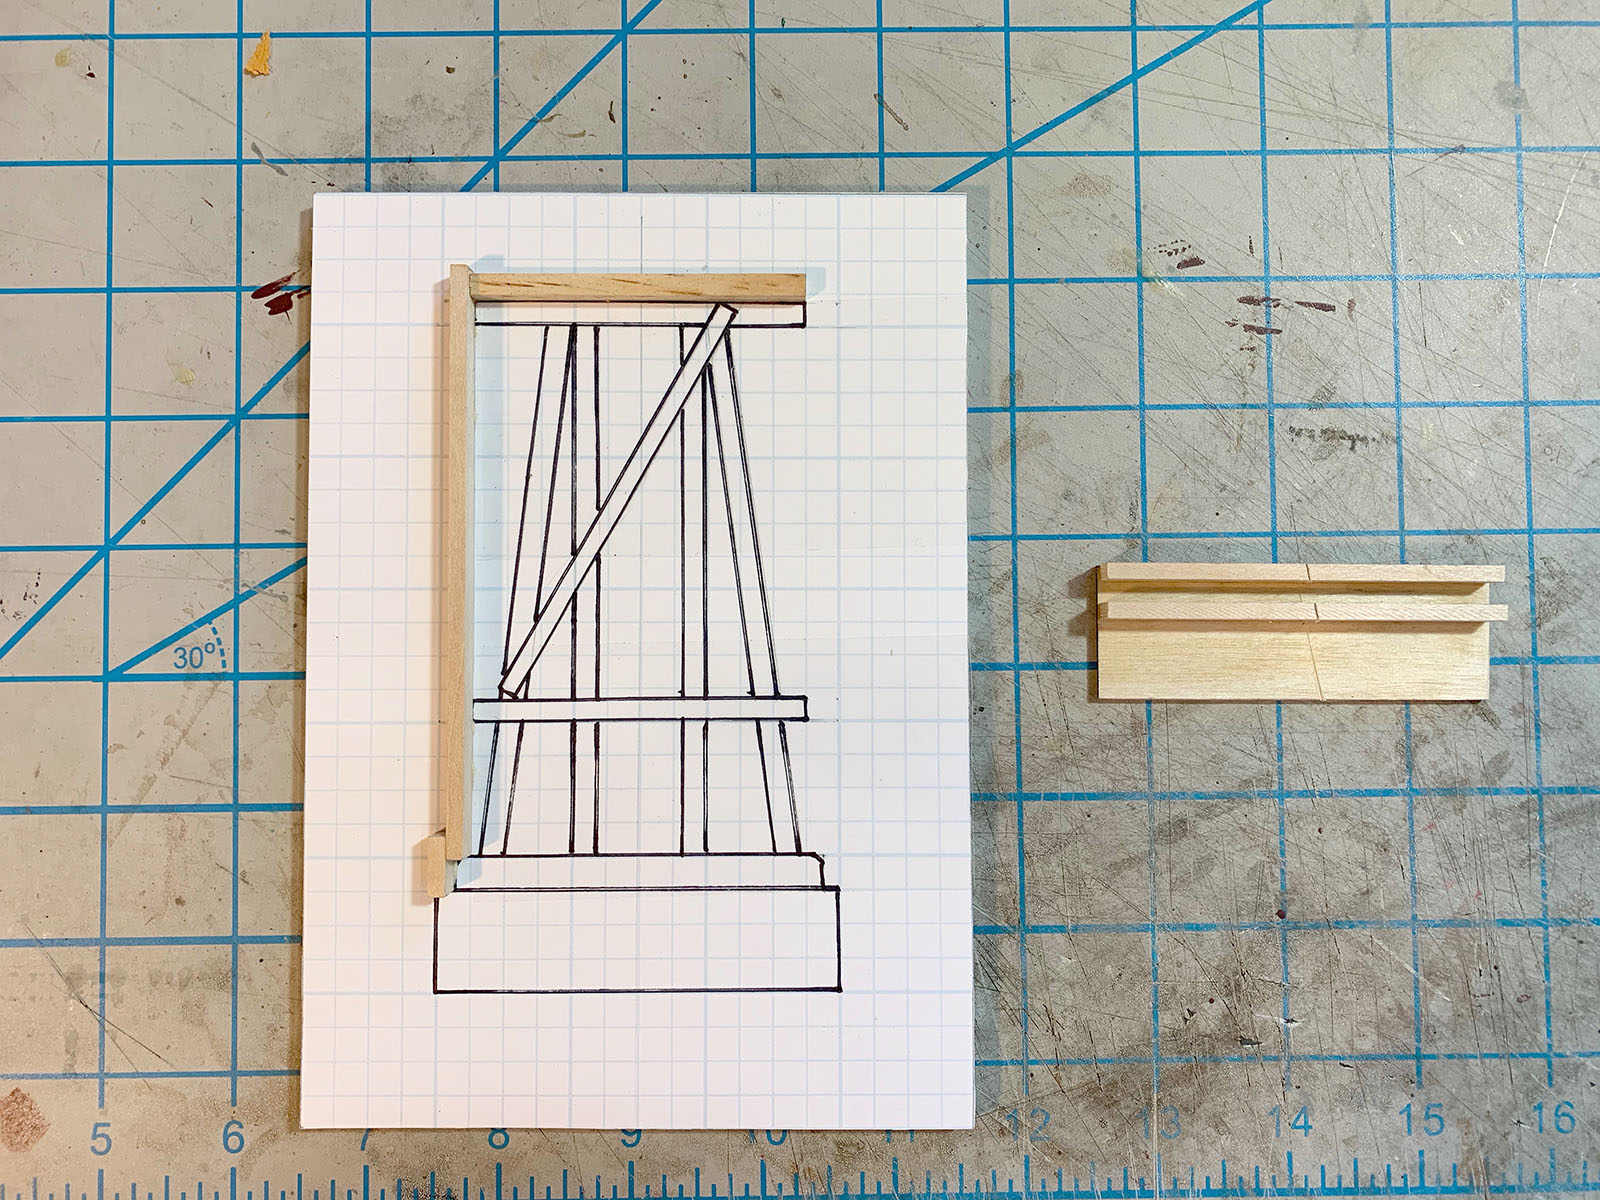
I created a jig to make construction of the bents easier. A scale drawing was laminated to foamcore then covered with clear packaging tape. The foamcore allows you to hold things in place with pins while the glue dries, and the tape ensures parts wont get glued to the template.

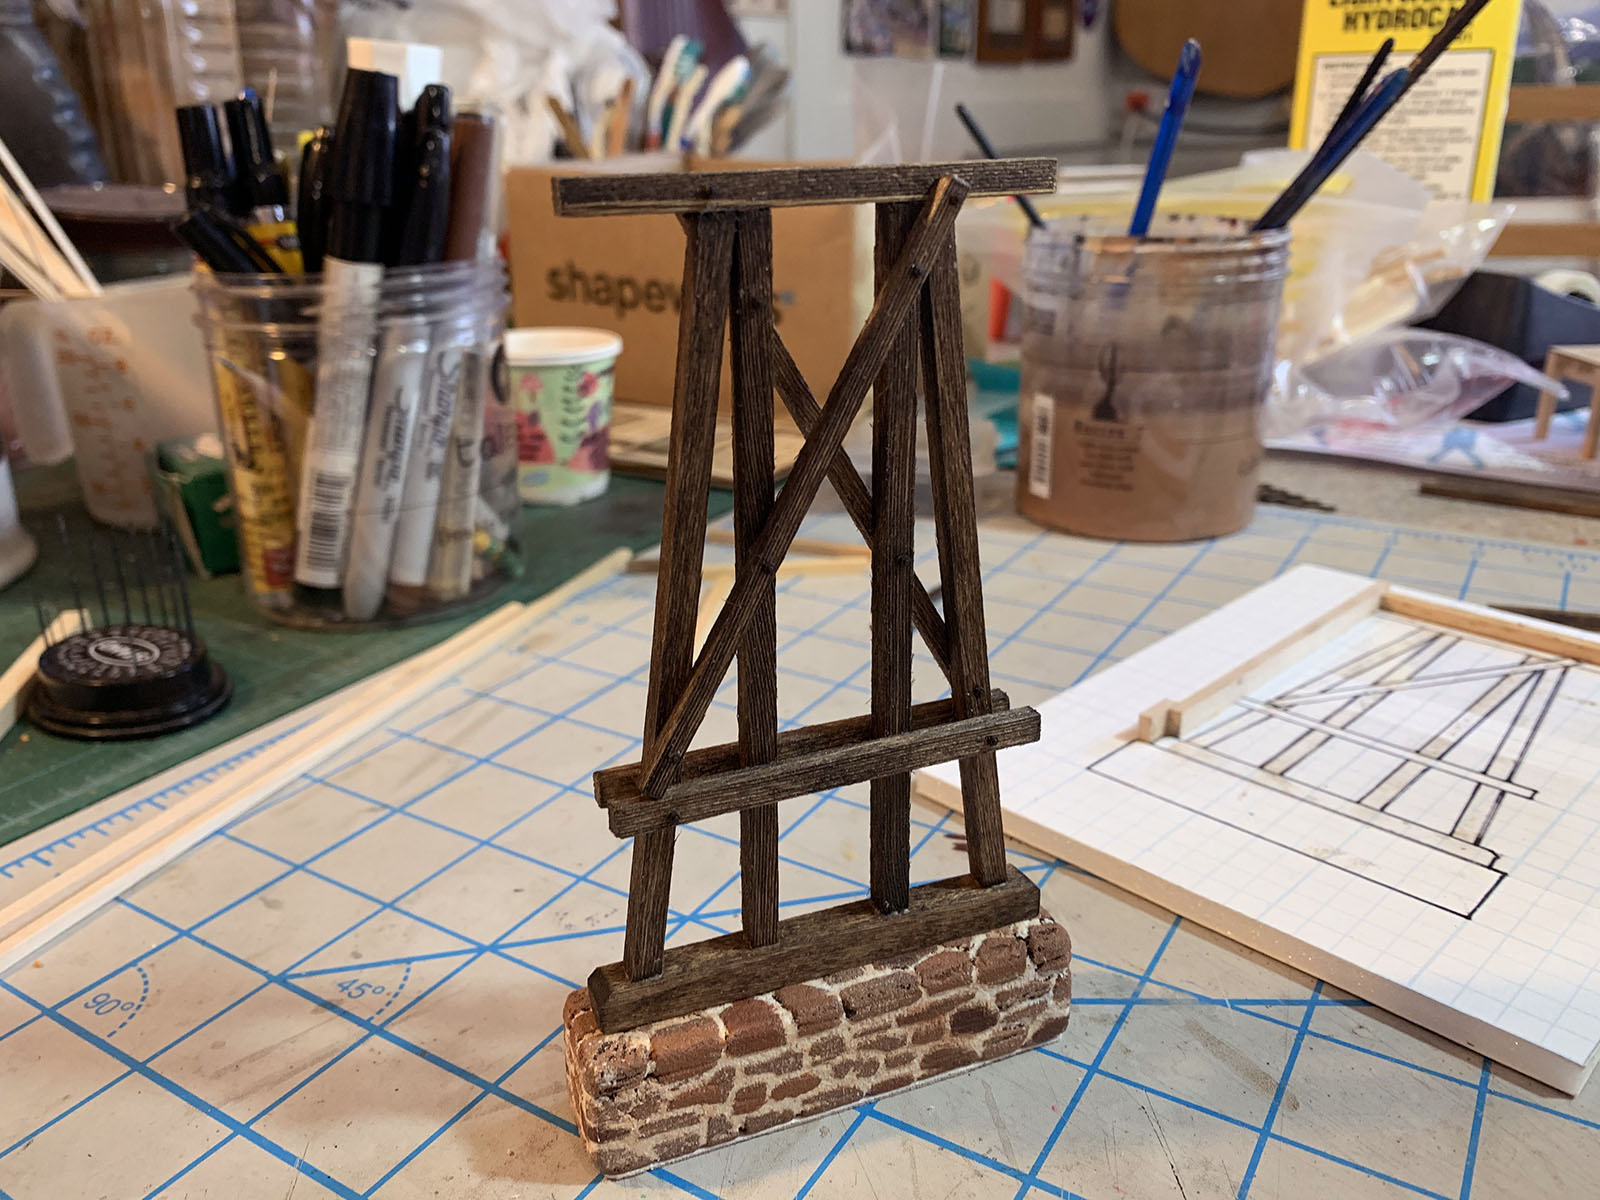
One of the completed bents. Careful measurements were required to maintain a correct height for the carved Balsa Foam footings. Grandt Line NBW’s were painted dark brown and applied in logical places.

Each bent was carefully cemented in its proper location beneath the trestle deck. Then the butterfly truss braces were custom cut and fitted for each bent. An abbreviated version of the jig above was used to build the short bent near the left end of the trestle.

With all of the bents and truss supports in place, the final footings and abutments could be added and blended into the existing scenery with Sculptamold.

With the bridge now complete, the next steps were to blend it into the existing scenery and finish the Gulch itself. I'll cover all of that and more in part 3 of this series. We'll look at ground cover, plants, and details; and do some final water modeling with clear epoxy resin to make those travertine pools come alive. I'll also show how I created the effect of an erupting geyser in model form. Stay tuned, amigos! Adios for now.

Click here to read Part 3.

The Saga of Geyser Gulch – Part 1

A Scene 7 Years in the Making

Way back in early 2013, I first described the area called Geyser Gulch on the original Thunder Mesa blog:

"Just after leaving Thunder Mesa, trains pass beneath majestic McKennon Arch, gateway to the Living Desert, and into an active geothermal area known locally as Geyser Gulch. The Gulch is spanned by a rickety old wooden trestle and is home to bubbling pools, multi-hued hot springs and more than a couple erupting geysers - including "Old Unfaithful," most famous of them all."

In this three part series, I'll revisit some of those old posts, and describe the planning and building of the Gulch right up to the present day. Along the way, I'll detail the planning process and techniques used to bring this scene to life.

Geyser Gulch was always planned as a signature scene on the Thunder Mesa layout, with the greatest vertical separation on the railroad; 33 inches or 132 scale feet from the bottom of the Gulch to the top of Baxter's Butte. While it has taken seven years for me to complete the scene, It didn't really need to. That's just the way it worked out, with other projects and interests cropping up and demanding attention along the way.

Follow along to see how it all came together!

Part 1: Building the Gulch

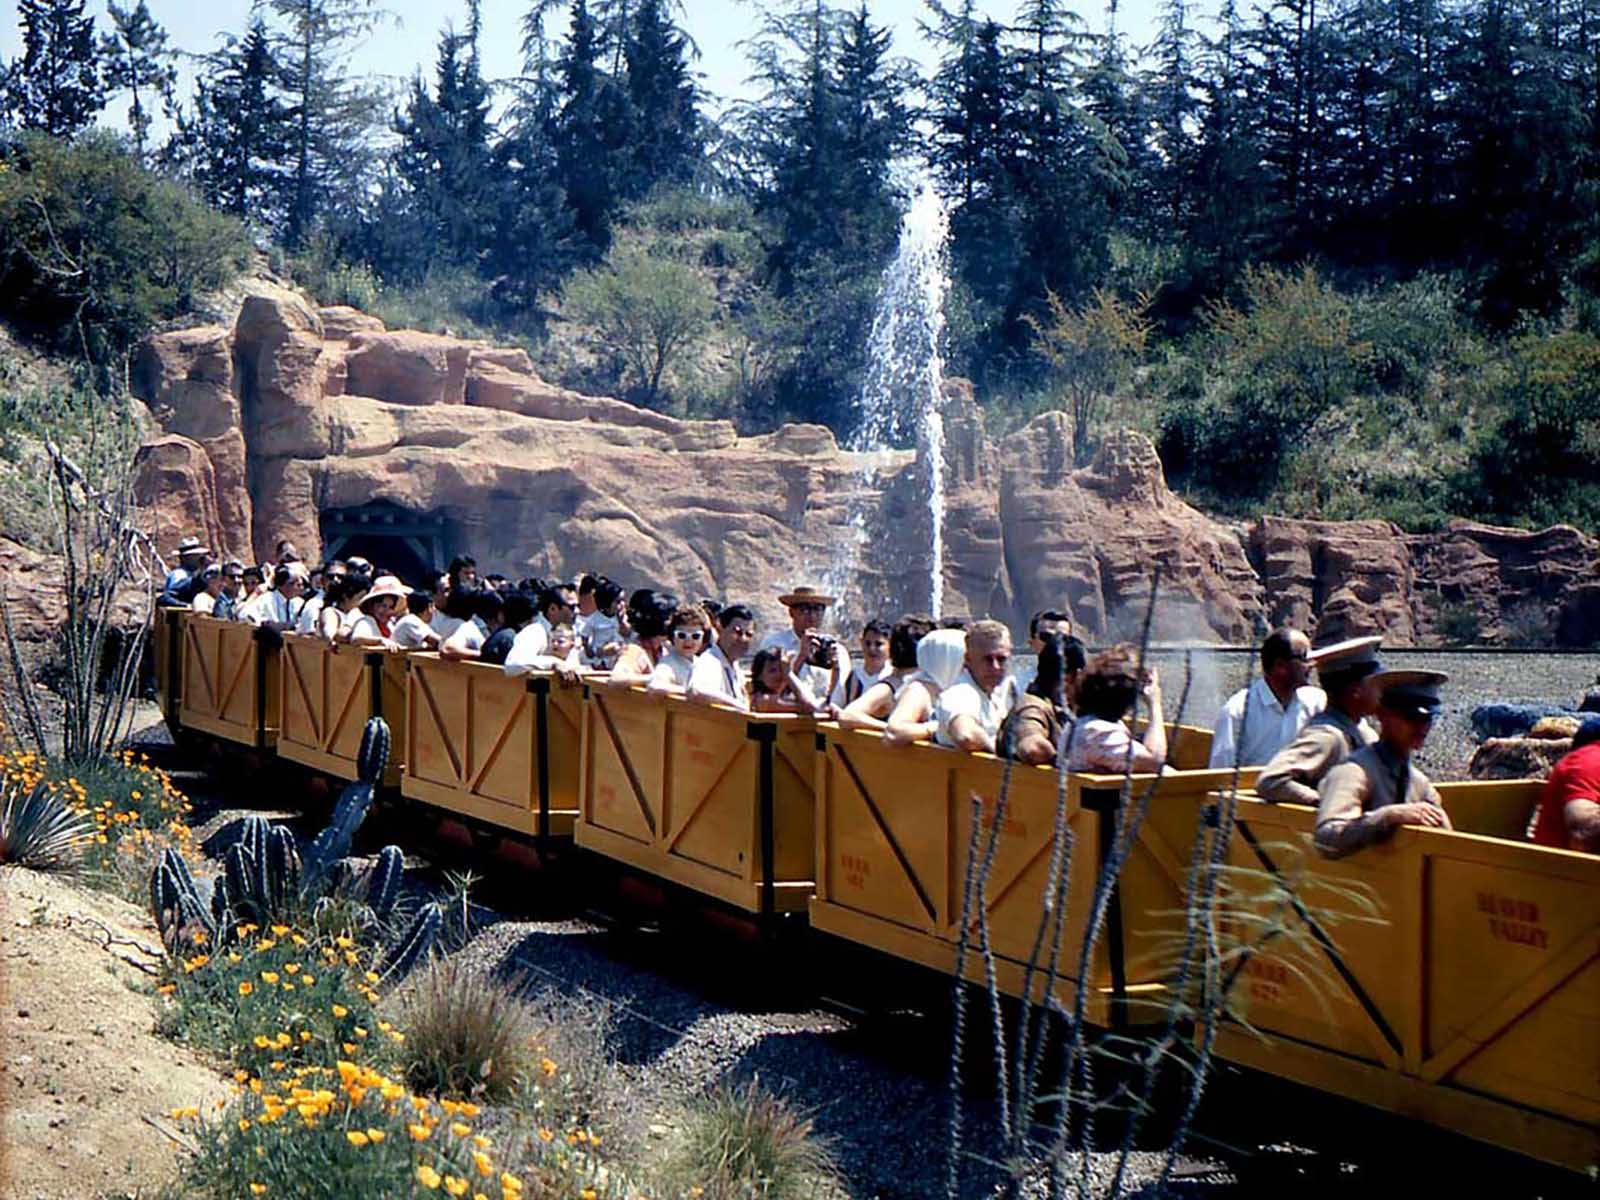
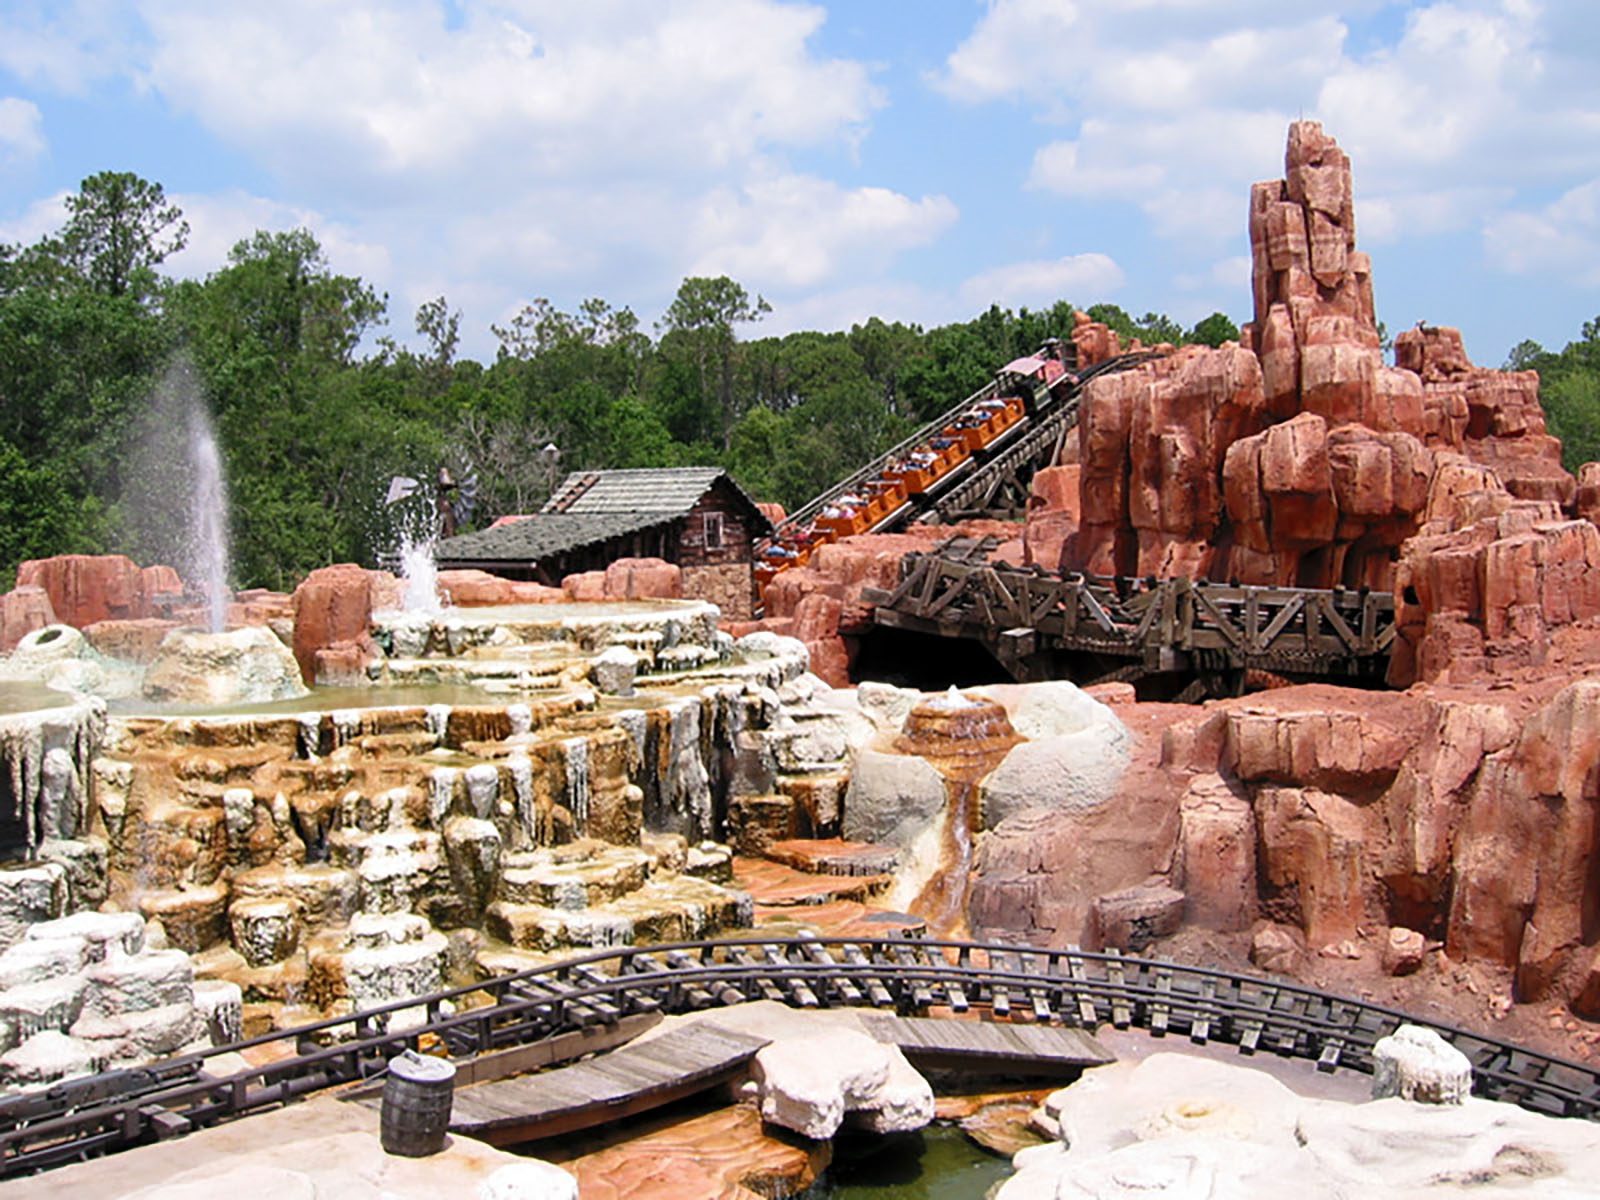
Inspiration for Geyser Gulch and its deep turquoise travertine pools came from several sources, not the least of which are similar scenes at Disney parks. The original Mine Train Thru Nature's Wonderland at Disneyland had an area with erupting geysers and bubbling mud pots, including "Old Unfaithful Geyser" that would erupt and mist riders as the mine trains passed. Then there are the hot springs and erupting geysers on the Big Thunder attractions at the Magic Kingdom in Walt Disney World and Tokyo Disneyland. Grizzly River Run at Disney California Adventure has an active geyser area that the rafts pass through, and there are similar scenes along the railroad at Disneyland Paris, and at Grizzly Gulch in Hong Kong Disneyland.

Equally important is where the real world inspiration for these Imagineered scenes came from; places like Yellowstone and Grand Canyon National Parks. My Geyser Gulch scene is based mostly on Mammoth Hot Springs at Yellowstone, and the colors of Havasupai at Grand Canyon.

Old Unfaithful erupting on the Mine Train Thru Nature’s Wonderland at Disneyland. Circa 1960. 

Hot Springs and erupting Geysers on the Big Thunder Mountain Railroad at the Magic Kingdom, Walt Disney World.

Creating a Natural Wonder

Geyser Gulch represents the essence of my modeling philosophy as it pertains to Thunder Mesa: Don't be boring. The truth about real railroads is that vast stretches of them are indeed boring or monotonous. If I wanted to be realistic I would focus on those mundane realities, but a strict adherence to realism has never been my goal. I want to create an immersive, wondrous world, with just enough realism salted in to make it believable. No real railroad would build their line beneath natural arches and over active geothermal areas, but this is the "Nature's Wonderland Route," so we pass from one scenic wonder to the next with all of the boring parts cut out.

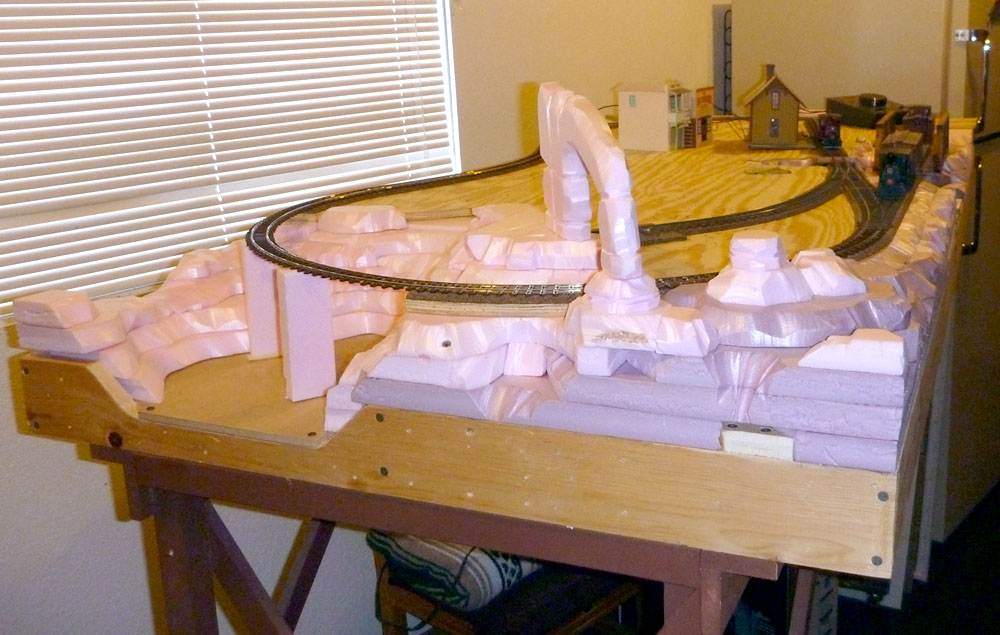
The scene occupies an inside corner of the layout with one of the sharpest curves on the entire line. Trains pass through McKennon Arch and transition to the new scene on a 15" radius curve. The scenery drops away below track level as Baxter's Butte soars high above, creating some of the most dramatic vertical separation on the railroad. But in the beginning, it was just plywood and Extruded Polystyrene Foam (EPF).

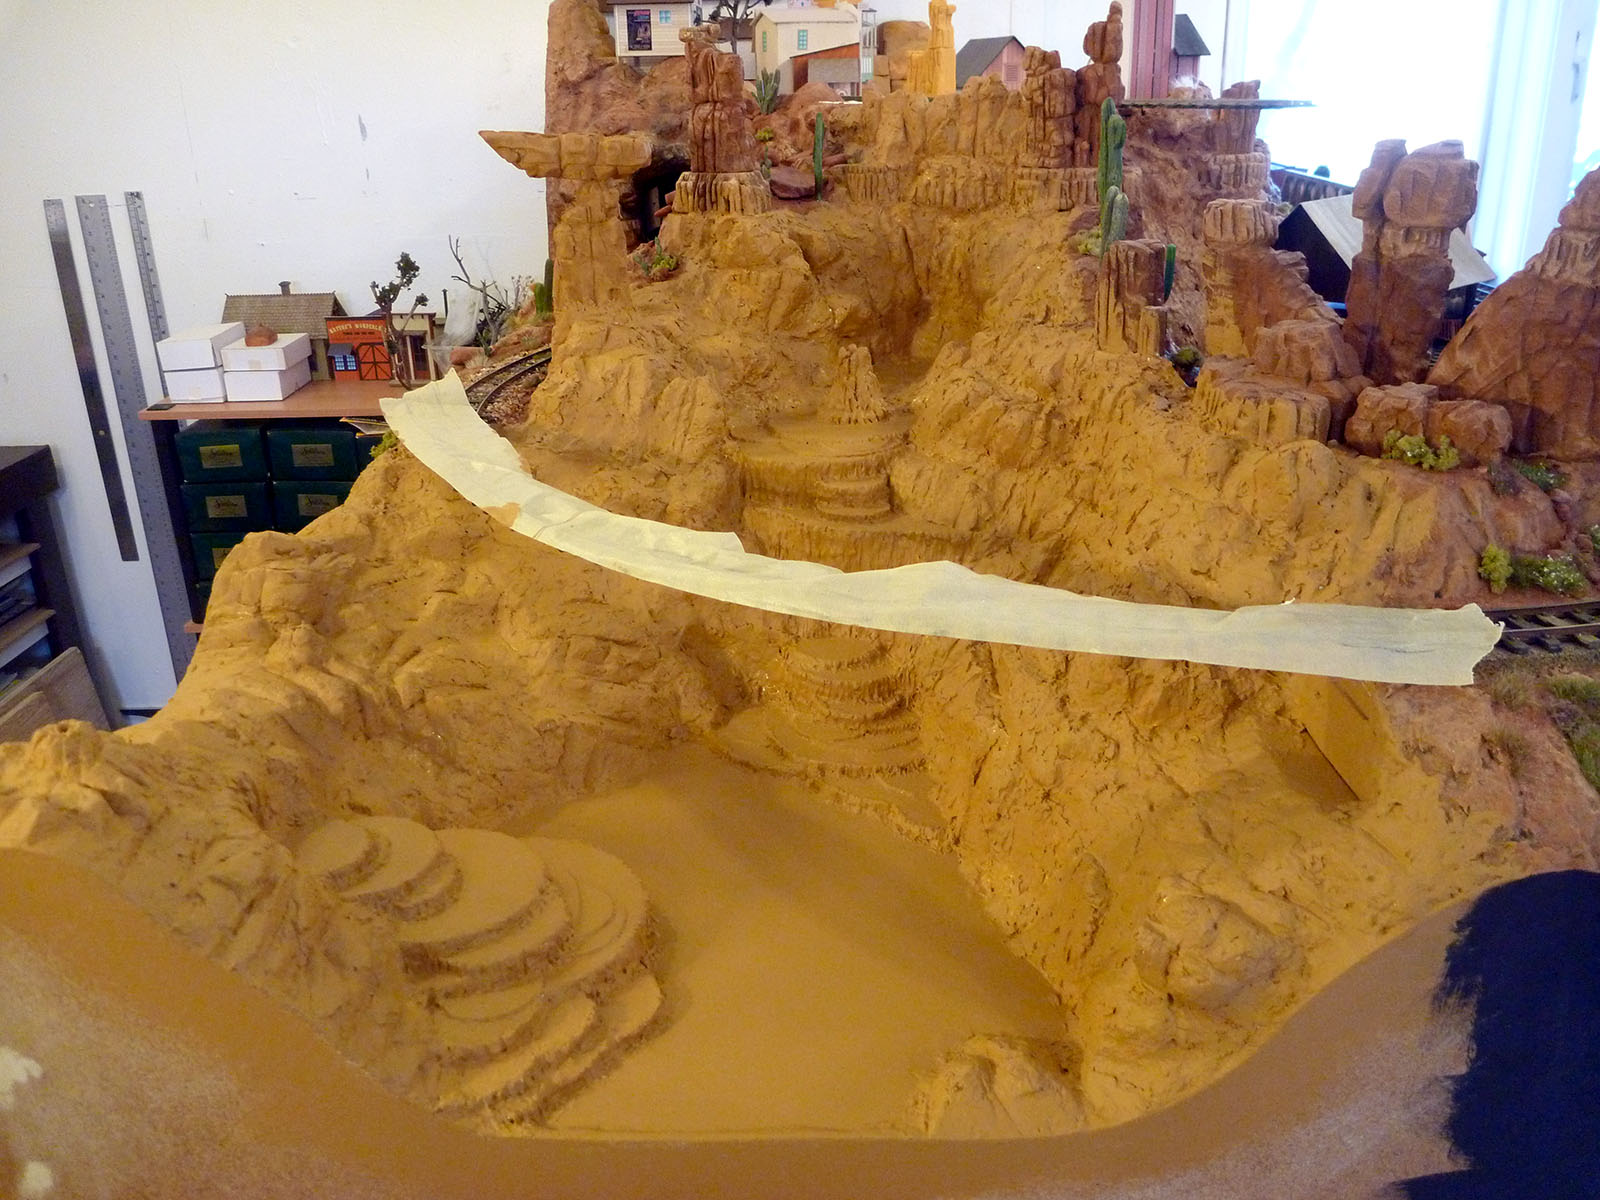
The basic shape of the Gulch was built up with 1″ pink EPF carved with a hot-wire cutting tool.

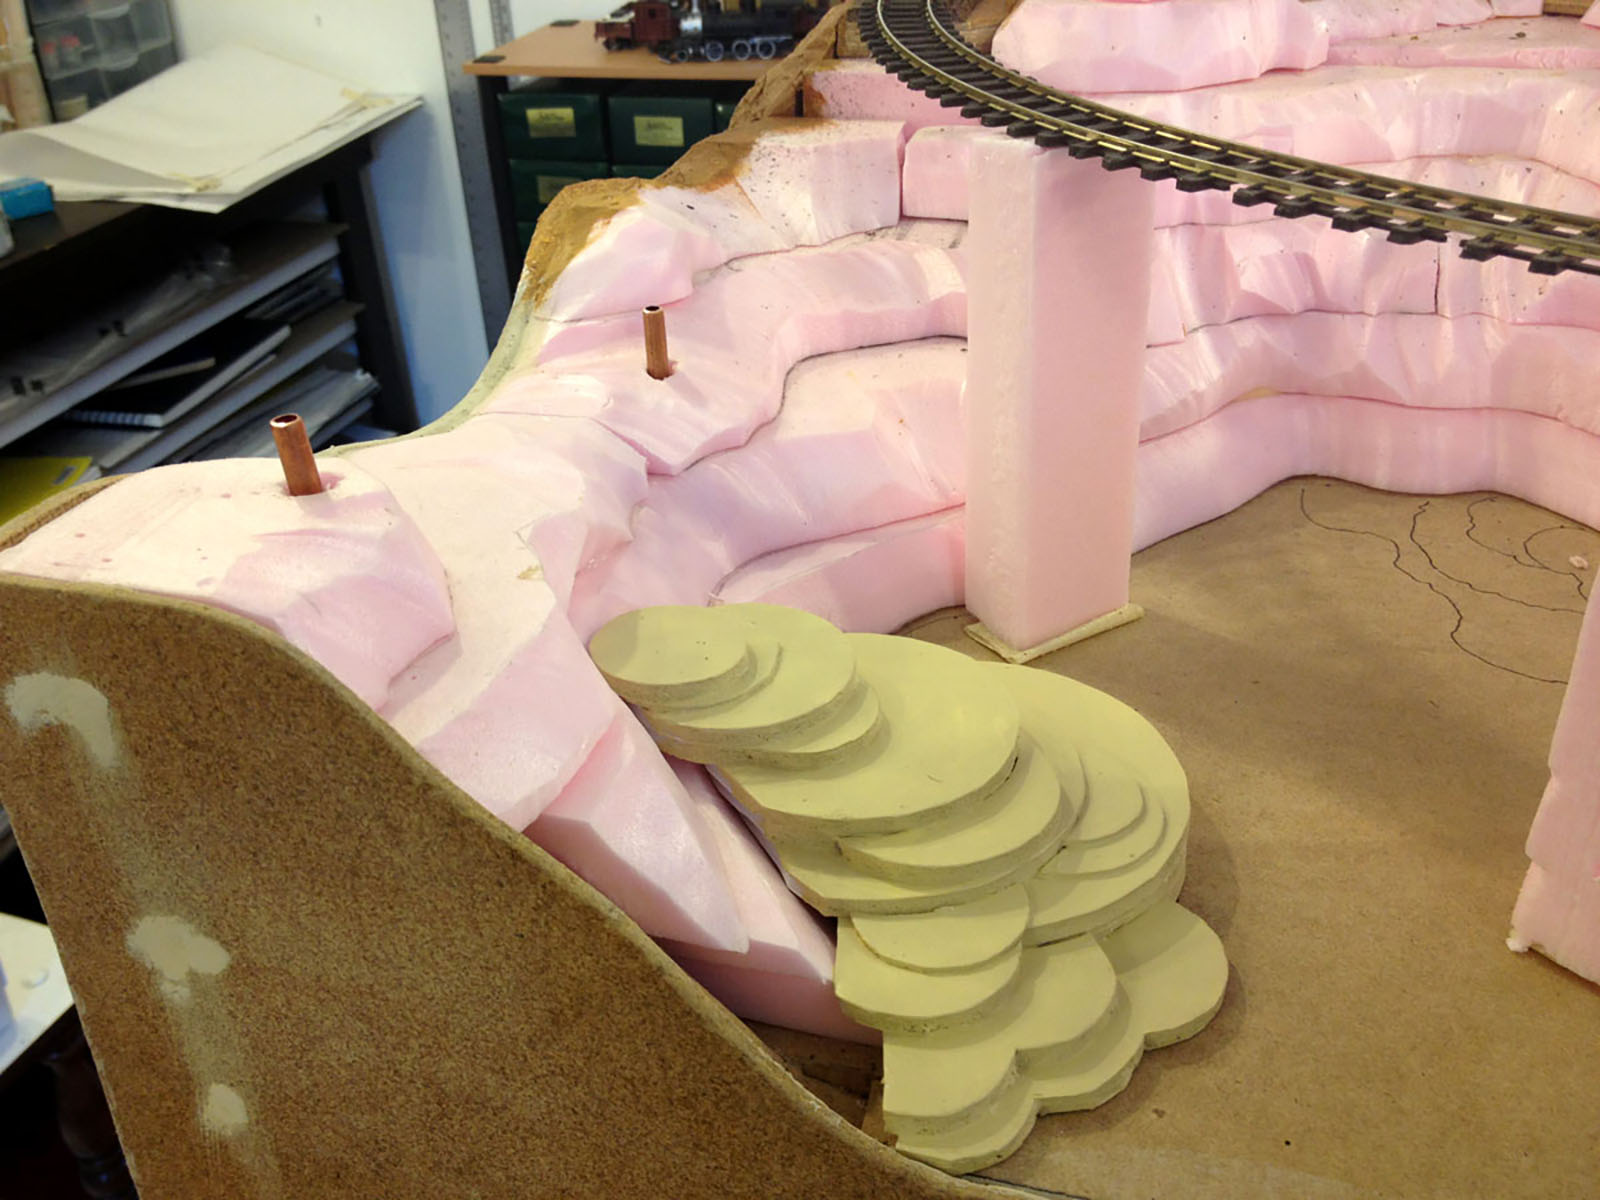
The terraced hot springs were built up with disks of foamcore, card-stock and paper, cemented into place with white glue.

1/4″ copper tubing serves as plumbing for the geyser heads. This will connect to a mini smoke machine below the layout. “Old Unfaithful” was carved from Balsa Foam.

The EPF foam layers were smoothed and blended together with Sculptamold. Rock detail was carved into the Sculptamold as it set.

Liquitex acrylic modeling paste was used to shape and detail the edges of the travertine terraces.

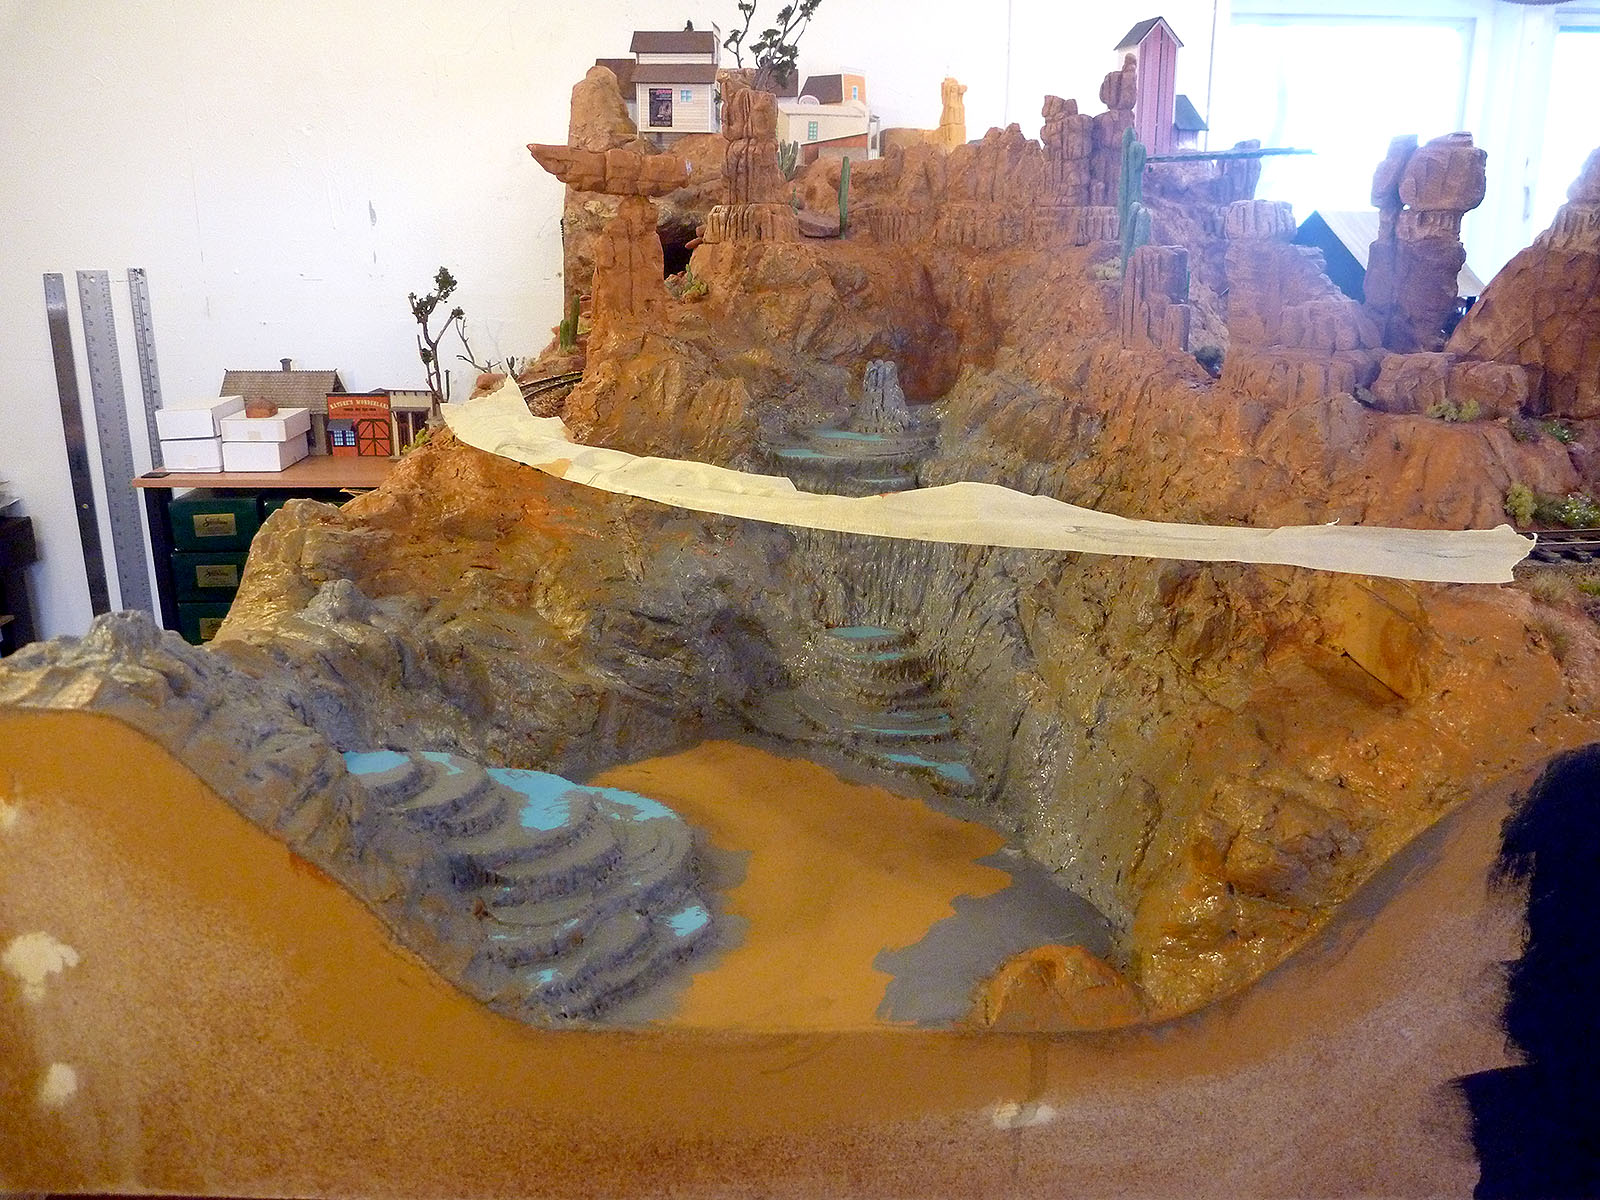
Once the Sculptamold and modeling paste was dry, the entire scene was painted with the scenic base color, Raw Sienna. I use acrylic or latex paints for this.

The areas around the hot springs and geysers were darkened with acrylic paint, and the first turquoise tones were added to the travertine pools.

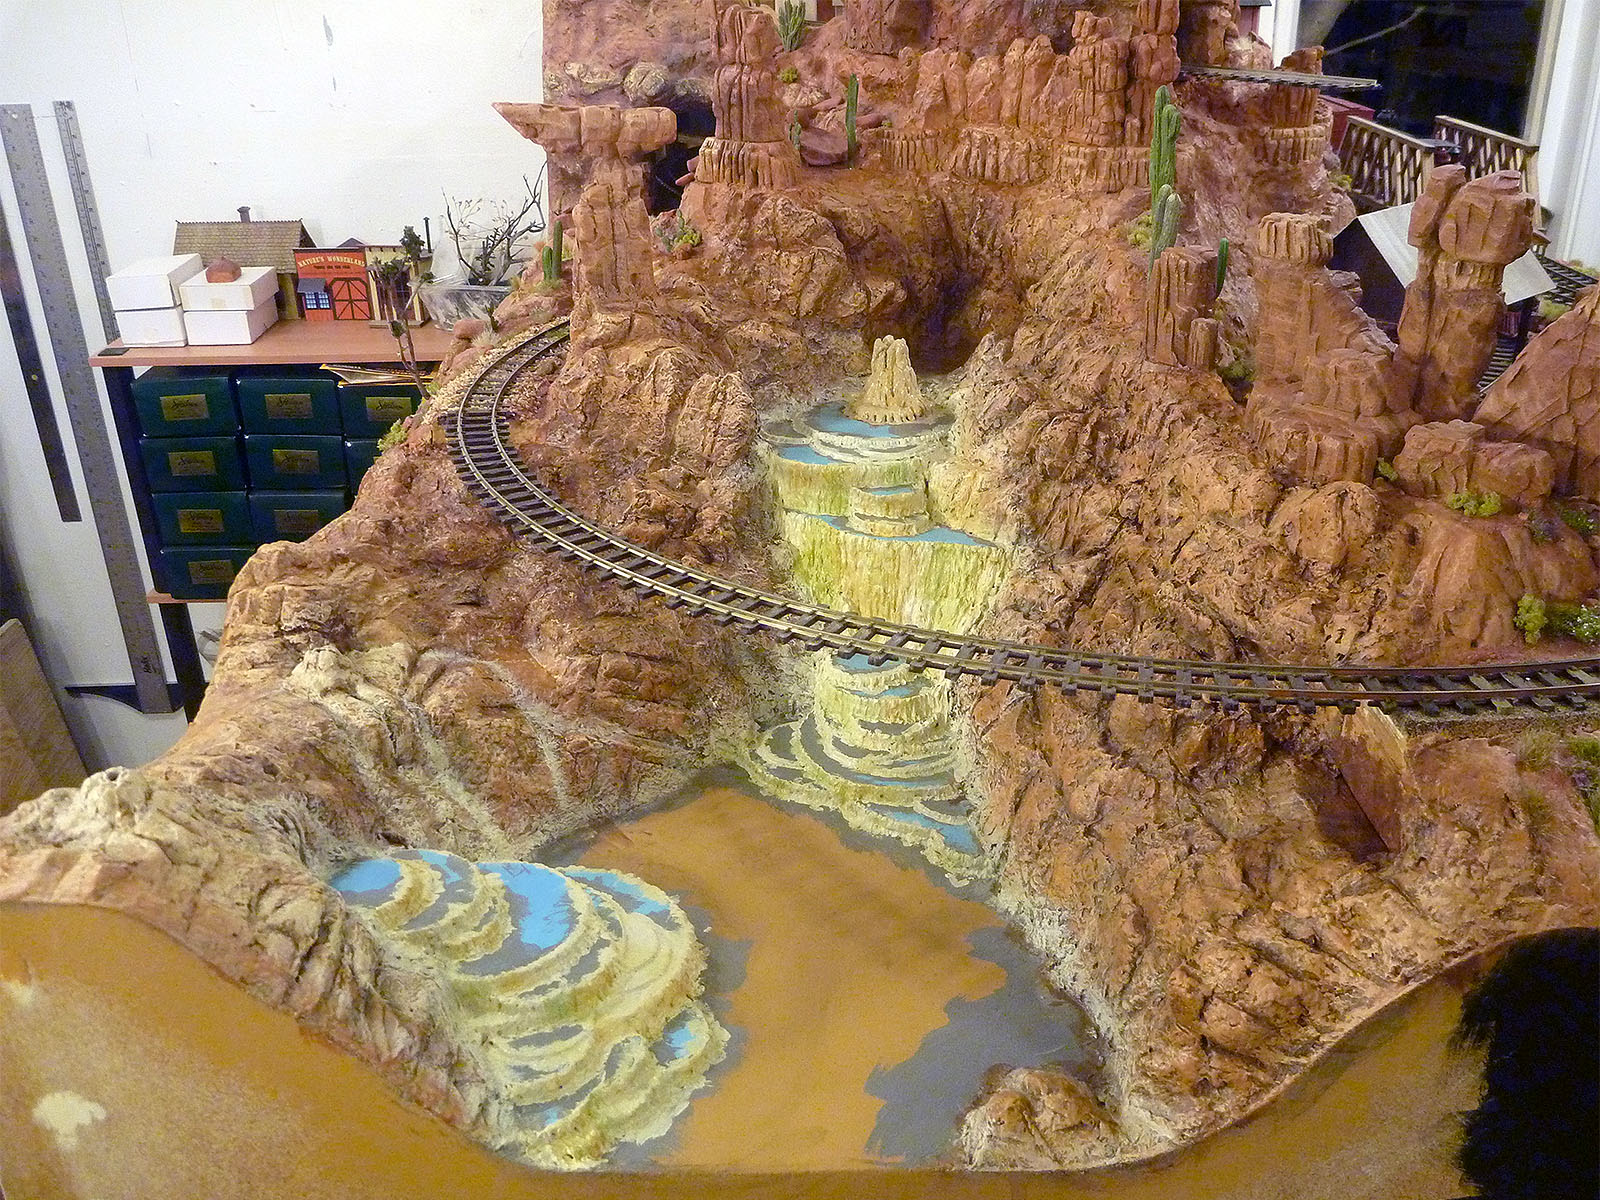
Raw Sienna, Burnt Sienna, Yellow Ochre, and Unbleached Titanium acrylics were used to finish the rock colors and create the look of years of mineral staining from the springs.

The travertine pools were painted with mixtures of turquoise acrylic paints, mixed to match the colors I have observed at Havasupai in Grand Canyon and other locations around the Southwest. Colors were blended together in place with a soft brush to give the look of churning and bubbling springs.


At this stage, progress on the Gulch was delayed for several years as work, many other projects, and an eventual move of the entire layout to my new studio in Jerome kept the project simmering on the back burner. Recently, work on the Gulch has resumed, and in part 2 of this series, I'll dive into the planning and construction of Geyser Gulch Trestle. Then, in part 3, we'll finish the Gulch with liquid epoxy resin, ground-cover, plants and details, and finally see Old Unfaithful erupt!

Thanks for coming along for the ride, amigos. Adios for now!

Click here to read part 2.

Walt Disney’s Carolwood Barn Kit From Crescent Creek Models

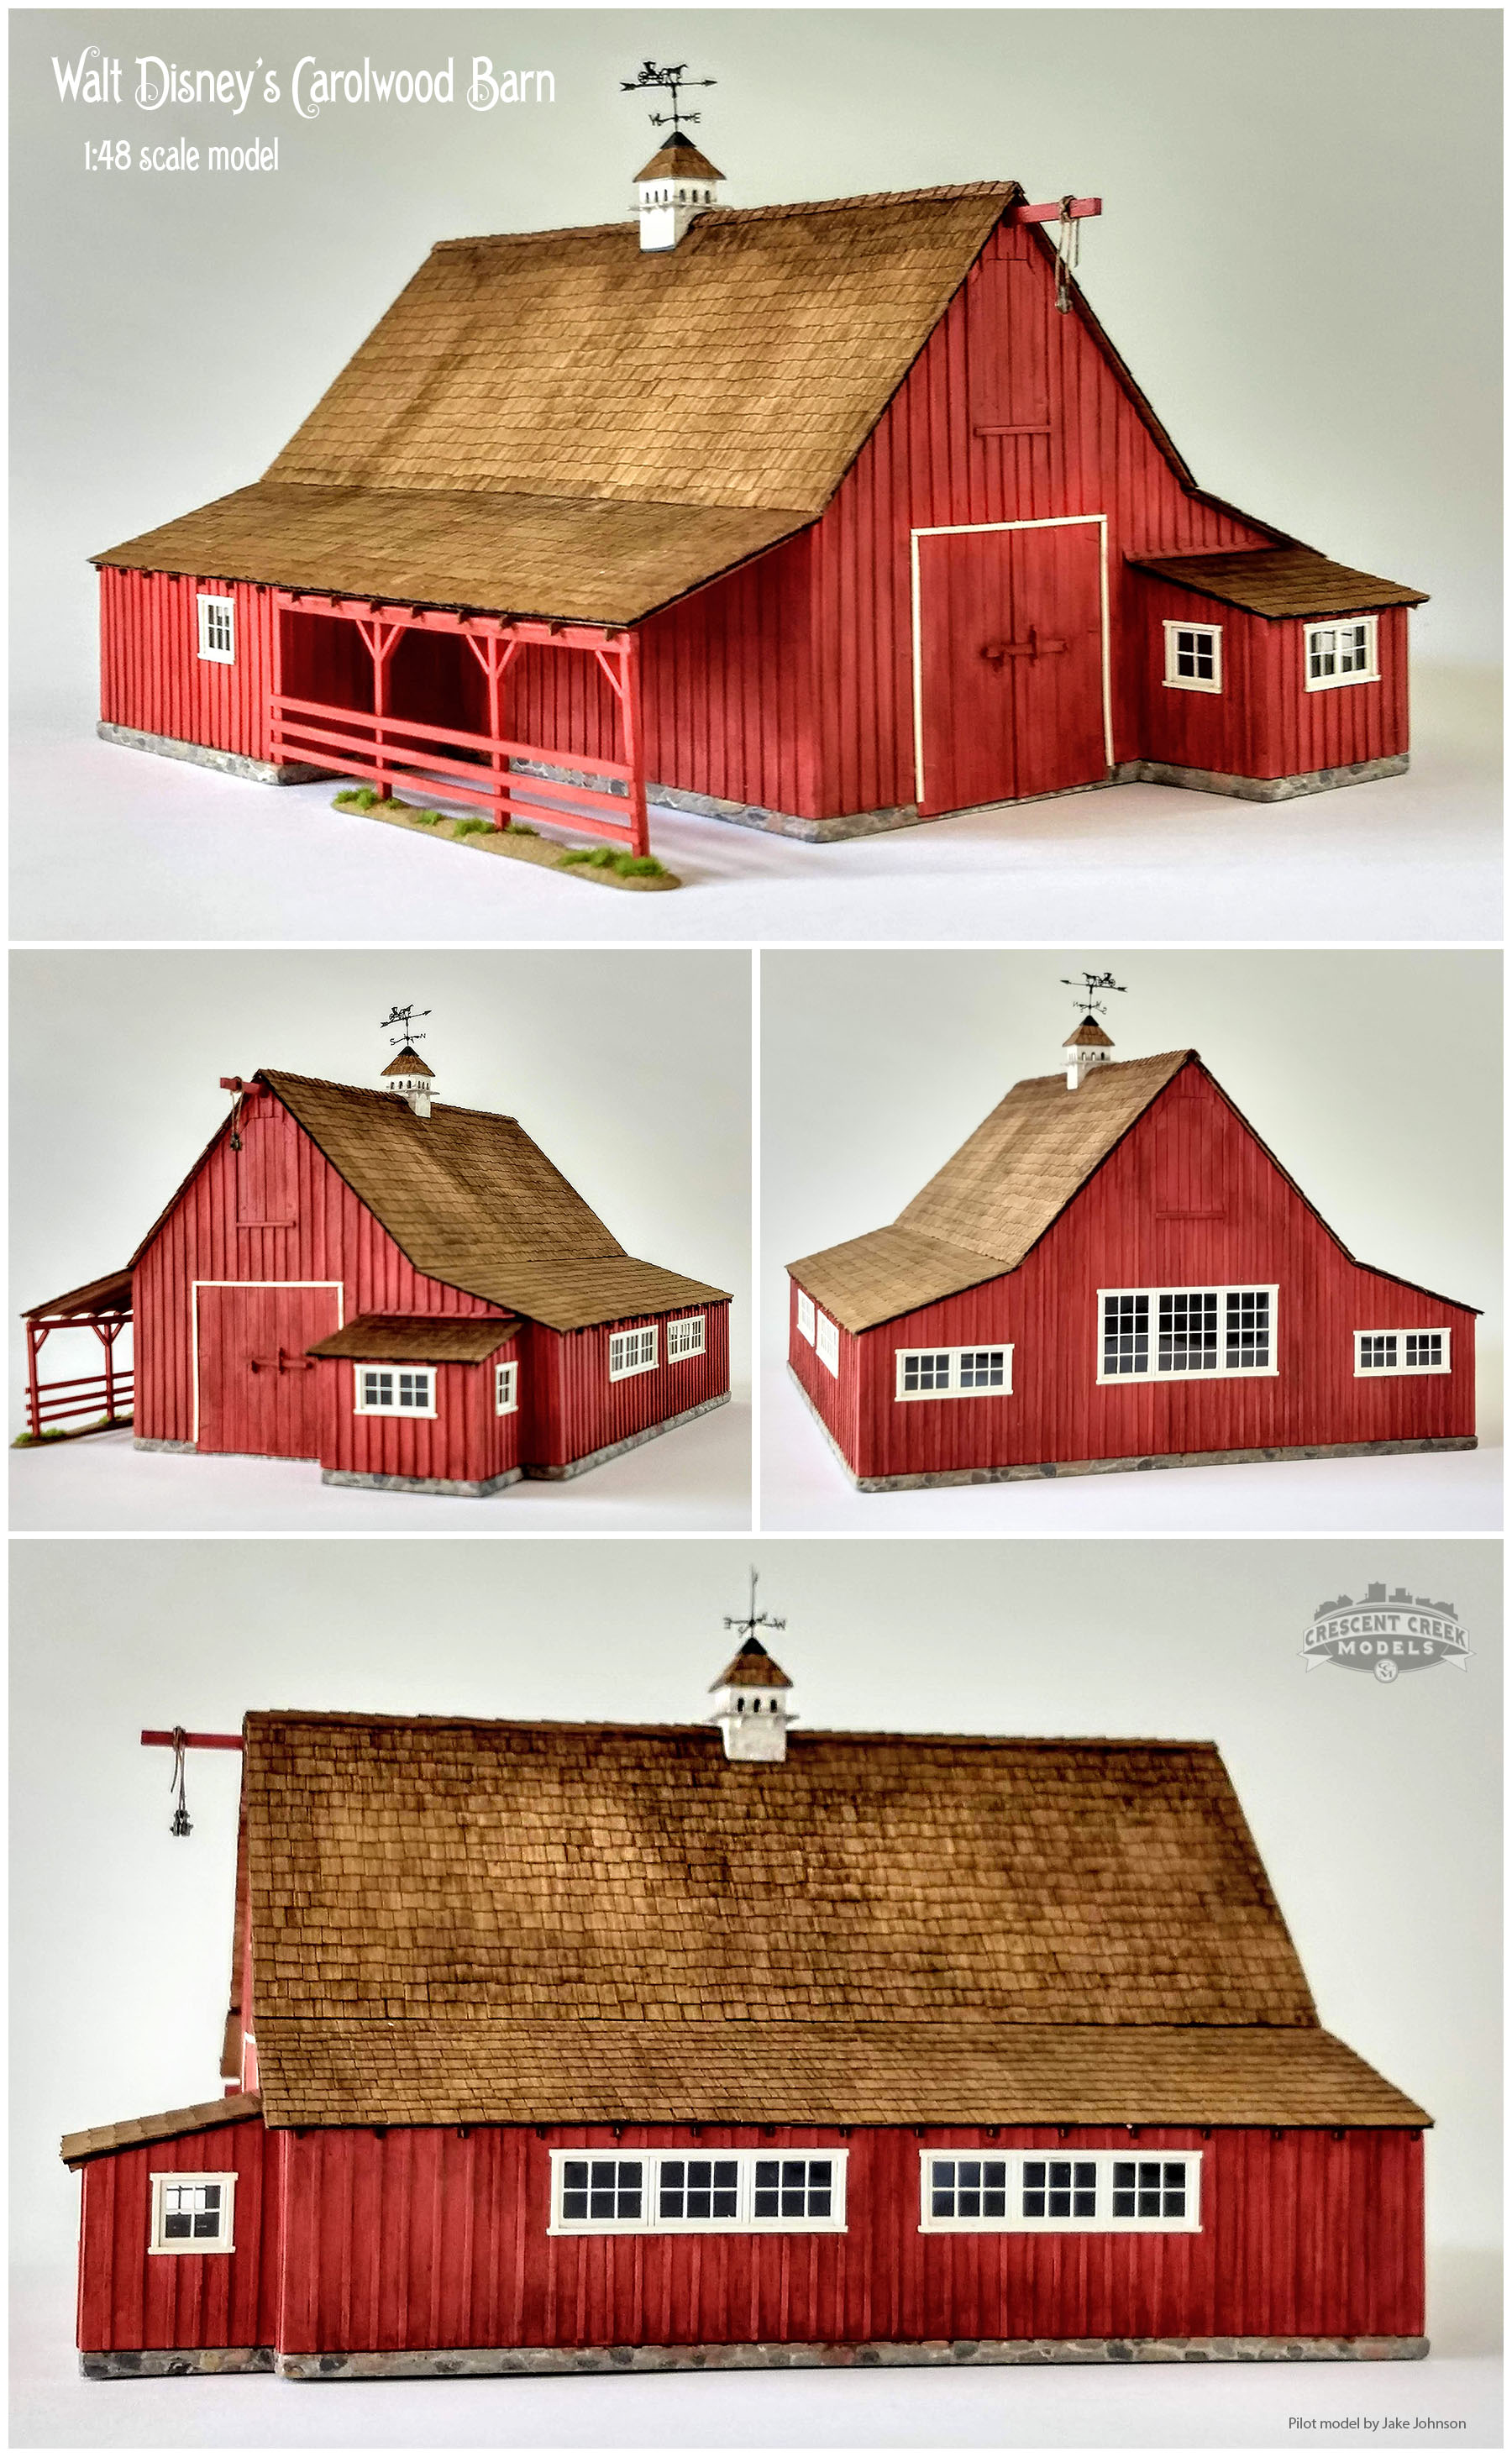
In partnership with the Carolwood Foundation, Crescent Creek Models is thrilled to announce the O scale, premier edition of our Walt Disney's Carolwood Barn model kit. This video gives some history of Walt's Barn and the inspiration for these beautiful kits. The premier edition of 200 O scale kits are available for pre-order now and will ship in early fall 2019. Order yours now while supplies last!

http://98f.2a4.myftpupload.com/product/walt-disneys-carolwood-barn-o-scale/

Fort Collins Municipal Railway

It’s time for anther railroad adventure! Let’s take a ride on Fort Collins Municipal Railway streetcar 21. This is a heritage electric streetcar railway with one of the few Birney streetcars still operating in the United States. It runs down the center of Mountain Avenue in beautiful and historic Fort Collins, just as it first did in 1907 when the line was operated by the parent Colorado & Southern. Today, the railway is operated by the Fort Collins Municipal Railway Society on weekends during May through September in Fort Collins, CO. http://www.fortcollinstrolley.org/welcome.html

Music in this video is courtesy of the YouTube Audio Library.

Santa Margarita Ranch: May 25, 2019

Central California’s Santa Margarita Ranch hosts the Best in the West Antique Tractor and Machine Show every year on Memorial Day Weekend. Featuring Rob Rossi’s Pacific Coast Railroad with the original Disneyland Railroad Coaches, and a host of other wonderful machines from years past, this is one of a kind event is a must-do for any rail fan! Here’s a video recapping our experience there in May. Enjoy.

Evolution of a Scene: Hanging Rock

Here’s a video look at the evolution of the scene at Hanging Rock on my Thunder Mesa Mining Company model railroad. Hanging Rock is a former railroad construction camp that now serves as a haunt for outlaws. This is an area that has grown and changed over the last couple years and hopefully this will give some insights into the process. Enjoy!

The Story of Crescent Creek

rainbow ridge structures disneyland

Not much remains today of the little mining town of Crescent Creek, even its exact location is shrouded in legends, rumors and tall tales.  As with most such stories, those who know won't tell, and those who tell don't know. But if half the tales are to be believed, and they shouldn't be, it was once a raucous and bawdy boomtown to rival the likes of Dodge City or Tombstone. Colorful characters like Mark Twain, Butch Cassidy, Wyatt Earp, Doc Holliday, Bat Masterson, and even the notorious Burro Bob where said to have frequented the saloons and gambling halls that once lined Front Street in this fabled "Gomorrah of the West," as at least one newspaper described it. Sadly, you won't find it marked on any map or atlas today, but if you choose to go looking for Crescent Creek, and the mountain of riches still said to be hidden there from the Lost Eldorado Mine, rest assured that it lies somewhere near trails-end, across the Rainbow Desert, due west of Thunder Mesa, but a little north of Grizzly Flats.
Still, at least two intrepid adventurers have found their way to Crescent Creek in modern times. While on an extended expedition through the wild frontier lands of the American West, Jake Johnson and Dave Meek claim to have rediscovered all that is left of the long forgotten boomtown. Following clues found in old newspaper clippings and a hastily scrawled map drawn from the recollections of a half-crazed desert rat, they at last found their way to the narrow mountain pass and abandoned railroad right of way that legend reports as the only way in or out of Crescent Creek. After months of searching and many dead end trails, they were near the end of their provisions. They new that if this canyon was yet another dead end, they would be forced to give up the search.

As they traversed the narrow pass, a storm began to blow in from the southwest. Suddenly, a big thunder clap echoed above the canyon walls, spooking the pack mules and scattering their supplies. Lightning flashed and the rain lashed down. Hunkering below the meager shelter provided by an overhanging boulder, Jake and Dave had no choice but to wait out the storm. When it finally passed, booming and echoing away down the canyon, they spied a beautiful rainbow above the ridge, and below, revealed by a beam of sunlight, was the abandoned town of Crescent Creek.

They never did find the rumored riches of the Lost Eldorado Mine (though Dave really wants to keep looking), but they did fill their sketchbooks and journals with treasure of another sort: the vivid history of a Wild West boomtown told through the time-weathered structures of an earlier era. Returning to civilization, Jake and Dave resolved to share their discovery with the world, and, most particularly, the model railroading community. Both being the model building sort, and knowing they sat upon a veritable trove of architectural marvels and curiosities, they set about forming Crescent Creek Models in order to immortalize their find forever in miniature.

And that, if you can believe it, is the story of Crescent Creek.